概要
- AWS Lambda入門①(Node編)〜関数をデプロイして動かす〜とAWS Lambda入門②(Node編)〜DynamoDBにアクセスする〜の続編です
- 今回は前回までに作成したLambda関数をAPI Gatewayを使ってHTTPでアクセスできるように公開します
Api Gatewayとは
- API GatewayはAWSが提供するサービスでHTTPでアクセス可能なAPIを作成できるサービスです
- AWSの様々なサービスの呼び出しができるのでクライアントからするとLambdaなどをHTTPアクセスで実行するような感覚で使うことができます
API GatewayでLambda関数を公開する
Hello関数を公開してみる
- まずは前回までで作ってあるHello関数を公開してみます
serverless.ymlに設定を追加します
serverless.yml
# ...省略functions:hello:handler:handler.helloevents:-http:path:hellomethod:get# ...省略handlerの下にいくつか追加しましたpathはアクセスするときのpathですmethodはアクセスするときのHTTPメソッドです
- 簡単ですね!
ローカルで動作確認
- デプロイする前にまずはローカルで動作確認します
- API Gatewayをローカルで動かすために必要なライブラリを追加します
yarn add -D serverless-offline@next
serverless-offlineのドキュメントは2020/3/5時点でα版の6系で書かれているとのことなので
@nextをつけて6系をインストールする
serverless.ymlに設定を追加します
serverless.yml
# ...省略plugins:-serverless-offline# 追加した行-serverless-dynamodb-localcustom:serverless-offline:# 追加した行httpPort:8083# 追加した行dynamodb:stages:devstart:port:8082inMemory:truemigrate:trueseed:trueseed:hello:sources:-table:${self:provider.environment.DYNAMODB_TABLE}-hellosources:[./seeds/hello.json]# ...省略pluginsにserverless-offlineを追加しましたcustomにサーバ起動時のポート番号を追加しました- デフォルトは3000です
- 以下のコマンドでサーバを起動します
sls offline start
- ログにURLが表示されているはずです
┌───────────────────────────────────────────┐
   │                                           │
   │   GET | http://localhost:8083/dev/hello   │
   │                                           │
   └───────────────────────────────────────────┘
- 今回はREST Clientを使って動作確認します
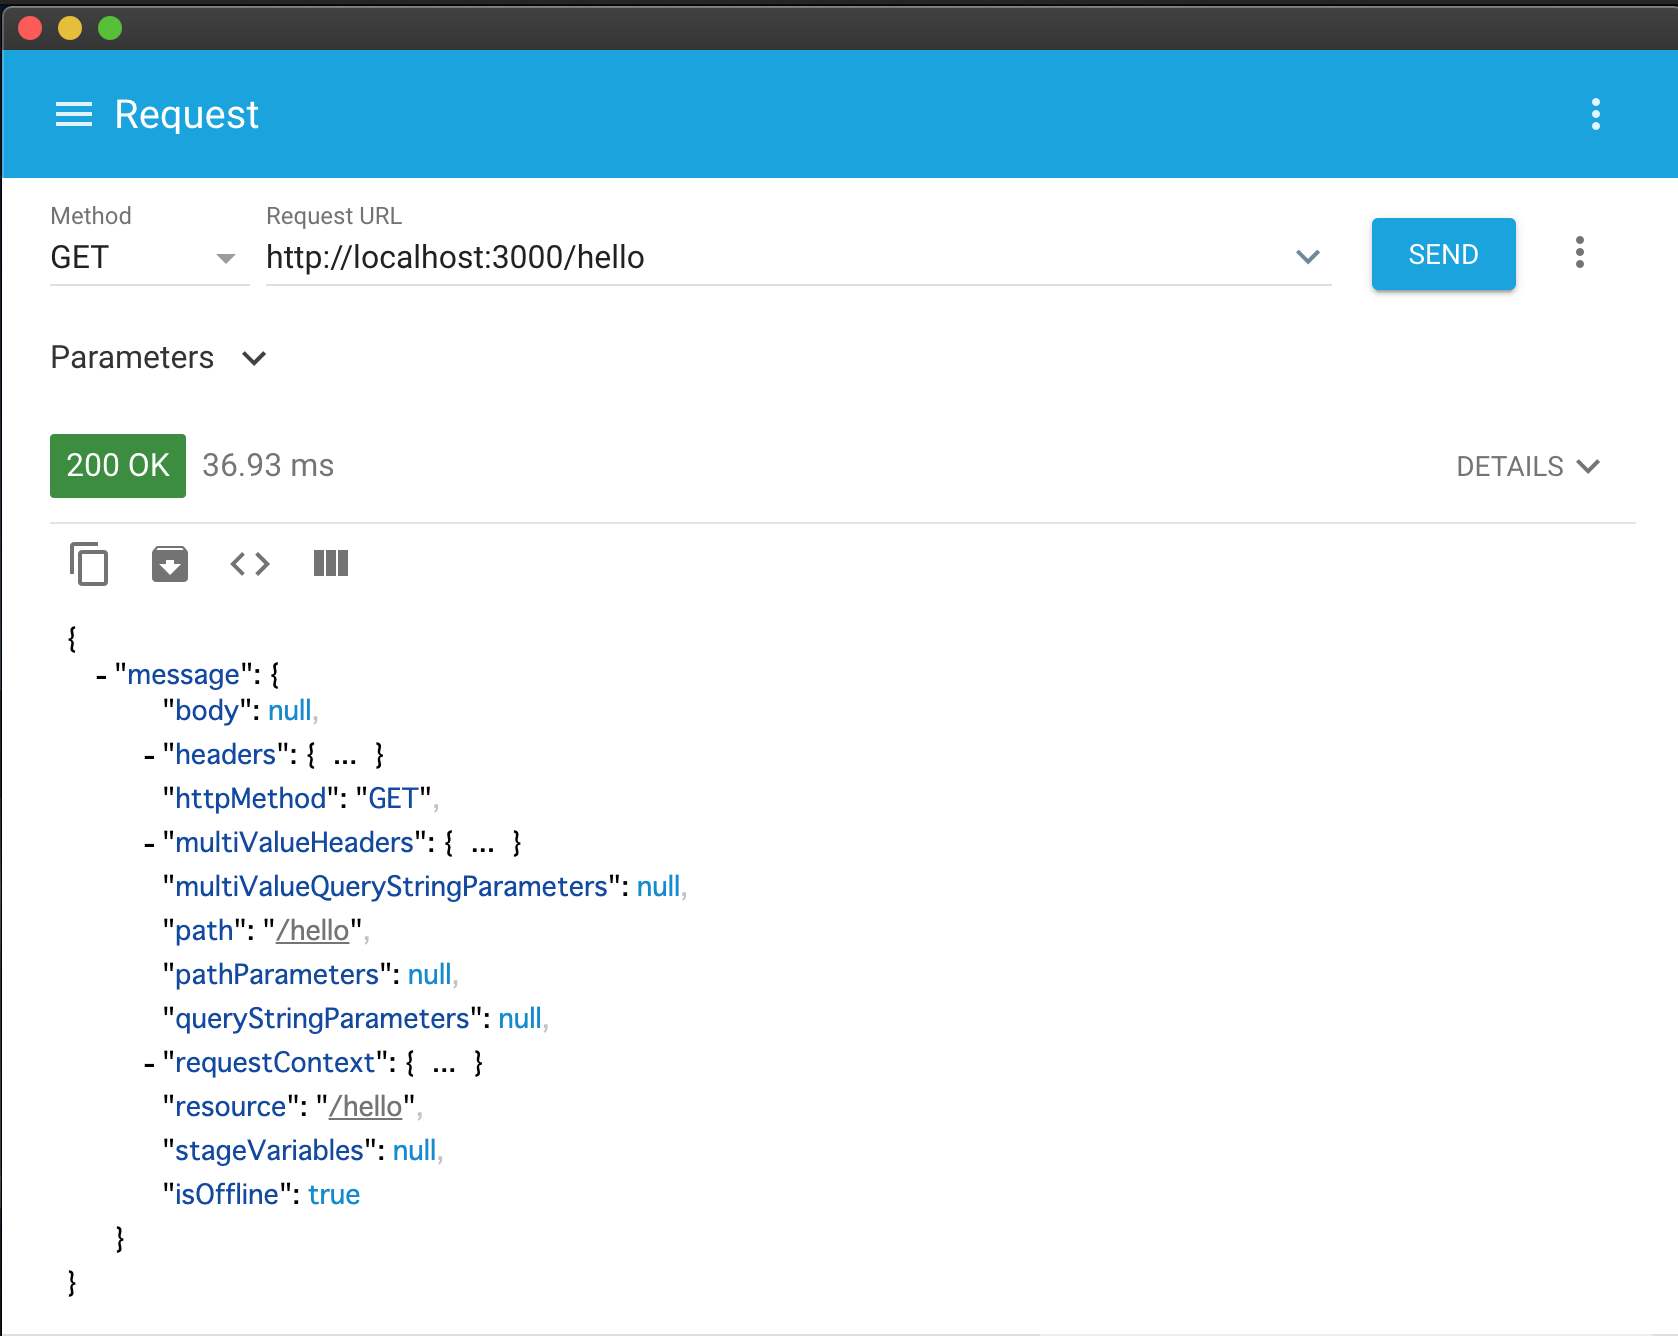
- うまくいけば画像のような結果になっているはずです
- Lambdaを直接叩いていた時は
statusCodeとmessageの2つが返ってきていましたが今回はmessageだけです statusCodeはAPI GatewayがHTTPレスポンスのステータスコードとしてセットして返却してくれています
AWSにデプロイして動作確認
- ローカルで確認できたのでAWSにデプロイします
- いつも通りServerlessFrameworkのコマンドを使います
sls deploy
- デプロイに成功すると作成されたAPIのURLがログに出力されます
- こんな感じ
Serverless: Stack update finished...
Service Information
service: sls-sample
stage: dev
region: ap-northeast-1
stack: sls-sample-dev
resources: 24
api keys:
  None
endpoints:
  GET - https://xxxxxxxxx.execute-api.ap-northeast-1.amazonaws.com/dev/hello
functions:
  hello: sls-sample-dev-hello
  put: sls-sample-dev-put
  get: sls-sample-dev-get
  query: sls-sample-dev-query
  getAll: sls-sample-dev-getAll
layers:
  None
Serverless: Run the "serverless" command to setup monitoring, troubleshooting and testing.
✨  Done in 351.49s.
- REST Clientでアクセスして確認します

- ステータスコード200で成功しました
- これでhello関数を世の中に公開することができました
全ての関数を公開する
- hello関数と同じように残りの関数も公開してみましょう
API Gatewayの設定追加
serverless.ymlを修正します
serverless.yml
# ...省略functions:hello:handler:handler.helloevents:-http:path:hellomethod:getput:handler:handler.putenvironment:tableName:${self:provider.environment.DYNAMODB_TABLE}-helloevents:-http:path:messagesmethod:postget:handler:handler.getenvironment:tableName:${self:provider.environment.DYNAMODB_TABLE}-helloevents:-http:path:messages/{id}method:getgetAll:handler:handler.getAllenvironment:tableName:${self:provider.environment.DYNAMODB_TABLE}-helloevents:-http:path:messagesmethod:get# ...省略functionの項目にそれぞれURLとHTTPメソッドを追加しました- getのpathは
messages/{id}とすることでidをURLで指定するようにしました
- getのpathは
- 関数を一部修正します
- get関数がURLに埋め込まれたidを取得できるようする
- put関数が渡されたパラメータを取得できるようにする
handler.js
// ...省略module.exports.get=asyncevent=>{const{id}=event.pathParameters;// この行を修正constparams={TableName:tableName,Key:{id},};try{constresult=awaitdynamo.get(params).promise();return{statusCode:200,body:JSON.stringify(result.Item),};}catch(error){return{statusCode:error.statusCode,body:error.message,};}};// ...省略module.exports.put=asyncevent=>{constid=String(Date.now());const{message}=JSON.parse(event.body);// この行を修正constparams={TableName:tableName,Item:{id,message},};try{awaitdynamo.put(params).promise();return{statusCode:200,body:JSON.stringify({id,message}),};}catch(error){return{statusCode:error.statusCode,body:error.message,};}};// ...省略ローカルで動作確認
- ローカルサーバを立ち上げます
- ローカルのDBを見に行くように
LOCAL=trueをつけて環境変数を設定しておきます - 詳しくは前回のDynamo編をご参照ください
- ローカルのDBを見に行くように
LOCAL=true sls offline start
- ログにURLが出力されます
┌────────────────────────────────────────────────────┐
   │                                                    │
   │   GET  | http://localhost:8083/dev/hello           │
   │   POST | http://localhost:8083/dev/messages        │
   │   GET  | http://localhost:8083/dev/messages/{id}   │
   │   GET  | http://localhost:8083/dev/messages        │
   │                                                    │
   └────────────────────────────────────────────────────┘
- REST Clientでアクセスしてみましょう
- それぞれ成功すると以下のようになるはずです


AWSで動作確認
- AWSにデプロイしてREST Clientでアクセスしてみましょう
sls deploy
- 関数の文だけURLが表示されます
endpoints:
  GET  - https://xxxxxxxxx.execute-api.ap-northeast-1.amazonaws.com/dev/hello
  POST - https://xxxxxxxxx.execute-api.ap-northeast-1.amazonaws.com/dev/messages
  GET  - https://xxxxxxxxx.execute-api.ap-northeast-1.amazonaws.com/dev/messages/{id}
  GET  - https://xxxxxxxxx.execute-api.ap-northeast-1.amazonaws.com/dev/messages
functions:
  hello: sls-sample-dev-hello
  put: sls-sample-dev-put
  get: sls-sample-dev-get
  getAll: sls-sample-dev-getAll
- REST Clientでアクセスしてみてください
- キャプチャは省略しますがローカルのときと同じようにアクセスできていればOKです
まとめ
- API Gatewayを使うことでHTTリクエストでLambda関数を実行できました
- ServerlessFrameworkを使うと簡単にAPI Gatewayの設定をすることができます
- ローカルで動作させるためのライブラリも整っているため開発もやりやすくていいですね