Quantcast
Channel: Node.jsタグが付けられた新着記事 - Qiita
Viewing all 8825 articles
Browse latest View live

【メモ】LambdaからgoogleDriveAPIを操作する

$
0
0

はじめに

LambdaからgoogleAPIでGooglDriveをいじりたかったのですが、サービスアカウントを用いた参考文献が少なく、理解するのに時間がかかったのでメモ感覚で書いておきます。

本題

Googleデベロッパーコンソールに行く,プロジェクトを作成

Googleデッッベロッパーコンソールにログイン
スクリーンショット 2021-01-23 0.32.38.png

APIの有効化>APIライブラリからGoogle Drive APIを有効化させる

スクリーンショット 2021-01-23 0.33.27.png

認証情報の追加>サービスアカウント

スクリーンショット 2021-01-23 0.34.53.png

ひとまずロールにオーナーをつけてみよう

スクリーンショット 2021-01-23 0.36.29.png

アカウントが作成されたら>JSONの鍵を生成&ダウンロード

スクリーンショット 2021-01-23 0.38.03.png
※鍵のタイプを聞かれたらひとまずJSONを選択
↓こんな感じのやつ

{
  "type": "service_account",
  "project_id": "exxxxxxxxxxxxxxxxxxxx",
  "private_key_id": "axxxxxxxxxxxxxxxxxxxxxxxxxxxxxxxxxx",
  "private_key": "-----BEGIN PRIVATE KEY-----\nxxxxxxxxxxxxxxxxxxxxxxxxxxxxxxxxxxxxxxxxxxxxxxxxxxxxxxxxxxxxxxxxxxxxxxxxxxxxxxxxxxxxxxxxxxxxxxxxxxxxxxxxxxxxxxxxxxxxxxxxxxxxxxxxxxxxxxxxxxxxxxxxxxxxxxxxxxxxxxxxxxxxxxxxxxxxxxxxxxxxxxxxxxxxxxxxxxxxxxxxxxxxxxxxxxxxxxxxxxxxxxxxxxxxxxx\n-----END PRIVATE KEY-----\n",
  "client_email": "id-xxx@xxxxxxxxxxxxxxx.iam.gserviceaccount.com",
  "client_id": "xxxxxxxxxxxxxxxxxx",
  "auth_uri": "https://accounts.google.com/o/oauth2/auth",
  "token_uri": "https://oauth2.googleapis.com/token",
  "auth_provider_x509_cert_url": "https://www.googleapis.com/oauth2/v1/certs",
  "client_x509_cert_url": "https://www.googleapis.com/robot/v1/metadata/x509/xxxxxxxxxxxxxxxxxxxxx5.iam.gserviceaccount.co

ソースコードの作成

cd desktop
mkdir sample
cd sample
touch index.js
touch privatekey.json
npm init -y

privatekey.jsonに先ほどインストールした認証情報のJSONを入れる

//googleAPIをいじるためのモジュール
npm install googleapis
index.js
const{google}=require("googleapis");constprivatekey=require("./privatekey.json");exports.handler=async(event)=>{constres=awaitPromise.resolve().then(function(){returnnewPromise(function(resolve,reject){//JWT auth clientの設定constjwtClient=newgoogle.auth.JWT(privatekey.client_email,null,privatekey.private_key,["https://www.googleapis.com/auth/drive"]);//authenticate requestjwtClient.authorize(function(err,tokens){if(err){reject(err);}else{//認証成功resolve(jwtClient);}});});}).then(function(jwtClient){returnnewPromise(asyncfunction(resolve,reject){constdrive=google.drive({version:"v3",auth:jwtClient});drive.files.list({pageSize:10,fields:"nextPageToken, files(id, name)",},(err,res)=>{if(err)reject(err);constfiles=res.data.files;if(files.length){resolve(files);}else{resolve("No files found.");}});});});console.log(res)};

ややこしかったこと

認証方法にはいくつかあり、 公式リファレンスのquickstartにもあるようなOAuth 2.0 クライアント IDを用いた方法では、トークンの有効期限が一時間のため、常時使い続けるためにはリフレッシュトークンを用いて一時間に一回アクセストークンを更新しなければならない。こちらの場合はGUIで試すこともできる。

そのため、今回はサービスアカウントを利用した。
サービスアカウントでは、スコープを与えるだけでは、ファイルに書き込んだりすることができない。googleDriveのコンソールからサービスアカウントのメールアドレスに編集権限を与える必要がある。

お世話になったサイト

https://developers.google.com/drive/api/v3/quickstart/nodejs
https://developers.google.com/oauthplayground/
https://playwithgoogleapi.hatenablog.com/entry/2019/06/30/133415
https://qiita.com/n0bisuke/items/ff1479cd14e7a0c0be0c

まだ追い切れてなくて気になったやつ

https://github.com/googleapis/google-auth-library-nodejs#samples


Gatsbyでreact-modalを使う方法について

$
0
0

最近Gatsbyを使って勉強をしてみています。

Reactを素で使うよりもとっかかりやすく、StarterやPluginの充実、GraphQLの標準装備と個人的には学習コストが少ないし、Reactを最初にやるには良いんじゃないかなとは思ってます。

Gatsby

今回は、Gatsbyを使ってページにモーダルウィンドウの機能を実装するために使えるreact-modalをGatsbyで使う場合に結構ハマってしまったので、備忘録を兼ねてメモです。

react-modal documentation

react-modalのセットアップ

react-modalの初期設定は簡単です。
npmなりyarnなどを使ってreact-modalをインストールすればOKです。

command
npm install react-modal

react-modalを使う(1ページに1つのモーダルのみを表示する場合)

まずはシンプルに1ページに1つのモーダルだけを表示する場合です。
例としてmodal-simple.jsというページで設定したとすると以下のようなコードになります。

page/modal-simple.js
importReactfrom"react"importModalfrom"react-modal";// react-modalの初期設定// root nodeのSelectorを設定Modal.setAppElement("#___gatsby");// react-modalのデザインを設定修正する場合の例Modal.defaultStyles.overlay.backgroundColor="black";constModalSingle=()=>{//モーダルの表示状態と切り替える為にState(props)を準備const[modalIsOpen,setIsOpen]=React.useState(false);// shouldCloseOnEscやshouldCloseOnOverlayCloseを使う場合に設定が必要consthandleCloseModal=()=>{setIsOpen(false)}return(<div><divclassName="container">ここにモーダルを表示します<buttonclassName="button"onClick={()=>setIsOpen(true)}>ボタン</button>
</div>
<ModalisOpen={modalIsOpen}onRequestClose={()=>handleCloseModal()}shouldCloseOnEsc={true}shouldCloseOnOverlayClick={true}><div>モーダルの表示内容です</div>
</Modal>
</div>
)}exportdefaultModalSingle

これで以下のようなモーダル表示をするためのボタンと、モーダル表示がされるはずです。
イメージ画像

ポイントはGatsbyでは明確にprops等が通常見えないので…
React.useState()を使ってステータス管理用のpropsを準備してます。

また、shouldCloseOnEscなどを使いたい場合は、onRequestCloseの定義も必要です。
そこを設定しないと機能しないので気をつけてください。
onRequestClose - react-modal documentation

応用編:1ページに複数モーダルを表示したい場合

上の設定だと1ページに1つのモーダルなら良いのですが、複数だとうまく出来ません。
複数のモーダルの表示を切り替え分けたい場合は、ステータス管理を少し調整するコツが必要です。

modal-multiple.js
importReactfrom"react"importModalfrom"react-modal";// react-modalの初期設定// root nodeのSelectorを設定Modal.setAppElement("#___gatsby");constModalMultiple=()=>{// モーダルの表示状態と切り替える為にState(props)を準備// false = 非表示、数値 = 表示しているModalの番目とするconst[modalIsOpen,setIsOpen]=React.useState(false);//どのモーダルを表示するのか操作するために関数を準備consthandleOpenModal=(num)=>{setIsOpen(num)}// shouldCloseOnEscやshouldCloseOnOverlayCliceを使う場合に設定が必要// モーダルを非表示の状態にするため、falseを指定するconsthandleCloseModal=()=>{setIsOpen(false)}return(<div><divclassName="container">パターン2ここにモーダルを表示します<ul><li><buttonclassName="button"onClick={()=>handleOpenModal(0)}>モーダル1</button></li></ul>
<ul><li><buttonclassName="button"onClick={()=>handleOpenModal(1)}>モーダル2</button></li></ul>
<ul><li><buttonclassName="button"onClick={()=>handleOpenModal(2)}>モーダル3</button></li></ul>
<ul><li><buttonclassName="button"onClick={()=>handleOpenModal(3)}>モーダル4</button></li></ul>
</div>
<ModalisOpen={(modalIsOpen===0)}onRequestClose={()=>handleCloseModal()}shouldCloseOnEsc={true}shouldCloseOnOverlayClick={true}><div>モーダル1の表示内容です</div>
</Modal>
<ModalisOpen={(modalIsOpen===1)}onRequestClose={()=>handleCloseModal()}shouldCloseOnEsc={true}shouldCloseOnOverlayClick={true}><div>モーダル2の表示内容です</div>
</Modal>
<ModalisOpen={(modalIsOpen===2)}onRequestClose={()=>handleCloseModal()}shouldCloseOnEsc={true}shouldCloseOnOverlayClick={true}><div>モーダル3の表示内容です</div>
</Modal>
<ModalisOpen={(modalIsOpen===3)}onRequestClose={()=>handleCloseModal()}shouldCloseOnEsc={true}shouldCloseOnOverlayClick={true}><div>モーダル4の表示内容です</div>
</Modal>
</div>
)}exportdefaultModalMultiple

で定義するisOpenの状態を数値にしてしまえば、その値が合致した時だけ表示されます。
各Modalの表示条件をModalIsOpenの値で条件て設定し、表示制御する関数(今回はhandleOpenModal())を使って制御をすれば動きます。

image.gif

今回はOnClick要素でOpenしたいモーダルのID(0−3)を指定すれば開くように設定しています。

実際に今回動作を組んでみたサンプルコードをgithubにあげてますので、参考までに。

manji6/gatsby-modal: Gatsby で react-modalを使うサンプル

これがモーダル複数バージョンのサンプルコード
gatsby-modal/modal-multiple.js at main · manji6/gatsby-modal

Alexa SmartHomeSkillの開発 公式チュートリアルに加え、アカウントリンクの実装、ModeControllerの追加

$
0
0

はじめに

AlexaのSmartHomeSkillは、照明や扇風機などの家電を、Alexaを使って操作するための機能です。PowerOnOffやModeControllerなどのあらかじめ決められたインターフェイスがあり、それらを利用して機能を組み立てていきます。
SmartHomeSkillでは、音声認識から意図解釈まではAmazon側でビルドされたモデルによって実行するため、開発者が意図解釈のために対話エージェントを訓練する必要はありません。
CustomSkillでは、意図解釈は、開発者が、Dialogflowのようなエージェントを訓練する必要があります。

目指す姿

スマートフォンのAlexaアプリから、SmartHomeSkillを呼び出します。
SmartHomeSkillを使って、PowerOnOffおよび、ModeControllerを使えるようにします。
本記事では、Alexaを通じて、洗濯機のオン、オフ、および、洗濯モードをデリケートモードに設定するのを目指します。
基本的には、公式のチュートリアルに従って進めます。
https://developer.amazon.com/ja-JP/docs/alexa/smarthome/steps-to-build-a-smart-home-skill.html
チュートリアルに出てくるlambdaのNode.jsのコードにアカウントリンクとModeControllerのインターフェイスを追加する形で説明します。
分かりにくいところを補完しながら進めます。

アカウントリンクの実装

まずは、アカウントリンク部分の実装を説明します。
アカウントリンクのため、本記事では、Login with Amazon(LWA)を使います。
セキュリティプロファイルを作成すると、クライアントIDとクライアントシークレットが発行されます。
lwa.png.jpg

バックエンドでは、下記の通り、Authorizationのハンドリングのための関数を追加します。
下記のコードのOAUTH_CLIENT_IDに上記のLWAのクライアントID、OAUTH_CLIENT_SECRETに、クライアントシークレットを設定します。
下記の関数は、以下の記事からコピペしました(https://qiita.com/poruruba/items/5e31b82bfbdeef20519d)。

node.js
functionhandleAuthorization(request,context){console.log("handleAuthorization function was called.");varcode=request.directive.payload.grant.code;varoptions={url:'https://api.amazon.com/auth/o2/token',method:'POST',headers:{'Content-Type':'application/json'},json:{grant_type:'authorization_code',code:code,client_id:OAUTH_CLIENT_ID,client_secret:OAUTH_CLIENT_SECRET}};returnnewPromise((resolve,reject)=>{Request(options,function(error,response,body){if(error){console.log('error: ',error);returnreject(error);}console.log(body);accessToken=body.accessToken;varheader=JSON.parse(JSON.stringify(request.directive.header));header.name='AcceptGrant.Response';context.succeed({event:{header:header,payload:{}}});returnresolve();});});}

Lambda関数の冒頭の、リクエストの種類によって処理を振り分けている箇所にて、アカウントリンクを実施する場合、上記の関数を呼び出す処理を追加します。

node.js
elseif(request.directive.header.namespace=='Alexa.Authorization'){log("DEBUG:","Authorization request",JSON.stringify(request));handleAuthorization(request,context);}

ここまでできた時点で、スマホのAlexaアプリから、スマートホームスキルのアカウントリンクができるようになっているはずです。

ModeControllerの追加

ModeControllerインターフェイス
https://developer.amazon.com/ja-JP/docs/alexa/device-apis/alexa-modecontroller.html
handleDiscovery関数内にて、デバイスのCapabilityを定義している箇所があります。ここに、ModeControllerのインターフェイスを追加します。

node.js
{"type":"AlexaInterface","interface":"Alexa.ModeController","instance":"Washer.Mode","version":"3","properties":{"supported":[{"name":"mode"}],"retrievable":true,"proactivelyReported":true,"nonControllable":false},"capabilityResources":{"friendlyNames":[{"@type":"text","value":{"text":"モード","locale":"ja-JP"}}]},"configuration":{"ordered":false,"supportedModes":[{"value":"Mode.Delicate","modeResources":{"friendlyNames":[{"@type":"text","value":{"text":"デリケート","locale":"ja-JP"}}]}}]}}// end of modecontroller interface

これで、アカウントリンク済みの状態で、「デリケートモードにして」と発話すると、Alexa側としては、デリケートモードがデバイスに存在していることは認識してくれます。
ただ、デリケートモードにしてくれと言われた時の実際の動作が規定されていないので、そこを決めてやります。
以下のデモコードを追加します。

node.js
functionhandleModeControl(request,context){log("DEBUG handleModeControl called.");// 検出中に渡されたデバイスIDを取得しますvarrequestMethod=request.directive.header.name;varinstance=request.directive.header.instance;varresponseHeader=request.directive.header;responseHeader.namespace="Alexa";responseHeader.name="Response";responseHeader.messageId=responseHeader.messageId+"-R";// リクエスト中のユーザートークンパスを取得しますvarrequestToken=request.directive.endpoint.scope.token;varmodeResult=request.directive.payload.mode;// 本来は、ここで洗濯機の制御APIを呼び出しますvarcontextResult={"properties":[{"namespace":"Alexa.ModeController","instance":instance,"name":"mode","value":modeResult,"timeOfSample":"2017-09-03T16:20:50.52Z",//結果から取得します。"uncertaintyInMilliseconds":50}]};varresponse={context:contextResult,event:{header:responseHeader,endpoint:{scope:{type:"BearerToken",token:requestToken},endpointId:"demo_id"},payload:{}}};log("DEBUG Alexa.PowerController ",JSON.stringify(response));context.succeed(response);}

さらに、Lambdaの冒頭の処理分岐部分に以下を追記します。

node.js
elseif(request.directive.header.namespace=='Alexa.ModeController'){log("DEBUG:",JSON.stringify(request));handleModeControl(request,context);}

これで、スマホアプリからデリケートモードにして、と発話すると、handleModeControl()が呼ばれるようになります。
ほぼ同様にして、他のインターフェイスも実装することができます。

おわりに

AlexaのSmartHomeSkillを使い、電源オンオフとモード切り替えを実装しました。
SmartHomeSkillを使うことで、簡単にIoT家電を操作できるようになります。
これが足りないぞというのがありましたら、コメントお願いします。

Docker x Express x PostgreSQL x Sequelize 環境構築メモ

$
0
0

検索したら意外とヒット少なかったので記事化

初学者ゆえ適切でないコードや表現があるかと思います。その際は優しくご指導いただけますと幸いです。

開発環境

  • macOS Catalina 10.15.7
  • Docker 20.10.2

作業ディレクトリ作成

Terminal
mkdir hoge/app
cd app
npm init

適当な場所に作業ディレクトリを作成&npm init
package nameとかは適当なものを選択。

server.js作成

Terminal
touch server.js
npm i --save express
server.js
constexpress=require("express");constapp=express();app.get("/",(req,res)=>{res.send("Hello World!");});app.listen(9000,()=>{console.log("The app listening on port 5000");});

nodemon設定

node server.jsだとserver.jsを書き換えるたびに再起動しなければならないため、nodemonを設定しておく。

Terminal
npm i --save nodemon
package.json
"scripts":{"start":"nodemon server.js"}

node.jsのイメージを作成

node.jsの公式ドキュメントを参考にコンテナを作成する。

Dockerfile編集

Terminal
cd ..(appからhogeへ移動)
touch Dockerfile
Dockerfile
# ベースイメージFROM node:14.15.4# 作業ディレクトリWORKDIR /usr/src# packages.jsonを個別にコピーする理由は後述COPY/packages*.json ./RUN npm install# その他のファイル群もコンテナへコピーCOPY / ./EXPOSE 5000# サーバースタートCMD ["npm", "start"]

npm_modulesをignoreする

.dockerignore
npm_modules
npm-debug.log

npm_modulesをコピーするのは時間がかかるのでignoreして、先述のnpm installで作成する。

現在のhogeディレクトリ構成はこんな感じ

Screen Shot 2021-01-23 at 1.08.26.png

buildする

Terminal
docker build -t hoge/node .

-t: タグをつけるオプション(イメージの名前になる)

Terminal
Successfully built 英数字
Successfully tagged hoge/node:latest

↑こうなったらOK

コンテナ作成

Express、Postgresを組み合わせたコンテナを作成していく。

みんな大好きdocker-compose

Terminal
touch docker-compose.yml
touch .env
docker-compose.yml
version:"3"services:app:# docker-compose up実行時に開始する関連サービス(上から順に実行)depends_on:-postgres# コンテナを実行するときの元となるimage(さっき作ったやつ)image:hoge/node# コンテナの名前container_name:"hoge_express-pg"# マウントするパス(ホストの相対パス:DockerfileのWORKDIRからの絶対パス)volumes:-./app:/usr/src/app# ホストマシンにつなげるポート(ホスト:コンテナ)ports:-5000:9000# 環境変数env_file:.env# コンテナの永続化tty:truepostgres:image:postgres:13-alpinecontainer_name:postgresports:-5432:5432volumes:-./postgres/init:/docker-entrypoint-initdb.denv_file:.envhostname:postgres# rootにしないとあとで「権限ないで」って言われるuser:root# ブラウザでdbを確認できるすごいヤツ(任意)pgadmin4:image:dpage/pgadmin4:4.20container_name:pgadmin4depends_on:-postgresports:-80:80volumes:-./pgadmin:/var/lib/pgadmin/storageenv_file:.envhostname:pgadmin4

volumesに指定したパスはホストマシンとコンテナとでファイルが共有されて便利。

.env
POSTGRES_USER=hoge
POSTGRES_PASSWORD=hoge
POSTGRES_INITDB_ARGS=--encoding=UTF-8

TZ=Asia/Tokyo

PGADMIN_DEFAULT_EMAIL=root
PGADMIN_DEFAULT_PASSWORD=root

POSTGRES_~: dbのログイン情報と設定
TZ: TimeZone
PGADMIN_DEFAULT_~: pgAdmin4のログイン情報

動作確認

Terminal
docker-compose up
Terminal
postgres  | 2021-01-23 01:24:24.380 JST [1] LOG:  database system is ready to accept connections
~
hoge_express-pg | [nodemon] starting `node server.js`
hoge_express-pg | The app listening on port 5000
~
pgadmin4  | [2021-01-22 16:24:29 +0000] [1] [INFO] Listening at: http://[::]:80

こんな感じに3つのコンテナの起動が確認できたらOK。

ブラウザ

ブラウザでlocalhost:5000にアクセスするとHello World!できる。
Screen Shot 2021-01-23 at 1.27.45.png

db作成

Ctrl+Cで一度コンテナを終了し、自動生成されたpostgres/initフォルダにSQLファイルを追加する。
ここに配置されたSQLはコンテナ開始時に実行されるので、db作成の他、初期データの設定にも便利。

Terminal
touch postgres/init/template.sql
postgres/init/template.sql
CREATEDATABASEdevelopment

作成したらもう一度docker-compose upしておく。

pgAdmin4初期設定(任意)

ブラウザでlocalhost:80にアクセス

Screen Shot 2021-01-23 at 2.02.39.png

こんな感じの画面が出るので、.envで設定したユーザー名とパスワードでログイン。

ちなみに、dpage/pgAdmin4:4は何故かこの段階でログインできない不具合があるようです(これに気づくのに一晩費やした)。

サーバー追加

ログインしたらAdd New ServerConnectionタブで
- Host: postgres
- Port: 5432
- Mentenance database: postgres
- Username: hoge
- Password: hoge

左のサーバー一覧にpostgresとその中にdevelopmentdbが表示されればOK。

もしコンテナ作成後に.envでパスワードなどを変更した場合は一度コンテナを削除してから再度接続を行う必要があるので注意。

Sequelize設定

ここからはコンテナ内で作業する(けどvolumesで共有されているのでほとんどの作業はホスト側でやっても平気←Docker使う意味は??
VSCodeでDockerの拡張機能を入れてると、ここから簡単にコンテナのbashを起動できる

Screen Shot 2021-01-23 at 1.30.34.png

各種パッケージインストール&Sequelize初期設定

/usr/src/app#
npm i --save sequelize sequelize-cli pg
npx sequelize-cli init

npx sequelize-cli initをすると、config, models, migrations, seedersフォルダが作成される

このディレクトリ名を見てわかるように、SequelizeはRubyのActiveRecordのようにdbのマイグレーションがJSでできるようになるスグレもの

config.json変更

/app/config/config.json
{"development":{"username":"hoge",←.envで設定したdbのログイン情報"password":"hoge","database":"development",←dbの名前"host":"postgres","dialect":"postgres"},"test":{省略},"production":{省略}}

これでSequelizeの設定は完了。

Sequelizeでdbへアクセス

modelを作成

/usr/src/app#
npx sequelize-cli model:generate --name Post --attributes title:string,body:string

--name: model名
--attributes: modelが保有する属性(カラム)

migrations/日付-create-postmodels/post.jsの2つが自動生成されているのを確認する。

migrations/20210123053140-create-post
"use strict";module.exports={up:async(queryInterface,Sequelize)=>{awaitqueryInterface.createTable("Posts",{id:{allowNull:false,autoIncrement:true,primaryKey:true,type:Sequelize.INTEGER,},title:{type:Sequelize.STRING,},body:{type:Sequelize.STRING,},createdAt:{allowNull:false,type:Sequelize.DATE,},updatedAt:{allowNull:false,type:Sequelize.DATE,},});},down:async(queryInterface,Sequelize)=>{awaitqueryInterface.dropTable("Posts");},};
models/post.js
"use strict";const{Model}=require("sequelize");module.exports=(sequelize,DataTypes)=>{classPostextendsModel{/**
     * Helper method for defining associations.
     * This method is not a part of Sequelize lifecycle.
     * The `models/index` file will call this method automatically.
     */staticassociate(models){// define association here}}Post.init({title:DataTypes.STRING,body:DataTypes.STRING,},{sequelize,modelName:"Post",});returnPost;};

マイグレーション

/usr/src/app#
npx sequelize-cli db:migrate
/usr/src/app#
> Sequelize CLI [Node: 14.15.4, CLI: 6.2.0, ORM: 6.4.0]

> Loaded configuration file "config/config.json".> Using environment "development".>== 20210123053140-create-post: migrating =======>== 20210123053140-create-post: migrated (0.022s)

migratedとなればOK。

Expressからdbをさわってみる

Create

server.js
constexpress=require("express");constapp=express();+constmodels=require("./models/index");app.get("/",(req,res)=>{res.send("Hello World!");});+// createして/へリダイレクトする+app.get("/create",(req,res)=>{+awaitmodels.Post.create({+title:"sample title",+body:"sample body",+});+res.redirect("/");+});app.listen(9000,()=>{console.log("The app listening on port 5000");});

modelsをrequireするとき、./models/だと失敗するので注意。

アクセス

Chrome
localhost:5000/create

pgAdminで確認

Servers/postgres/Databases/development/Schemas/public/Tables/の中の先ほど生成したモデル名のテーブルを右クリックし、View/Edit Data->All Rows

Screen Shot 2021-01-23 at 14.56.26.png

Data OutputタブでデータがCreateされているのが確認できる。

Read

server.js
constexpress=require("express");constapp=express();constmodels=require("./models/index");// 全て取得して返すapp.get("/",(req,res)=>{+models.Post.findAll().then((posts)=>{+res.send(posts);+});-//   res.send("Hello World!");});// createして/へリダイレクトするapp.get("/create",(req,res)=>{models.Post.create({title:"sample title",body:"sample body",});res.redirect("/");});app.listen(9000,()=>{console.log("The app listening on port 5000");});

アクセス

Chrome
localhost:5000

Screen Shot 2021-01-23 at 15.00.58.png

無事に取得できているのが確認できた!

おしまい

あとはejsを入れたりしてviewを整形したり、bodyParserでFormデータを受け取ったりすればサービスとして本格的な開発が進められる。

今回のコード

https://github.com/nullworkbench/docker-express-postgresql-sequelize

node.jsのローカルサーバーでクライアントサイドjavascriptが動かない

$
0
0

はじめに

  • 素人がタイトルの問題で詰まったので解決方法を残しておきます
  • 解決方法の一つは@Suibari_chaさんの記事を大いに参考にさせてもらいましたが(ほぼそのままです)、「javascriptが動かない」でググると見つけづらかったので一応記載させていただきました

解決方法1

下記記事のSuibari_chaさんのcssを読み込む方法:Node.jsでhttpサーバを立てた際にCSSが読み取れない場合の対処法について

と同様に、javascriptのMIMEタイプを指定します。
サーバー起動時に「.jsはJavaScriptとして扱う」
というのを教えてあげないといけないということみたいです。
(node.jsなんだからそれくらいデフォルトで分かってくれよと思いますけども)

解決方法2

expressを使います

まず、expressをインストール

npm install express

下記のサーバー起動のスクリプトを書いて起動します。

index.js
// node index.js で起動varexpress=require('express');varapp=express();app.use(express.static(__dirname));// ここに入っているjsやcssを使うapp.get('/',function(req,res){//res.send('Hello World!');res.sendFile(__dirname+'/index.html');});app.listen(3000,function(){console.log('Example app listening on port 3000!');});//http://localhost:3000にアクセスして確認

こちらではいちいちMIMEタイプを指定しなくて良いみたいです。
ポイントはここです。

app.use(express.static(__dirname));// ここに入っているjsやcssを使う

終わり

Node.jsがとっつきにくい言語だと思ったら ~非同期処理とは?~【初心者向け】

$
0
0

背景

JavaやらPythonやらの言語でエンジニア人生を送っていると、Node.jsは「何か違う~!!」と思う言語だと思う。今回はどんなところがとっつきにくい点なのか、他の言語と何が違うのかを書いていく:runner_tone5::thought_balloon:

Node.jsってどんな言語?

Node.jsは他の言語と比べて決定的に異なる点がある。「ノンブロッキングI/O」という処理方式を採用している点だ。ブロッキングとは、Node.jsのプログラムを実行する際に、ファイル呼び出しやネットワークリクエストなどNode.js以外の操作が完了するまで待たなければならない状態だ。ブロッキングが発生すると、プログラムの次の処理に進むことができない。Node.jsでは、このブロッキングを避けるため「ノンブロッキングI/O」という非同期処理を採用している。ファイル呼び出しやネットワークリクエストの処理の結果を待たずに次のプログラムコードが実行される。

const fs = require('fs'); // ファイル読込ライブラリ

// ファイル内容をコンソールに出力するコールバック関数
const fileoutput = (err, txt) => {
  console.log(txt); 
};

console.log('前');
fs.readFile('./readme.txt', 'utf8', fileoutput);
console.log('後');

上記のプログラムを実行すると、前、後、ファイルの中身という順番でコンソールに出力される。ファイル読込の処理結果を待たず、次のプログラムコードが実行されていることが分かるだろう。

なぜ非同期?

非同期的にプログラムを実行して、ブロッキングをなぜ避けなければいけないのかというと、Node.jsはシングルスレッドで動く処理だからだ。スレッドとは、プログラムを実行する実行単位のことだ。例えばWebサーバーにリクエストがきて、プログラムを実行する際に並列で実行できないとすると、シングルスレッドのためプログラムを実行する場所が他になく、大幅に処理が滞ってしまう。そのため、非同期で次の処理を実行できるようにしているのだ。そのため、メモリを効率的に利用できたり、プロセスのデッドロックが起こりにくいというメリットがある。

まとめ

Node.jsのほとんどの関数はこのように非同期で実施されるため、実行される順番には留意してコードを書こう:raised_hand:

Cloud Functions for Firebase で runtime を Node.js 12 にしてデプロイする方法

$
0
0

はじめに

Cloud Functions for Firebase でデプロイの際にnodeのバージョン周りでエラーが出てハマったのでまとめました。
簡潔に設定の仕方を紹介した後、ハマりどころを末尾に記載しておきます。

runtime を Node.js 12 にしてデプロイする方法

やり方は全部で2つあります。

1. package.jsonに記述する方法

以下のようにenginesに"node":"12"と記載する

{"name":"functions","description":"Cloud Functions for Firebase","scripts":{},"engines":{"node":"12"},"dependencies":{},"devDependencies":{},"private":true}

2. firebase.jsonに記述する方法

firebase functions をinitするとinitしたカレントディレクトリに firebase.jsonが作成されると思います。そこに以下のような記述を足すことでランタイムを指定できます!

{"functions":{"runtime":"nodejs12","predeploy":["npm --prefix \"$RESOURCE_DIR\" run lint"]}}

v8.6.0で変更があったみたいです。 or と書いてあるように、package.jsonでやるやり方も使えます
image.png

公式リリースノート

ランタイム指定がうまくいった時のdeployのログ

以下のように、 creating Node.js 12 ~~~と出ていれば指定できています!
image.png

大前提・要注意

1. FirebaseのプランをBlazeプラン(従量課金プラン)にすること

2. グローバルインストールされている firebase-toolsが最新のものであること!

これが古いままだと以下のようなエラーが出ます

Error: package.json in functions directory has an engines field which is unsupported. The only valid choices are: {"node": "8"} and {"node": "10"}.

3. 使用しているライブラリが必要とするnodeのバージョン要件をローカル環境が満たしていること!

deployなのでてっきりpackage.jsonに正しくランタイム指定されていればクラウド上で問題なくビルドしてくれると思ってましたが、どうやら自分が想像していたのとはビルドの仕組みが違うみたいで..(勉強します。)

自分は使用しているライブラリがnode v12以上を要求していたにも関わらず、ローカルのnodeのバージョンがv10系だったため、延々と以下のエラーが出てしまいました。

Error: There was an unknown problem while trying to parse function triggers. Please ensure you are using Node.js v6 or greater.

image.png

自分はnodebrewを使っていたので以下で解決しました。バージョンはご自身のライブラリの要件に合わせてしよしなに変えてください。

nodebrew use 12.20.1

新しく作った環境にfirebase-toolsがない場合は以下も実行

npm i -g firebase-tools

参考

公式リリースノート
Cloud Functions for FirebaseでNode.js 12を利用する方法

Node.js: Let's Encrypt の証明書を使ったブローカーに接続

$
0
0

こちらで作成したブローカーに接続する方法です。
Mosquitto で Let's Encrypt の証明書を使う

.env
HOST=abc.example.com
TOPIC=sensors/topic_1
publish_ca.js
#! /usr/bin/node
// ---------------------------------------------------------------//  publish_ca.js////                  Jan/23/2021//// ---------------------------------------------------------------'use strict'constmqtt=require('mqtt')constfs=require('fs')constdotenv=require('dotenv')// ---------------------------------------------------------------console.error("*** 開始 ***")dotenv.config()consthost=`${process.env.HOST}`consttopic=`${process.env.TOPIC}`constcaFile=fs.readFileSync("/etc/ssl/certs/ca-certificates.crt")constoptions={rejectUnauthorized:false,ca:caFile}constclient=mqtt.connect('mqtts://'+host+':8883',options)client.on('connect',function(){consttoday=newDate()varddx=(1900+today.getYear())+"-"+(today.getMonth()+1)ddx+="-"+today.getDate()+""+today.getHours()ddx+=":"+today.getMinutes()+":"+today.getSeconds()client.publish(topic,ddx)console.log(ddx)client.publish(topic,'Good Afternoon mqtts')client.publish(topic,'こんにちは')client.end()console.error("*** 終了 ***")})// ---------------------------------------------------------------

実行コマンド

export NODE_PATH=/usr/lib/node_modules
./publish_ca.js
subscribe_ca.js
#! /usr/bin/node
// ---------------------------------------------------------------//  subscribe.js////                      Jan/23/2021//// ---------------------------------------------------------------'use strict'constmqtt=require('mqtt')constfs=require('fs')constdotenv=require('dotenv')// ---------------------------------------------------------------console.error("*** 開始 ***")dotenv.config()consthost=`${process.env.HOST}`consttopic=`${process.env.TOPIC}`constcaFile=fs.readFileSync("/etc/ssl/certs/ca-certificates.crt")constoptions={rejectUnauthorized:false,ca:caFile}constclient=mqtt.connect('mqtts://www2.ekzemplaro.org:8883',options)client.on('connect',function(){client.subscribe(topic)})client.on('message',function(topic,message){// message is Bufferconsole.log(message.toString())})// ---------------------------------------------------------------

実行コマンド

export NODE_PATH=/usr/lib/node_modules
./subscribe_ca.js

laravel-mixのコンパイルでSyntaxError: Unexpected token = と怒られたら

$
0
0

発生したエラー

laravel-mixでコンパイルしたところ下記のエラーで怒られた
触ってないファイルでsyntax errorとか言われて困った

ubuntu
#npm run dev
npm WARN npm npm does not support Node.js v10.23.1
npm WARN npm You should probably upgrade to a newer version of node as we
npm WARN npm can't make any promises that npm will work with this version.
npm WARN npm Supported releases of Node.js are the latest release of 4, 6, 7, 8, 9.
npm WARN npm You can find the latest version at https://nodejs.org/

>@ dev /var/www/vue-laravel-spa
>npm run development

npm WARN npm npm does not support Node.js v10.23.1
npm WARN npm You should probably upgrade to a newer version of node as we
npm WARN npm can't make any promises that npm will work with this version.
npm WARN npm Supported releases of Node.js are the latest release of 4, 6, 7, 8, 9.
npm WARN npm You can find the latest version at https://nodejs.org/

>@ development /var/www/vue-laravel-spa
>mix

[webpack-cli] /var/www/vue-laravel-spa/node_modules/laravel-mix/src/Mix.js:18
    static _primary = null;                    ^

SyntaxError: Unexpected token =
    at new Script (vm.js:83:7)
    at NativeCompileCache._moduleCompile (/var/www/vue-laravel-spa/node_modules/v8-compile-cache/v8-compile-cache.js:240:18)
    at Module._compile (/var/www/vue-laravel-spa/node_modules/v8-compile-cache/v8-compile-cache.js:184:36)
    at Object.Module._extensions..js (internal/modules/cjs/loader.js:789:10)
    at Module.load (internal/modules/cjs/loader.js:653:32)
    at tryModuleLoad (internal/modules/cjs/loader.js:593:12)
    at Function.Module._load (internal/modules/cjs/loader.js:585:3)
    at Module.require (internal/modules/cjs/loader.js:692:17)
    at require (/var/www/vue-laravel-spa/node_modules/v8-compile-cache/v8-compile-cache.js:159:20)
    at module.exports (/var/www/vue-laravel-spa/node_modules/laravel-mix/setup/webpack.config.js:2:17)
npm ERR! code ELIFECYCLE
npm ERR! errno 2
npm ERR! @ development: `mix`
npm ERR! Exit status 2
npm ERR! 
npm ERR! Failed at the @ development script.
npm ERR! This is probably not a problem with npm. There is likely additional logging output above.

npm ERR! A complete log of this run can be found in:
npm ERR!     /root/.npm/_logs/2021-01-23T09_26_30_393Z-debug.log
npm ERR! code ELIFECYCLE
npm ERR! errno 2
npm ERR! @ dev: `npm run development`
npm ERR! Exit status 2
npm ERR! 
npm ERR! Failed at the @ dev script.
npm ERR! This is probably not a problem with npm. There is likely additional logging output above.

npm ERR! A complete log of this run can be found in:
npm ERR!     /root/.npm/_logs/2021-01-23T09_26_30_443Z-debug.log

環境

% sw_vers
ProductName:    Mac OS X
ProductVersion: 10.15.7
BuildVersion:   19H2

% docker version
Client: Docker Engine - Community
 Cloud integration: 1.0.1
 Version:           19.03.13
 API version:       1.40

# php -v
PHP 7.4.7 (cli) (built: Jun 11 2020 18:41:17) ( NTS )
Copyright (c) The PHP Group
Zend Engine v3.4.0, Copyright (c) Zend Technologies
    with Xdebug v3.0.2, Copyright (c) 2002-2021, by Derick Rethans

# php artisan -v
Laravel Framework 8.24.0

原因

ググりまくった結果こちらのサイトに辿り着いた
https://github.com/JeffreyWay/laravel-mix/issues/2570
どうやらnode.jsのバージョンを最新にすると直るらしい

対処

こちらの記事を参考に対処した
https://qiita.com/seibe/items/36cef7df85fe2cefa3ea
https://qiita.com/kiwi-bird/items/e3e551938d09282cf4ee
今回初めて知ったのだがn packageを使うことでnpmパッケージとnode.js自体のバージョン管理をしてくれるらしい
こんな便利なものがあったのか

というわけでn packageをインストールする

ubuntu
#npm install n -g# グローバルにインストールするnpm WARN npm npm does not support Node.js v10.23.1
npm WARN npm You should probably upgrade to a newer version of node as we
npm WARN npm can't make any promises that npm will work with this version.
npm WARN npm Supported releases of Node.js are the latest release of 4, 6, 7, 8, 9.
npm WARN npm You can find the latest version at https://nodejs.org/
/usr/local/bin/n ->/usr/local/lib/node_modules/n/bin/n
+ n@7.0.0
added 1 package from 4 contributors in 0.858s

#n stable  # 最新のnodejsをインストール  installing : node-v14.15.4
       mkdir : /usr/local/n/versions/node/14.15.4
       fetch : https://nodejs.org/dist/v14.15.4/node-v14.15.4-linux-x64.tar.xz
   installed : v14.15.4 (with npm 6.14.10)

Note: the node command changed location and the old location may be remembered in your current shell.
         old : /usr/bin/node
         new : /usr/local/bin/node
To reset the command location hash either start a new shell, or execute PATH="$PATH"
#apt purge -y nodejs npm   # aptで入れた古いnodejsとnpmを削除Reading package lists... Done
Building dependency tree       
Reading state information... Done
The following packages were automatically installed and are no longer required:
  gyp javascript-common libbrotli1 libc-ares2 libexpat1 libjs-inherits libjs-is-typedarray libnode-dev libnode64 libpython-stdlib
  libpython2-stdlib libpython2.7-minimal libpython2.7-stdlib libreadline7 libssl-dev libuv1 libuv1-dev lsb-base mime-support nodejs-doc python
  python-minimal python-pkg-resources python2 python2-minimal python2.7 python2.7-minimal
Use 'apt autoremove' to remove them.
The following packages will be REMOVED:
  node-abbrev* node-ajv* node-ansi* node-ansi-align* node-ansi-regex* node-ansi-styles* node-ansistyles* node-aproba* node-archy*
  node-are-we-there-yet* node-asn1* node-assert-plus* node-asynckit* node-aws-sign2* node-aws4* node-balanced-match* node-bcrypt-pbkdf*
  node-bluebird* node-boxen* node-brace-expansion* node-builtin-modules* node-builtins* node-cacache* node-call-limit* node-camelcase*
  node-caseless* node-chalk* node-chownr* node-cli-boxes* node-cliui* node-clone* node-co* node-color-convert* node-color-name*
  node-combined-stream* node-concat-map* node-concat-stream* node-config-chain* node-console-control-strings* node-copy-concurrently*
  node-core-util-is* node-cross-spawn* node-cyclist* node-dashdash* node-decamelize* node-decompress-response* node-deep-extend* node-defaults*
  node-delayed-stream* node-delegates* node-detect-indent* node-detect-newline* node-duplexer3* node-duplexify* node-ecc-jsbn* node-editor*
  node-encoding* node-end-of-stream* node-errno* node-escape-string-regexp* node-execa* node-extend* node-extsprintf* node-find-up*
  node-flush-write-stream* node-forever-agent* node-form-data* node-from2* node-fs-vacuum* node-fs-write-stream-atomic* node-fs.realpath*
  node-gauge* node-get-caller-file* node-get-stream* node-getpass* node-glob* node-got* node-graceful-fs* node-gyp* node-har-schema*
  node-har-validator* node-has-flag* node-has-symbol-support-x* node-has-to-string-tag-x* node-has-unicode* node-hosted-git-info*
  node-http-signature* node-iconv-lite* node-iferr* node-import-lazy* node-imurmurhash* node-inflight* node-inherits* node-ini* node-invert-kv*
  node-is-builtin-module* node-is-npm* node-is-object* node-is-plain-obj* node-is-retry-allowed* node-is-stream* node-is-typedarray*
  node-isarray* node-isexe* node-isstream* node-isurl* node-jsbn* node-json-parse-better-errors* node-json-schema* node-json-stable-stringify*
  node-json-stringify-safe* node-jsonify* node-jsonparse* node-jsonstream* node-jsprim* node-latest-version* node-lazy-property* node-lcid*
  node-libnpx* node-locate-path* node-lockfile* node-lowercase-keys* node-lru-cache* node-mem* node-mime-types* node-mimic-fn*
  node-mimic-response* node-minimatch* node-minimist* node-mississippi* node-mkdirp* node-move-concurrently* node-mute-stream* node-node-uuid*
  node-nopt* node-normalize-package-data* node-npm-package-arg* node-npm-run-path* node-npmlog* node-oauth-sign* node-object-assign* node-once*
  node-opener* node-os-locale* node-osenv* node-p-cancelable* node-p-finally* node-p-limit* node-p-locate* node-p-timeout* node-package-json*
  node-parallel-transform* node-path-exists* node-path-is-absolute* node-path-is-inside* node-performance-now* node-prepend-http*
  node-process-nextick-args* node-promise-inflight* node-promzard* node-proto-list* node-prr* node-pump* node-pumpify* node-punycode* node-qs*
  node-qw* node-rc* node-read* node-read-package-json* node-readable-stream* node-registry-auth-token* node-registry-url* node-request*
  node-require-directory* node-require-main-filename* node-resolve-from* node-retry* node-rimraf* node-run-queue* node-safe-buffer* node-semver*
  node-semver-diff* node-set-blocking* node-sha* node-shebang-command* node-shebang-regex* node-signal-exit* node-slash* node-slide*
  node-sorted-object* node-spdx-correct* node-spdx-expression-parse* node-spdx-license-ids* node-sshpk* node-ssri* node-stream-each*
  node-stream-iterate* node-stream-shift* node-string-decoder* node-string-width* node-strip-ansi* node-strip-eof* node-strip-json-comments*
  node-supports-color* node-tar* node-term-size* node-text-table* node-through* node-through2* node-timed-out* node-tough-cookie*
  node-tunnel-agent* node-tweetnacl* node-typedarray* node-uid-number* node-unique-filename* node-unpipe* node-url-parse-lax*
  node-url-to-options* node-util-deprecate* node-uuid* node-validate-npm-package-license* node-validate-npm-package-name* node-verror*
  node-wcwidth.js* node-which* node-which-module* node-wide-align* node-widest-line* node-wrap-ansi* node-wrappy* node-write-file-atomic*
  node-xdg-basedir* node-xtend* node-y18n* node-yallist* node-yargs* node-yargs-parser* nodejs* npm*
0 upgraded, 0 newly installed, 241 to remove and 18 not upgraded.
After this operation, 16.7 MB disk space will be freed.
(Reading database ... 19266 files and directories currently installed.)
Removing npm (5.8.0+ds6-4+deb10u2) ...
Removing node-gyp (3.8.0-6) ...
Removing node-nopt (3.0.6-3) ...
Removing node-abbrev (1.1.1-1) ...
Removing node-request (2.88.1-2) ...
Removing node-har-validator (5.1.0-1) ...
Removing node-ajv (5.0.0-1) ...
Removing node-ansi (0.3.0-3) ...
Removing node-boxen (1.2.2-1) ...
Removing node-ansi-align (2.0.0-1) ...
Removing node-libnpx (10.2.0+repack-1) ...
Removing node-yargs (10.0.3-2) ...
Removing node-cliui (4.1.0-1) ...
Removing node-wrap-ansi (4.0.0-1) ...
Removing node-chalk (2.3.0-2) ...
Removing node-ansi-styles (3.2.1-1) ...
Removing node-ansistyles (0.1.3-1) ...
Removing node-npmlog (4.1.2-1) ...
Removing node-gauge (2.7.4-1) ...
Removing node-cacache (11.3.2-2) ...
Removing node-move-concurrently (1.0.1-2) ...
Removing node-archy (1.0.0-2) ...
Removing node-are-we-there-yet (1.1.4-1) ...
Removing node-http-signature (1.2.0-1) ...
Removing node-sshpk (1.13.1+dfsg-2) ...
Removing node-asn1 (0.2.3-1) ...
Removing node-dashdash (1.14.1-2) ...
Removing node-jsprim (1.4.0-1) ...
Removing node-verror (1.10.0-1) ...
Removing node-form-data (2.3.2-2) ...
Removing node-asynckit (0.4.0-2) ...
Removing node-aws-sign2 (0.7.1-1) ...
Removing node-aws4 (1.8.0-1) ...
Removing node-read-package-json (2.0.13-1) ...
Removing node-copy-concurrently (1.0.5-4) ...
Removing node-bcrypt-pbkdf (1.0.1-1) ...
Removing node-bluebird (3.5.1+dfsg2-2) ...
Removing node-normalize-package-data (2.4.0-1) ...
Removing node-is-builtin-module (2.0.0-1) ...
Removing node-builtin-modules (3.0.0-1) ...
Removing node-npm-package-arg (6.0.0-2) ...
Removing node-validate-npm-package-name (3.0.0-1) ...
Removing node-builtins (1.0.3-1) ...
Removing node-call-limit (1.1.0-1) ...
Removing node-yargs-parser (11.1.1-1+deb10u1) ...
Removing node-camelcase (5.0.0-1) ...
Removing node-caseless (0.12.0-1) ...
Removing node-tar (4.4.6+ds1-3) ...
Removing node-chownr (1.1.1-1) ...
Removing node-cli-boxes (1.0.0-1) ...
Removing node-widest-line (1.2.2-1) ...
Removing node-co (4.6.0-1) ...
Removing node-color-convert (1.9.0-3) ...
Removing node-color-name (1.1.3-1) ...
Removing node-combined-stream (1.0.7-1) ...
Removing node-mississippi (3.0.0-1) ...
Removing node-concat-stream (1.6.2-1) ...
Removing node-config-chain (1.1.11-1) ...
Removing node-console-control-strings (1.1.0-1) ...
Removing node-through2 (2.0.5-2) ...
Removing node-flush-write-stream (1.0.3-1) ...
Removing node-term-size (1.2.0+dfsg-2) ...
Removing node-os-locale (2.0.0-1) ...
Removing node-execa (0.10.0+dfsg-1) ...
Removing node-cross-spawn (5.1.0-2) ...
Removing node-parallel-transform (1.1.0-2) ...
Removing node-cyclist (1.0.1-2) ...
Removing node-decamelize (1.2.0-1) ...
Removing node-latest-version (3.1.0-1) ...
Removing node-package-json (4.0.1-1) ...
Removing node-got (7.1.0-1) ...
Removing node-decompress-response (3.3.0-1) ...
Removing node-registry-url (3.1.0-1) ...
Removing node-registry-auth-token (3.3.1-1) ...
Removing node-rc (1.1.6-2) ...
Removing node-deep-extend (0.4.1-2) ...
Removing node-delayed-stream (0.0.5-1) ...
Removing node-delegates (1.0.0-1) ...
Removing node-detect-indent (5.0.0-1) ...
Removing node-detect-newline (2.1.0-1) ...
Removing node-duplexer3 (0.1.4-4) ...
Removing node-pumpify (1.5.1-1) ...
Removing node-duplexify (3.6.1-1) ...
Removing node-ecc-jsbn (0.1.1-1) ...
Removing node-editor (1.0.0-1) ...
Removing node-encoding (0.1.12-2) ...
Removing node-stream-each (1.2.2-2) ...
Removing node-pump (3.0.0-1) ...
Removing node-end-of-stream (1.4.1-1) ...
Removing node-errno (0.1.4-1) ...
Removing node-escape-string-regexp (1.0.5-1) ...
Removing node-extend (3.0.2-1) ...
Removing node-extsprintf (1.3.0-1) ...
Removing node-find-up (2.1.0-1) ...
Removing node-forever-agent (0.6.1-1) ...
Removing node-from2 (2.3.0-1) ...
Removing node-fs-vacuum (1.2.10-2) ...
Removing node-fs-write-stream-atomic (1.0.10-4) ...
Removing node-get-caller-file (1.0.2-1) ...
Removing node-get-stream (3.0.0-1) ...
Removing node-getpass (0.1.7-1) ...
Removing node-write-file-atomic (2.3.0-1) ...
Removing node-sha (2.0.1-1) ...
Removing node-graceful-fs (4.1.11-1) ...
Removing node-har-schema (2.0.0-1) ...
Removing node-supports-color (4.4.0-2) ...
Removing node-has-flag (2.0.0-1) ...
Removing node-isurl (1.0.0-1) ...
Removing node-has-to-string-tag-x (1.4.1+dfsg-1) ...
Removing node-has-symbol-support-x (1.4.1+dfsg-1) ...
Removing node-has-unicode (2.0.1-2) ...
Removing node-hosted-git-info (2.7.1-1) ...
Removing node-iconv-lite (0.4.13-2) ...
Removing node-iferr (1.0.2-1) ...
Removing node-import-lazy (3.0.0.REALLY.2.1.0-1) ...
Removing node-unique-filename (1.1.0+ds-2) ...
Removing node-imurmurhash (0.1.4-1) ...
Removing node-ini (1.3.5-1) ...
Removing node-lcid (1.0.0-1) ...
Removing node-invert-kv (1.0.0-1) ...
Removing node-is-npm (1.0.0-1) ...
Removing node-is-object (1.0.1-1) ...
Removing node-is-plain-obj (1.1.0-1) ...
Removing node-is-retry-allowed (1.1.0-1) ...
Removing node-is-stream (1.1.0-1) ...
Removing node-is-typedarray (1.0.0-2) ...
Removing node-which (1.3.0-2) ...
Removing node-isexe (2.0.0-4) ...
Removing node-isstream (0.1.2+dfsg-1) ...
Removing node-jsbn (1.1.0-1) ...
Removing node-json-parse-better-errors (1.0.2-2) ...
Removing node-json-schema (0.2.3-1) ...
Removing node-json-stable-stringify (1.0.1-1) ...
Removing node-json-stringify-safe (5.0.1-1) ...
Removing node-jsonify (0.0.0-1) ...
Removing node-jsonstream (1.3.2-1) ...
Removing node-jsonparse (1.3.1-6) ...
Removing node-lazy-property (1.0.0-3) ...
Removing node-locate-path (2.0.0-1) ...
Removing node-lockfile (1.0.4-1) ...
Removing node-lowercase-keys (1.0.0-2) ...
Removing node-lru-cache (5.1.1-4) ...
Removing node-mem (1.1.0-1) ...
Removing node-mime-types (2.1.21-1) ...
Removing node-mimic-fn (1.1.0-1) ...
Removing node-mimic-response (1.0.0-1) ...
Removing node-minimist (1.2.0-1+deb10u1) ...
Removing node-mkdirp (0.5.1-1) ...
Removing node-promzard (0.3.0-1) ...
Removing node-read (1.0.7-1) ...
Removing node-mute-stream (0.0.8-1) ...
Removing node-node-uuid (3.3.2-2) ...
Removing node-npm-run-path (2.0.2-2) ...
Removing node-oauth-sign (0.9.0-1) ...
Removing node-object-assign (4.1.1-2) ...
Removing node-opener (1.4.3-1) ...
Removing node-osenv (0.1.5-1) ...
Removing node-p-cancelable (0.3.0-1) ...
Removing node-p-timeout (1.2.0-1) ...
Removing node-p-finally (1.0.0-2) ...
Removing node-p-locate (2.0.0-1) ...
Removing node-p-limit (1.1.0-1) ...
Removing node-path-exists (3.0.0-1) ...
Removing node-path-is-inside (1.0.2-1) ...
Removing node-performance-now (2.1.0+debian-1) ...
Removing node-url-parse-lax (1.0.0-1) ...
Removing node-prepend-http (2.0.0-1) ...
Removing node-promise-inflight (1.0.1-1) ...
Removing node-proto-list (1.2.4-1) ...
Removing node-prr (1.0.1-1) ...
Removing node-tough-cookie (2.3.4+dfsg-1) ...
Removing node-punycode (2.1.1-2) ...
Removing node-qs (6.5.2-1) ...
Removing node-qw (1.0.1-1) ...
Removing node-require-directory (2.1.1-1) ...
Removing node-require-main-filename (1.0.1-1) ...
Removing node-resolve-from (4.0.0-1) ...
Removing node-retry (0.10.1-1) ...
Removing node-tunnel-agent (0.6.1-1) ...
Removing node-semver-diff (2.1.0-2) ...
Removing node-semver (5.5.1-1) ...
Removing node-set-blocking (2.0.0-1) ...
Removing node-shebang-command (1.2.0-1) ...
Removing node-shebang-regex (2.0.0-1) ...
Removing node-signal-exit (3.0.2-1) ...
Removing node-slash (1.0.0-1) ...
Removing node-slide (1.1.6-2) ...
Removing node-sorted-object (2.0.1-1) ...
Removing node-validate-npm-package-license (3.0.1-1) ...
Removing node-spdx-correct (1.0.2-1) ...
Removing node-spdx-expression-parse (1.0.4-1) ...
Removing node-spdx-license-ids (1.2.2-1) ...
Removing node-ssri (5.2.4-2) ...
Removing node-stream-iterate (1.2.0-4) ...
Removing node-stream-shift (1.0.0-1) ...
Removing node-strip-eof (1.0.0-2) ...
Removing node-strip-json-comments (2.0.1-2) ...
Removing node-text-table (0.2.0-2) ...
Removing node-through (2.3.8-1) ...
Removing node-timed-out (4.0.1-4) ...
Removing node-tweetnacl (0.14.5+dfsg-3) ...
Removing node-typedarray (0.0.6-1) ...
Removing node-uid-number (0.0.6-1) ...
Removing node-unpipe (1.0.0-1) ...
Removing node-url-to-options (1.0.1-1) ...
Removing node-uuid (3.3.2-2) ...
Removing node-which-module (2.0.0-1) ...
Removing node-wide-align (1.1.0-1) ...
Removing node-xdg-basedir (3.0.0-1) ...
Removing node-xtend (4.0.1-2) ...
Removing node-y18n (3.2.1-2) ...
Removing node-yallist (3.0.3-1) ...
Removing node-run-queue (1.0.3-1) ...
Removing node-aproba (1.2.0-1) ...
Removing node-assert-plus (1.0.0-1) ...
Removing node-rimraf (2.6.2-1) ...
Removing node-glob (7.1.3-2) ...
Removing node-minimatch (3.0.4-3) ...
Removing node-brace-expansion (1.1.8-1) ...
Removing node-balanced-match (0.4.2-1) ...
Removing node-string-width (2.1.1-1) ...
Removing node-wcwidth.js (1.0.0-1) ...
Removing node-defaults (1.0.3-1) ...
Removing node-clone (2.1.2-1) ...
Removing node-concat-map (0.0.1-1) ...
Removing node-readable-stream (2.3.6-1) ...
Removing node-core-util-is (1.0.2-1) ...
Removing node-fs.realpath (1.0.0-1) ...
Removing node-inflight (1.0.6-1) ...
Removing node-inherits (2.0.3-1) ...
Removing node-isarray (2.0.4-1) ...
Removing node-once (1.4.0-3) ...
Removing node-path-is-absolute (1.0.0-1) ...
Removing node-process-nextick-args (2.0.0-1) ...
Removing node-string-decoder (1.2.0-1) ...
Removing node-safe-buffer (5.1.2-1) ...
Removing node-util-deprecate (1.0.2-1) ...
Removing node-wrappy (1.0.2-1) ...
Removing node-strip-ansi (4.0.0-1) ...
Removing node-ansi-regex (3.0.0-1) ...
Removing nodejs (10.23.1~dfsg-1~deb10u1) ...
(Reading database ... 14507 files and directories currently installed.)
Purging configuration files for npm (5.8.0+ds6-4+deb10u2) ...

##### 一度ログインしなおす ########npm run dev   # いざコンパイル>@ dev /var/www/vue-laravel-spa
>npm run development
>@ development /var/www/vue-laravel-spa
>mix

    Additional dependencies must be installed. This will only take a moment.

    Running: npm install vue-loader@^15.9.5 --save-dev --legacy-peer-deps

npm WARN optional SKIPPING OPTIONAL DEPENDENCY: fsevents@1.2.13 (node_modules/fsevents):
npm WARN notsup SKIPPING OPTIONAL DEPENDENCY: Unsupported platform for fsevents@1.2.13: wanted {"os":"darwin","arch":"any"} (current: {"os":"linux","arch":"x64"})
npm WARN optional SKIPPING OPTIONAL DEPENDENCY: fsevents@2.3.1 (node_modules/chokidar/node_modules/fsevents):
npm WARN notsup SKIPPING OPTIONAL DEPENDENCY: Unsupported platform for fsevents@2.3.1: wanted {"os":"darwin","arch":"any"} (current: {"os":"linux","arch":"x64"})

    Finished. Please run Mix again.


#npm run dev   # againとのことなので>@ dev /var/www/vue-laravel-spa
>npm run development
>@ development /var/www/vue-laravel-spa
>mix

99% done plugins BuildOutputPlugin


   Laravel Mix v6.0.10   


✔ Compiled Successfully in 16791ms
┌───────────────────────────────────────────────────────────────────────────────────────────────────────────────────────────────────────┬─────────┐
│                                                                                                                                  File │ Size    │
├───────────────────────────────────────────────────────────────────────────────────────────────────────────────────────────────────────┼─────────┤
│                                                                                                                            /js/app.js │ 1.4 MiB │
│                                                                                                                           css/app.css │ 179 KiB │
└───────────────────────────────────────────────────────────────────────────────────────────────────────────────────────────────────────┴─────────┘

成功しました
/public/js/app.js/public/css/app.cssが生成されました

Node.js + Spring BootでTOTP認証を実装してみた

$
0
0

少し暇な時間ができたので気まぐれにTOTP(Time-based One-Time Password)認証を実装してみた。
TOTP認証に関しては今更言うまでもないが、時間限定の一時パスコードにより二段階認証である。大意表的なアプリとしては、Google AuthenticatorやMicrosoft Authenticatorがある。

念のため、TOTP認証における認証の流れ/アルゴリズムは以下の通り。

TOTP生成アルゴリズム :
1. 現在時刻(UNIXタイムスタンプ)/有効期限(秒)の値をクライアント/サーバの双方で保持している秘密鍵でHMAC値を算出
2. 「1.」でHMAC値における20文字目の値から、下位4ビットを取り出す。言い換えれば、20文字目のビットに「00001111」とAND演算を掛ける
3. 「2.」で算出した値を10進数変換し、当該値をoffsetとする
4. 「3.」で取得したoffsetの値から4文字分「1.」で算出したHMACから切り出す
5. 「4.」で取得した値に4文字分(=31ビット)に対して、31ビットなので「0x7FFFFFFF」とAND演算を掛け合わせる
6. 「5.」で算出した値を10のTOTPの桁数分、べき乗した値の剰余計算

TOTP認証の流れ :
1. クライアントから端末識別情報とともに、上記アルゴリズムで算出されたTOTPをリクエスト
2. サーバー側で端末情報に紐づいた秘密鍵を取得
3. サーバー側で同様にTOTPを生成
4. 「1.」でリクエストされたTOTPと、「3.」で生成されたTOTPが一致していれば認証OK

今回、サーバーサイドはSpring Boot、クライアントサイドはNode.jsで実装した。現在時刻取得に関しては、クライアント/サーバー側でずれを無くすためにNTP(ntp.nict.jp)を使用。

① TOTP認証用API

packagecom.example.demo;importjava.io.IOException;importjava.io.UnsupportedEncodingException;importjava.net.InetAddress;importjava.nio.ByteBuffer;importjava.security.InvalidKeyException;importjava.security.NoSuchAlgorithmException;importjavax.crypto.Mac;importjavax.crypto.spec.SecretKeySpec;importorg.apache.commons.net.ntp.NTPUDPClient;importorg.apache.commons.net.ntp.TimeInfo;importorg.jboss.logging.Logger;importorg.springframework.beans.factory.annotation.Autowired;importorg.springframework.http.HttpStatus;importorg.springframework.http.MediaType;importorg.springframework.http.ResponseEntity;importorg.springframework.web.bind.annotation.RequestBody;importorg.springframework.web.bind.annotation.RequestMapping;importorg.springframework.web.bind.annotation.RequestMethod;importorg.springframework.web.bind.annotation.RestController;@RestControllerpublicclassTOTPAuth{/** TOTP取得DAO */@AutowiredprivateTotpDAOtotpDAO;/** ハッシュアルゴリズム */privatefinalstaticStringHMAC_SHA1="HmacSHA1";/** TOTP桁数 */privatefinalstaticintDIGIT=6;/** TOTP有効期限 */privatefinalstaticintSTEP_TIME=30;/** NTPドメイン */privatefinalstaticStringNTP_SERVER="ntp.nict.jp";/** NTPクライアント */privatefinalNTPUDPClientclient=newNTPUDPClient();/** ロガー設定 */privatefinalLoggerlog=Logger.getLogger(TOTPAuth.class);@RequestMapping(value="/totp/check",method=RequestMethod.POST,produces=MediaType.APPLICATION_JSON_VALUE+";charset=UTF-8")publicResponseEntity<TotpCheckResDTO>execute(@RequestBodyTotpLoginFormform)throwsUnsupportedEncodingException{TotpCheckResDTOresDTO=newTotpCheckResDTO();log.debug(TOTPAuth.class.getSimpleName()+"#execute request totp value: "+form.getTotp());SecretDTOsecretInfo=totpDAO.getSecret(form.getDeviceId());byte[]hmacByte=doHmac(secretInfo.getSecret());longtotp=getTOTP(hmacByte);log.debug(TOTPAuth.class.getSimpleName()+"#execute server calculated totp value: "+totp);if(form.getTotp()==totp){resDTO.setResultMsg("TOTP authentication success.");returnnewResponseEntity<TotpCheckResDTO>(resDTO,null,HttpStatus.OK);}resDTO.setResultMsg("TOTP authentication failed.");returnnewResponseEntity<TotpCheckResDTO>(resDTO,null,HttpStatus.FORBIDDEN);}/**
     * NTP時刻取得
     * 
     * @return NTP時刻
     * @throws IOException
     */privatelonggetNtpTime(){longntpTime;try{this.client.open();InetAddresshost=InetAddress.getByName(NTP_SERVER);TimeInfoinfo=this.client.getTime(host);info.computeDetails();ntpTime=(System.currentTimeMillis()+info.getOffset())/1000L;log.debug(TOTPAuth.class.getSimpleName()+"#getNtpTime current time: "+ntpTime);}catch(IOExceptione){thrownewRuntimeException(e);}returnntpTime;}/**
     * HMAC値算出
     * 
     * @param secret
     * @return HMAC値
     */publicbyte[]doHmac(Stringsecret){byte[]hmacByte=null;try{Objectmsg=getNtpTime()/STEP_TIME;SecretKeySpecsk=newSecretKeySpec(secret.getBytes(),HMAC_SHA1);Macmac=Mac.getInstance(HMAC_SHA1);mac.init(sk);hmacByte=mac.doFinal(msg.toString().getBytes());}catch(NoSuchAlgorithmExceptione){log.error(TOTPAuth.class.getSimpleName()+"#doHmac NoSuchAlgorithmException occurred, failed to create hmac hash value");thrownewRuntimeException(e);}catch(InvalidKeyExceptione){log.error(TOTPAuth.class.getSimpleName()+"#doHmac InvalidKeyException occurred, failed to create hmac hash value");thrownewRuntimeException(e);}returnhmacByte;}/**
     * TOTP取得
     * 
     * @param hmacByte HMAC値
     * @return TOTP
     */publiclonggetTOTP(byte[]hmacByte){intoffset=hmacByte[19]&0xF;ByteBufferresult=ByteBuffer.wrap(hmacByte,offset,offset+4);intp=result.getInt()&0x7FFFFFFF;longtotp=(long)(p%Math.pow(10,DIGIT));log.debug(TOTPAuth.class.getSimpleName()+"#getTOTP created totp value: "+totp);returntotp;}}

② 秘密鍵取得DAO

・Redisの構成は以下の通り
Key: 端末ID
Field: secret
Value: 秘密鍵

packagecom.example.demo;importjava.util.Map;importorg.springframework.beans.factory.annotation.Autowired;importorg.springframework.data.redis.core.RedisTemplate;importorg.springframework.stereotype.Component;importcom.fasterxml.jackson.core.JsonProcessingException;importcom.fasterxml.jackson.databind.ObjectMapper;@ComponentpublicclassTotpDAO{@AutowiredprivateRedisTemplate<Object,Object>redisTemplate;publicSecretDTOgetSecret(StringdeviceId){ObjectMappermapper=newObjectMapper();SecretDTOresDTO=null;try{Map<Object,Object>secretInfo=redisTemplate.opsForHash().entries(deviceId);resDTO=mapper.readValue(mapper.writeValueAsString(secretInfo),SecretDTO.class);}catch(JsonProcessingExceptione){thrownewRuntimeException(e);}returnresDTO;}}

③ RESTクライアント

constcrypto=require('crypto')constntpClient=require('ntp-client');constkey='mysecret'constdigit=6;conststep_time=30;constClient=require('node-rest-client').Client;constclient=newClient();consttotpUrl="http://localhost:8080/totp/check";//TOTP認証実行functionexecute(){newPromise((resolve,reject)=>{ntpClient.getNetworkTime("ntp.nict.jp",123,function(err,date){varcurrentDate=date.getTime();varmsg=Math.floor(currentDate/1000/step_time);console.log("HMAC msg: "+msg);constbufferArray=doHmac(key,msg);lettotp=truncate(bufferArray);console.log("totp: "+totp);checkTotp(totp);})})}//TOTP認証リクエストfunctioncheckTotp(totp){constargs={data:{deviceId:'1a2b3c',totp:totp},headers:{"Content-Type":"application/json"}}client.post(totpUrl,args,function(data,res){console.log(data)})}//JMACのHEX値を取得functiondoHmac(secret,currentTime){consthex=crypto.createHmac('sha1',secret).update(String(currentTime)).digest('hex');returnhex;}//truncate処理functiontruncate(hmac){varhmacArray=hmac.match(/.{2}/g);varhexVal='0x'+hmacArray[19].toString(16).toUpperCase()constoffset=hexVal&0xF;constp='0x'+hmacArray.slice(offset,offset+4).join("").toString(16).toUpperCase();constsNum=p&0x7FFFFFFF;returnsNum%Math.pow(10,digit);}//実行execute();

認証が成功すれば以下API応答が返却される。

HMAC msg value: 53713602
totp: 720527
{ resultMsg: 'TOTP authentication success.'}[Finished in 7.125s]

discord.jsでメンションするとmp3ファイルを再生するbot

$
0
0

はじめに

実装/実行環境: glitch.com : https://glitch.com/
定期bot監視: UptimeRobot : https://uptimerobot.com/
開発言語: Node.js
discord API: v12

botの作成等はこちらの記事を参考にしてください(コーディング部分以外)
https://note.com/bami55/n/ncc3a68652697#KRily

この記事の現バージョンより古いコードや、今回作成するbotのための追加作業を敵船説明していきます。
※ botの招待でURLの作成時にパーミッションをAdminにするのは嫌!!という方は、
  下記画像のようにBOT PERMISSIONSを設定してください
disco.png

コード

まず、ボイスチャットをbotが利用するには@discordjs/opusというパッケージが必要なので、
package.jsonを開き、上部のAdd Package@discordjs/opusと打ち込んでインポートしてください。
※数分かかるので気長にお待ちください


次に、assetsを開き、Upload an Asset↑を押して音声をアップロードしてください。
ここでアップロードしたファイルをクリックすることで、そのURLが取得できます。


次に、コードについてです。下記に僕の書いたコード全体を乗せます。

main.js
// Response for Uptime Robotconsthttp=require("http");http.createServer(function(request,response){response.writeHead(200,{"Content-Type":"text/plain"});response.end("Discord bot is active now \n");}).listen(3000);// Discord bot implementsconstdiscord=require("discord.js");constclient=newdiscord.Client();client.on("ready",message=>{client.user.setActivity("メンションで歓声");console.log("bot is ready!");});// メッセージ取得時client.on("message",message=>{// botのメンション かつ メンションしたユーザがvcチャネルに入っているかどうかif(message.mentions.has(client.user)&&message.member.voice.channel){// ボイチャに参加message.member.voice.channel.join().then(conn=>{// メンションメッセージを削除message.delete();// assetsに追加したmp3ファイルの再生インスタンスconstdispatcher=conn.play("assetsから再生したいmp3ファイルの URLをコピーして貼る");// 再生終了時にボイチャを抜けるdispatcher.on("finish",reason=>{conn.disconnect();});}).catch(console.log);return;}});if(process.env.DISCORD_BOT_TOKEN==undefined){console.log("please set ENV: DISCORD_BOT_TOKEN");process.exit(0);}client.login(process.env.DISCORD_BOT_TOKEN);

ready部分

まず、botのアクティビティ表示のためにuser.setActivity()を利用しています。
v11ではuser.setPresence()だったようです。

message部分

最初のif文で、メンションされた人物が当該botであるかの判定にmentions.has()を利用しています。
v11ではisMemberMentioned()だったようです。

また、メンションしたユーザーの所在voiceチャンネルの取得にmember.voice.channelを利用しています。
v11ではmember.voiceChannelだったようです。

assetsのファイル(.mp3)の再生にplay()を利用しています。
v11ではplayFile()だったようです。

また、再生ファイルの終了判定で"finish"としていますが、v11ではendだったようです。

最後に

メンションをbotが自動で消すようにしましたが、このままではタイミングが悪いと異なるメッセージが消される
可能性がありますので、bot自信を指すメッセージであるか確認した方がいいです。

また、UptimeRobotでURLにhttps://invited-fixed-wok.glitch.meを入力とあるが、これはログインしている
ユーザーのプロジェクトのプレビューページを指すものだと思うので、EditページのURLを入力すると良い...はず...

node.jsの基本

$
0
0

node.jsは僕にとってはじめてお金を稼げた言語でとても特別なものなのですが、仕様を端から端まで熱心に勉強したわけではなく、壁にぶつかってはググっての繰り返しで身につけたので自分の理解をちゃんと整理するための備忘録として、また初学の人たちへ少しでも役に立てばとまとめました。

node.jsとは

node.jsはサーバーサイドのイベント駆動型JavaScript環境です。イベント駆動型というのは、プログラムの実行から何かしらが起きるまで待機して、起きた事物が規定の条件を満たしたときに指定された命令を実行するプログラミングの概念です。node.jsはJavaScriptを用いてPHPやPythonなどで書くようなサーバーサイドアプリケーションを作成することができます。

Hello World

node.jsにおける最も基礎的なHello Worldです

server.js
consthttp=require('http')constport=3000consthostName="127.0.0.1"constheaders={'Content-Type':'text/plain'}http.createServer((req,res)=>{res.writeHead(200,headers)res.end('Hello World!\n')}).listen(port,hostName)console.log('Server running at http://'+hostName')

これを走らせます

node server.js

結果: Hello World!が http://127.0.0.1:3000へのgetリクエストに返信します

豆知識?コマンドラインで走らせたコードはCtrl + Cで終了させられます

npm (Node Package Manager)

npmはnode.jsにおけるパッケージマネージャーです。Pythonにおけるpipみたいなものでしょうか(pythonはflaskを少し触ったくらいですので間違ってたらご教授お願いします)npmはnode.jsの開発環境においてモジュールの作成、共有、再利用を可能にしてくれます。この機能はnode.jsのインストールについてきます。

モジュールのインストール方法

最も簡素な方法(例:express)

npm install express

モジュールの使い方

先程のhello worldでnode.jsにビルトインされているhttpモジュールを宣言しましたが全く同じように宣言できます。

constexpress=require('express')

express.jsはnode.jsにおける最も簡素なウェブフレームワークのひとつです。

server.js
constexpress=require('express')constport=3000constserver=express()server.get('/',(req,res)=>{res.header(200).send("Hello World!")})server.listen(port,()=>{console.log('server listen on port:'+port)})

豆知識npm に存在するモジュールはnpmのウェブサイトにて検索できますが "npm search [module_name]" でも検索できます。

ローカルインストールとグローバルインストール

npmでインストールするモジュールには二種類の方法があります。とても重要です。

ローカルインストール

ローカルにインストールするのはつまりそのディレクトリ内のnode_modulesフォルダにそのライブラリがインストールされるということです。
インストール方法

npm install [module_name]

グローバルインストール

グローバルインストールはそのマシンの全ファイルシステムでそのモジュールを実行可能にします。先程の例に使ったexpressは自動でアプリの骨組みを作成する機能がありますので、

npm install -g express
express [app_name]

で自動でウェブアプリの雛形を作ってくれます。

node.jsの仕組み

Non-blocking I/O

IOはInputとOutputのことでコンピューターを通して入力と出力の間のデータをやりとりすることです。
入力は必ずしも人間とコンピューターとのやりとりに限りません。ウェブアプリにおけるI/Oはどんどん複雑になっています。それは単なるブラウザとサーバーのやり取りに限らず、サードパーティのAPIとのやりとり、スマホなど別のデバイスを使った認証、データベースへの多重同時接続などなど。
つまるところネットワークにおけるI/Oは複雑で詳細な予測が難しいということです。
そしてI/Oの処理にはときに長い時間がかかり、データを読み込んでいる間などに処理がそこで待機しつづけてしまうことがあります。

非同期メソッド

この問題の解決のためにはコールバックを行います。

asynchronous.js
constfs=require('fs')fs.readFile('test.txt',(err,data)=>{if(err){console.log(err)return}console.log(data)})console.log("this text should come first")

コールバックであるconsole.log(data)は"this text should come first"のあとに実行されます。なぜコードの中で下にある処理が先に実行されるのか、シングルスレッドであるnode.jsでこれを可能にしているのがイベントループです。

イベントループ

node.jsの最も重要な特徴のひとつです。イベント駆動型であるnode.jsは何かが起きるまでループを繰り返して待機し続けていて、なにかすることが出てくるとすることとコールバックをキューに追加して他の一連の処理をして、次のI/Oへその処理が終了するまで待ち続けるループを行うのがイベントループです。
この特徴を最大限活かすのがnode.jsにおける効率的なコードを書くうえで大切になります。関数はイベントループをブロックしない、時間のかかる処理は細かい処理に分割するなどなど。

その2へ続きます。

Reactでの認証時にJWTをCookieに設定する方法

$
0
0

SPAでの認証といえばJWTを使うことが多いと思いますが、
localStorageに保存するとセキュリティリスクが高いとかで、
CookieにHttpOnlyな値として保存するのが良いとしばしば言われることもあります。
今回はReact × ExpressでJWTをCookieに保存する具体的な方法を紹介します。

(そもそもJWTを使うべきかとか、localStorageを使うことのリスクなどについては要件次第なのであまり言及しません)

調査にあたっては以下の記事を参考にしました。
React Authentication: How to Store JWT in a Cookie

記事の方法そのままでは自分の環境では上手くいかなかったので、ハマりポイントも含めて手順を解説します。

最終的に出来上がったもの

動作環境

以下のDockerイメージを使用して挙動を確認しました。
node:15.5.1-alpine3.12

準備編

まずはlocalStorageにJWTを保存して動くサンプルアプリケーションを用意します。
上記の参考記事を見てもらっても良いですが、
こちらで用意した以下のリポジトリを見てもらっても良いです。
本記事ではこちらに準じて進めます。

Reactの部分だけTypeScriptを使用 + Dockerを使った構成
https://github.com/Kanatani28/jwt-how-to-use

(ちなみに自前でプロジェクトを作成したい場合はcreate-react-appでプロジェクトを作成して、各種ライブラリをインストールしてください。)

ソースコードは以下のようになっています。

App.tsx
importReact,{useState}from'react';importaxiosfrom'axios';import'./App.css';constapiUrl='http://localhost:3001';axios.interceptors.request.use(// allowedOriginと通信するときにトークンを付与するようにする設定config=>{const{origin}=newURL(config.urlasstring);constallowedOrigins=[apiUrl];consttoken=localStorage.getItem('token');if(allowedOrigins.includes(origin)){config.headers.authorization=`Bearer ${token}`;}returnconfig;},error=>{returnPromise.reject(error);});typeFood={id:numberdescription:string}functionApp(){conststoredJwt=localStorage.getItem('token');const[jwt,setJwt]=useState(storedJwt||null);const[foods,setFoods]=useState<Food[]>([]);const[fetchError,setFetchError]=useState(null);constgetJwt=async()=>{const{data}=awaitaxios.get(`${apiUrl}/jwt`);localStorage.setItem('token',data.token);setJwt(data.token);};constgetFoods=async()=>{try{const{data}=awaitaxios.get(`${apiUrl}/foods`);setFoods(data);setFetchError(null);}catch(err){setFetchError(err.message);}};return(<><sectionstyle={{marginBottom:'10px'}}><buttononClick={()=>getJwt()}>Get JWT</button>{jwt&&(<pre><code>{jwt}</code></pre>)}</section><section><buttononClick={()=>getFoods()}>
          Get Foods
        </button><ul>{foods.map((food,i)=>(<li>{food.description}</li>))}</ul>{fetchError&&(<pstyle={{color:'red'}}>{fetchError}</p>)}</section></>);}exportdefaultApp;
server.js
constexpress=require('express');constjwt=require('express-jwt');constjsonwebtoken=require('jsonwebtoken');constcors=require('cors');constapp=express();app.use(cors());constjwtSecret='secret123';app.get('/jwt',(req,res)=>{// JWTを生成する(今回は固定値で作成している)res.json({token:jsonwebtoken.sign({user:'johndoe'},jwtSecret)});});app.use(jwt({secret:jwtSecret,algorithms:['HS256']}));constfoods=[{id:1,description:'burritos'},{id:2,description:'quesadillas'},{id:3,description:'churos'}];app.get('/foods',(req,res)=>{res.json(foods);});app.listen(3001);console.log('App running on localhost:3001');

アプリケーション概要

server.jsには/jwt/foodsという2つのエンドポイントを用意しています。
/jwtはJWTを、/foodsはJSONデータを返します。
App.tsxではボタンを2つ用意し、それぞれボタンを押したタイミングでサーバーと通信するようにしています。

docker-compose upを実行するとlocalhost:3000でReactのアプリケーションが立ち上がり、
その後docker-compose exec front node src/server.jsを実行すると
localhost:3001でNode.jsのアプリケーションが立ち上がります。

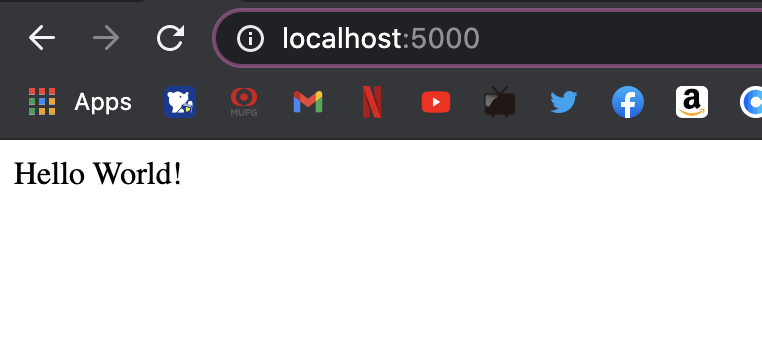
localhost:3000にアクセスすると以下のような画面が表示されるはずです。

いきなりGet Foodsボタンを押すと401エラーが表示され、
Get JWTでJWTを取得後、Get Foodsボタンを押すと、今度は正常に通信できるはずです。

  • JWTなしで通信
    スクリーンショット 2021-01-21 22.37.22.png

  • JWTありで通信
    スクリーンショット 2021-01-21 22.37.33.png

localStorageを確認してみる

Chromeの開発者ツール > Applicationを開くとlocalStorageに取得したtokenが設定されているのが確認できます。

スクリーンショット 2021-01-21 23.38.45.png

localStorageに保存されているので、当然JavaScriptで取得することができます。

localStorage.getItem("token")

この状態があまりよろしくないので修正していきます。

修正編

JWTをCookieに保存する

まず最初にserver.jsのJWTを発行する部分を修正していきます。

そもそもCookieの仕組みって?

図にすると以下のようになります。
(知ってるよって人はスキップしてください)

スクリーンショット 2021-01-22 17.19.04.png

サーバーからのレスポンスヘッダーにSet-Cookieという値が設定されていた場合、
クライアントのCookieにその値がセットされます。
以降そのサーバーとの通信ではセットされたCookieの値が付与されることになります。
フルスタックなフレームワークだとこういった仕組みを提供しているものが多いです。

Set-Cookieヘッダーを付与するようにする

Cookieをセットするためには、サーバーのレスポンスにSet-Cookieヘッダーを含める必要があります。
Cookieを使うため、JWT取得時に以下のようにSet-Cookieヘッダーを含めてレスポンスを返すようにします。

server.js
app.get('/jwt',(req,res)=>{consttoken=jsonwebtoken.sign({user:'johndoe'},jwtSecret);// Set-Cookieヘッダーにtokenをセットする処理res.cookie('token',token,{httpOnly:true});res.json({token});});

今回はHttpOnlyをtrueとしているため、document.cookieのようなJavaScriptからはアクセスできず、
基本的にはHTTP通信するときのみ参照できるようになっています。
(HttpOnlyを設定していない場合はセキュリティ的にはlocalStorageに保存する方法と大差ないかと思います)

CORS対応する(ハマりポイント)

こちらは元記事にはなかった手順になります。
SPAではよくある構成かと思いますが、今回はlocalhost:3000localhost:3001
クロスオリジンでアプリケーションを起動しています。
クロスオリジンでCookieを使用する場合、いくつか設定が必要になります。

server.jsのcorsを設定している部分を以下のように修正します。

server.js
app.use(cors({credentials:true,origin:"http://localhost:3000"}));

これでlocalhost:3000で起動しているアプリケーションともCookieをやり取りすることができるようになります。

また、App.tsxの方にも以下を追記します。

App.tsx
axios.defaults.withCredentials=true;

今回はサーバーとの通信にaxiosを使用していますが、
axiosはデフォルトではCookieを使う設定になっていないので、
上記のようにwithCredentialsをtrueにすることで通信時にCookieを送信できるようになります。

ここまで設定できたら再度アプリケーションを動かしてみましょう。
Get JWTボタンを押すとJWTが取得でき、開発者ツールで確認すると
Cookieにtokenが設定できているはずです。

スクリーンショット 2021-01-24 17.47.38.png

Cookieに設定されたtokenを検証するようにする

server.jsでApp.tsxからのリクエスト時にCookieに設定されたtokenを検証する処理を追記・修正します。

まずは新しくcookie-parserというライブラリを追加します。

docker-compose exec front yarn add cookie-parser

次にserver.jsを以下のように修正します。

server.js
constcookieParser=require('cookie-parser');// 略app.use(cookieParser());app.use(jwt({secret:jwtSecret,algorithms:['HS256'],getToken:req=>req.cookies.token}));

expressではcookie-parserを使用することでRequestに含まれるCookieを簡単に取得できるようになります。
また、検証もexpress-jwtを使うことで手軽にできるようになります。(req.cookies.tokenの部分)
getTokenで設定した関数でトークンを取得し、secretに設定した値を使って検証するといったような形です。

次にApp.tsxの方で不要になったlocalStorageを使用する部分を削除しておきます。
この部分は参考記事ではこの対応はしていませんが、
localStorageとCookieどちらが使われているかわかりにくくなるかもしれないので念のために消しておきます。

また、この修正でlocalStorageからJWTを読み込まないようにしたので
画面表示時にJWTが表示されることがなくなります。
HttpOnlyなCookieを使ったのでdocument.cookieのようなJavaScriptからは取得できないようになっています。

App.tsx
// 略// Bearerで送る必要がなくなったので不要// axios.interceptors.request.use(//   config => {//     const { origin } = new URL(config.url as string);//     const allowedOrigins = [apiUrl];//     const token = localStorage.getItem('token');//     if (allowedOrigins.includes(origin)) {//       config.headers.authorization = `Bearer ${token}`;//     }//     return config;//   },//   error => {//     return Promise.reject(error);//   }// );// 略functionApp(){// localStorageにセットしなくなったので不要// const storedJwt = localStorage.getItem('token');// 初期値はnullにしているconst[jwt,setJwt]=useState<string|null>(null);// 略constgetJwt=async()=>{const{data}=awaitaxios.get(`${apiUrl}/jwt`);// localStorageにセットする必要がないので不要// localStorage.setItem('token', data.token);setJwt(data.token);};// 略

以上でJWTをCookieに保存してサーバーとやりとりできるようになりました。

CSRF対策

localStorageはXSSによる攻撃を受けやすいのに対して、
Cookieの場合はCSRFによる攻撃を受けやすいと言われています。

なのでCookieを使ったtokenのやり取りにはCSRFへの対策とセットで行なう必要があります。

サンプルアプリケーションのアップデート

server.jsにPOSTリクエストを受け付けるエンドポイントを追加します。

server.js
app.post('/foods',(req,res)=>{foods.push({id:foods.length+1,description:'new food'});res.json({message:'Food created!'});});

実装は適当ですが、新しくFoodを追加するようなAPIができたイメージですね。
成功した場合はFood created!というメッセージが返ってきます。

また、App.tsxの方から、POSTリクエストを送信するように修正します。

App.tsx
functionApp(){// 略const[newFoodMessage,setNewFoodMessage]=useState(null);constcreateFood=async()=>{try{const{data}=awaitaxios.post(`${apiUrl}/foods`);setNewFoodMessage(data.message);setFetchError(null);}catch(err){setFetchError(err.message);}};// 略return(<>
      // 略
      <section><buttononClick={()=>createFood()}>
          Create New Food
        </button>{newFoodMessage&&<p>{newFoodMessage}</p>}</section></>);}

CSRFトークンを利用する

expressではcsurfというライブラリを使うことで
手軽にCSRF対策をすることができます。
まずはライブラリを追加します。

docker-compose exec front yarn add cookie-parser

/csrf-tokenにCSRFトークンを取得するエンドポイントを設定します。

server.js
constcsrf=require('csurf')// 略constcsrfProtection=csrf({cookie:true});app.use(csrfProtection);app.get('/csrf-token',(req,res)=>{res.json({csrfToken:req.csrfToken()});});

これでCSRFトークンを発行できるようになったので、
App.tsxから利用するようにします。

App.tsx
functionApp(){// 略useEffect(()=>{constgetCsrfToken=async()=>{const{data}=awaitaxios.get(`${apiUrl}/csrf-token`);axios.defaults.headers.post['X-CSRF-Token']=data.csrfToken;};getCsrfToken();},[]);// 略}

画面表示時にCSRFトークンを取得し、axiosに設定するようにしています。
これでCSRFの対策ができました。

※ちなみにCSRFトークン取得時にもCookieの値が検証されるので、403エラーが出る場合はJWT取得後に画面を更新してからCreateしてみてください。今回は一画面にすべて詰め込んでいるのでこんな感じになってしまいます。

スクリーンショット 2021-01-24 17.26.40.png

最後に

Cookieの仕組みやCORSについての理解があればフロントエンドがReactからVueになろうが
バックエンドがExpressから他のFWになろうが知識を流用できるはずです。

また、localStorageでもCookieでもXSS対策がされていない場合、難易度に差はあれど盗難のリスクが発生するのは同じなので
そもそもXSS対策がされているかどうかのチェックは必須といえるでしょう。

クロスサイトスクリプティング(XSS)対策としてCookieのHttpOnly属性でどこまで安全になるのか

高い保守性やUXを保持しつつ安全なアプリケーションを目指していきたいですね。

参考

React Authentication: How to Store JWT in a Cookie
クロスサイトでCookieが設定できない場合に確認すること
CORSまとめ
express.jsのcors対応
Express cors middleware
MDN Web Docs Set-Cookie
クロスサイトスクリプティング(XSS)対策としてCookieのHttpOnly属性でどこまで安全になるのか

Node.js on Raspberry Pi Zero WHのはまりどころ

$
0
0

概要

Raspberry Pi Zero WH上にNode.jsの実行環境を構築しました。
やりたいことはRaspberry Pi Zero上での形態素解析と画像生成です。

しかしRaspberry Pi Zero WHはARMv6コア、RAM512MBと最小限のアーキテクチャです。
リッチなことをやろうとすると一筋縄ではいきません。
色々工夫して何とか実行環境を構築できました。

その時のはまりどころを情報共有します。

Agenda

主に以下3つではまったので、それぞれを説明します。
1. ARMv6コア起因
2. RAM不足起因
3. ライブラリ不足起因

はまったところ

1. ARMv6コアによるnpmエラー

Raspberry Pi ZeroはARMv6コアを実装しています。
v6コアは2000年代前半のアーキテクチャでちょい古です。
なので、

  • apt/apt-getのインストールしてもnpmがエラーを吐く
  • スクリプトを使わず手動でインストールしようにもNode.js公式のTOPではv7以降しか載っていない

よって過去のdistを掘り当てて手動コピーしないといけませんでした。
手順は以下の通り。

$ wget https://nodejs.org/dist/v11.15.0/node-v11.15.0-linux-armv6l.tar.gz
$ tar zxvf node-v11.15.0-linux-armv6l.tar.gz
$ cd [解凍したディレクトリ]
$ rm CHANGELOG.md LICENSE README.md
$ sudo cp -R * /usr/local/
$ node -v
$ npm -v

v11.15.0を選んだのは、現状ARMv6対応してるlatest versionだからです。
(間違ってたら指摘お願いします…!)

2. メモリ不足によるmecab-ipadic-neologdコンパイル失敗

最適な形態素解析を行うため、mecabの新語辞書インストールの必要がありました。
しかしインストール時のコンパイルで2GBのRAMが要求されます。
Raspberry Pi ZeroはRAM512MBですw /(^o^)\

公式にもあるスワップを使用したメモリ拡張で解決しました。手順は以下。
今のところ全く問題なく、MeCabれてます。

$ sudo dd if=/dev/zero of=/swapfile1 bs=1M count=2048  # 2GBのスワップ領域を確保
$ sudo chmod 600 /swapfile1                            # パーミッション設定
$ sudo mkswap /swapfile1                               # スワップ領域を作る
$ sudo swapon /swapfile1                               # スワップ領域を有効化
$ ./bin/install-mecab-ipadic-neologd -n                # インストール
$ sudo swapoff /swapfile1                              # スワップ領域を無効化
$ sudo rm /swapfile1                                   # スワップ領域を削除

3. ライブラリ不足によるnode-canvasのコンパイルエラー

自分はRaspberry Pi OS Liteをインストールしました。
初期ライブラリが少ないからなのか、以下の通り色々はまりました。

  • npm install canvas時にcanvas moduleが見つからない
  • アプリ実行時にjsdom(nodeパッケージ)がimageをロードできない的なエラーを吐く

原因は、単にライブラリが足りてないだけでした。
以下ライブラリをインストール後、エラー関連のパッケージを再インストール&ビルドして解決。

$ sudo apt-get install build-essential libcairo2-dev libpango1.0-dev libjpeg-dev libgif-dev librsvg2-dev libjpeg8-dev libgif-dev g++
$ npm install canvas --build-from-source

さいごに

本記事で実行しているアプリは、もともとherokuのslug size制限で動かせなかったものです。
こんな小さなボードでこれだけのことができることに驚愕です。
ラズパイゼロ最高。オンプレミス最高。

参考記事

  1. https://www.taneyats.com/entry/install-nodejs-on-raspberrypi-zero
  2. https://github.com/Automattic/node-canvas/wiki/Installation%3A-Ubuntu-and-other-Debian-based-systems
  3. https://girliemac.com/blog/2016/06/13/kittycam-update-with-raspberrypi3/

フロントサーバ、バックサーバの分離された構成でミニマムなサービスを作る。

$
0
0

はじめに

本記事はモノリシックでない分離されたアーキテクチャ(マイクロサービス)について理解を深めるため、
ミニマムなアプリを作ってみたときのまとめ記事です。
※当方初心者のため、間違いありましたら是非ともご指摘お願いいたします。

著者について

以下著者のスペック

  • エンジニア一年目
  • WebアプリといえばMVCしか知らない
  • マイクロサービス?なにそれおいしいの

背景

基本情報などの勉強中、よくこんな図が出てきて混乱していました。

image.png

  • Webアプリのアーキテクチャ?、MVCしかしらんけど?
  • アプリのサーバって一つだけじゃないの?
  • でもReactとかは独立してサーバーが立っているぽい、、
  • どうやってバックエンドと連携させるんやろ、、?

このような疑問を持った私は、「わかんないなら触ってみればいいじゃん!」と意気込み、
フロントエンドとバックエンドの機能をサーバごとに切り離したミニマムなアプリを作ろうと決めました。

開発

概要

画面を担当するフロントサーバとロジックを担当するバックサーバの二つのサーバを立てて、
インターネットのニュースを検索できるアプリを作る。

環境

  • Node.js v14.15.1

    • サーバサイドのJavaScript
    • こちらの記事が非常にわかりやすくおすすめ
    • 今回は超簡単なロジックを実装するのみに使う
  • Express v4.17.1

    • Node.jsで動く軽量なWebフレームワーク
    • Webサーバを立てるのも非常に簡単
    • 今回はAPIのルーティング等に使う
  • Yarn v1.22.4

    • npmと互換性があるパッケージ管理システム
    • 一度インストールしたパッケージをキャッシュするためインストールが高速

目標

画像のような簡単なニュース検索アプリを作る。
検索条件を入れ、「Search」ボタンを押下すれば、検索条件にヒットするニュースを検索する。
image.png

構成

本アプリの構成を以下画像に示します。
image.png

重要であるのはフロントサーバとバックサーバをAPIで疎結合している点です。
フロントサーバはバックサーバのAPIを呼び出し、返却されたレスポンスをもとに画面描画をします。

手順

バックサーバの実装

Node.js, Expressの解説は目的ではないため、重要な部分(独自APIを実装する部分)のみ示します。
以下はExpressでサーバを起動する部分です。

backend/server.js
'use strict';constexpress=require('express');constapp=express();constcors=require('cors');constdotenv=require('dotenv');dotenv.config({path:'./.env'});constmorgan=require('morgan');// CORS(クロスオリジンリソース共有)を許可app.use(cors());require('./routes/news')(app);// アクセスロガーを実装app.use(morgan('dev'));// サーバをポート3000で起動app.listen(process.env.PORT,()=>console.log('listening on port '+process.env.PORT));module.exports=app;

ここではCORS(クロスオリジン間リソース共有)を有効にしています。
CORSについては自分もよく理解しきれていないですがMDNに以下のような説明があります。

オリジン間リソース共有Cross-Origin Resource Sharing (CORS) は、追加の HTTP ヘッダーを使用して、あるオリジンで動作しているウェブアプリケーションに、異なるオリジンにある選択されたリソースへのアクセス権を与えるようブラウザーに指示するための仕組みです。ウェブアプリケーションは、自分とは異なるオリジン (ドメイン、プロトコル、ポート番号) にあるリソースをリクエストするとき、オリジン間 HTTP リクエストを実行します。
https://developer.mozilla.org/ja/docs/Web/HTTP/CORS

こちらの記事が詳しいため参考にしてください。

次はインターネットからニュースの情報を取得する処理です。
ここではNews APIというAPIを本アプリ用にラップしています。

backend/routes/news.js
constNewsAPI=require('newsapi');constnewsapi=newNewsAPI(process.env.NEWS_API_ACCESS_KEY);constmorgam=require('morgan');constrouter=require('express').Router();module.exports=(app)=>{router.route('/').get((req,res)=>res.json({message:'This is a index page.'}));router.route('/news').get((req,res)=>{newsapi.v2.topHeadlines({// 検索条件が指定されなかった場合はデフォルトの条件を指定する。country:req.query.country||'jp',category:req.query.category||'general',q:req.query.q||'',pageSize:Number(req.query.pageSize)||30}).then(news=>res.json(news));});//bind access loggerapp.use(morgam('dev'));app.use(router);};

フロントサーバの実装

こちらもReactの解説は目的でないため、重要な部分(バックサーバと通信する部分)のみ示します。
またcreate-react-appを使用してテンプレを作成しました。

以下はバックサーバのAPIを呼び出し、返却されたニュース一覧のJSONを画面上の変数に渡しています。

frontend/src/App.js
consthandleSubmit=asyncevent=>{// submitボタンを押すとブラウザのデフォルトでリロードされてしまうため// デフォルトの動作をさせないよう設定するevent.preventDefault();// バックサーバのAPIを呼び出すletarticlesArr=awaitaxios.get(endPoint+'/news',{// 画面に入力された検索条件を独自APIのリクエストに乗せる params:{country:country.value,category:category.value,q:keyword,pageSize:pageSize.value}})// データが返却されたら変数articlesArrにデータを代入する。.then(res=>res.data.articles);// 画面上の変数にデータを代入する。setArticles(articlesArr);};

完成品

ソースは以下においてあります。
https://github.com/yasuaki640/news-api-app

※コードレビュー歓迎

終わりに

業務でも趣味でもモノリシックなアーキテクチャしか触ったことがなく、
ツイッター上でマイクロサービスなどの用語を理解するのに時間がかかりました。
※現在は完全に理解した程度

技術理解のために実際に触れてみるのはやはり強いですね、、、
本記事がどなたかのお役に立てれば幸いです。
※間違いありましたら是非ご指摘お願いいたします。


nodenvでNode.jsをバージョン管理

$
0
0

※この記事はMacOSを前提として書かれています。
※Windowsの場合は、「nodistでNode.jsをバージョン管理」を参照してください。

nodenvの環境の準備

nodenvを使ってNode.jsのインストールやバージョン管理をおこないます。

nodenvのインストール

まず、ターミナルで以下のコマンドを実行します。

ターミナル
git clone https://github.com/nodenv/nodenv.git ~/.nodenv

次に以下のコマンドを実行します。このコマンドで失敗しても、nodenvは正常に動くので大丈夫です。1
:ターミナル
cd ~/.nodenv && src/configure && make -C src

nodenvコマンドを実行できるように、パスを通します。

ターミナル
echo 'export PATH="$HOME/.nodenv/bin:$PATH"' >> ~/.bash_profile

nodenvを初期化するために、以下のコマンドを実行します。

ターミナル
~/.nodenv/bin/nodenv init

すると次のような結果が表示されます。

# Load nodenv automatically by appending
# the following to ~/.bash_profile:

eval "$(nodenv init -)"

この指示の通り、~/.bash_profileに記述を加えます。

~/.bash_profile
eval "$(nodenv init -)"

ここでターミナルを閉じて、新たにターミナルを立ち上げます。

node-buildプラグインのインストール

以下のコマンドを順に実行して、node-buildプラグインをインストールします。

ターミナル
mkdir -p "$(nodenv root)"/plugins
git clone https://github.com/nodenv/node-build.git "$(nodenv root)"/plugins/node-build

Node.jsのインストール

インストール可能なNode.jsのバージョンの一覧を表示します。

ターミナル
nodenv install -l

以下のようにNode.jsのバージョンが表示されます。

...
14.15.0
14.15.1
14.15.2
14.15.3
14.15.4
15.0.0
15.0.1
15.1.0
15.2.0
15.2.1
15.3.0
15.4.0
15.5.0
15.5.1
15.6.0
chakracore-dev
chakracore-nightly
...

ここでは14.15.4のNode.jsをインストールします。

ターミナル
nodenv install 14.15.4

確認のために、Node.jsのバージョンを表示してみます。

ターミナル
node -v

すると、以下の結果が表示されます。

nodenv: node: command not found

The `node' command exists in these Node versions:
  14.15.4

nodenv: node: command not foundと表示されるのは、インストールしたNode.jsがグローバルに設定されていないからだそうです。2
nodenv global 14.15.4を実行してから、改めてNode.jsのバージョンを確認すると、以下のように結果が表示されました。

v14.15.4

npmのバージョンの確認

以下のコマンドで、現在のnpmのバージョンを確認してみます。

ターミナル
npm -v

npmのバージョンは6.14.10でした。Node.jsのリリース一覧を確認すると、Node.js 14.15.4に対応するnpmのバージョンと一致していました。

Puppeteerで3rd-party cookieを保存・利用する

$
0
0

Puppeteerで3rd-party cookieを保存・利用したい場合の処理についてまとめました。ログイン処理がクロスサイトになっているWebページをPuppeteerで利用する場合など、下記の知識が必要になることがあります。

cookieのセーブ

cookieを保存するファイルをtmpdirに作る方針のコードです。別のパスに保存する場合はよしなに変更してください。

constos=require('os');constpath=require('path');constfs=require('fs').promises;/*(中略)*/try{constclient=awaitpage.target().createCDPSession();constallBrowserCookies=(awaitclient.send('Network.getAllCookies')).cookies;constcookiePath=path.join(os.tmpdir(),'cookies.json');awaitfs.writeFile(cookiePath,JSON.stringify(allBrowserCookies,null,2));}catch(err){// do nothingconsole.log(err)}

このコードのポイントはCDP (Chrome DevTools Protocol)のメソッドを呼び出してcookieを取り出している部分です。page.cookies()だと現在のURLに紐付いているcookieしか返してくれないので、3rd-party cookieが必要な場合は使えません。

cookieの読み込み・利用

cookieの読み込みは特に注意点はありません。

下記コードではファイルが見つからなかったときのエラーを無視していますが、仕事のコードならもう少し真面目にエラー処理を書いた方がいいと思います。

constos=require('os');constpath=require('path');constfs=require('fs').promises;/*(中略)*/try{constcookiePath=path.join(os.tmpdir(),'cookies-dmarcket.json');constcookiesString=awaitfs.readFile(cookiePath);constcookies=JSON.parse(cookiesString);awaitthis.page.setCookie(...cookies);}catch(err){// do nothingconsole.log(err)}

元ネタ

フレームワークexpressのインストールと起動

$
0
0

初めに

以下コマンドでコンソール起動

vagrant up
vagrant ssh

次に

以下コマンドで Express application generatorをインストール

yarn global add express-generator@4.16.0

最後に

以下コマンドでファイルでファイル作成
hoge部分はファイル名

express --view=pug hoge

以下コマンドでPORT=8000で起動
http://localhost:8000/にアクセスすると開ける

yarn install
DEBUG=hoge:* PORT=8000 yarn start

Node.js 特定の値が含まれているJSONファイルを振り分ける

$
0
0

エンタメ系企業の社内もろもろを担当しているakibinです。

Twitterアカウント
Youtubeチャンネル

最近、Shuta Hasunuma Philharmonic Orchestra / HOLIDAY feat. Moeka Shiotsukaにハマってます。春らしくて春が待ち遠しくなりますよ寒いの飽きたよいいかげんにしてほしい。

概要

Node.jsで特定の値が含まれているJSONファイルをピックアップして、他のディレクトリにコピーしました。
なぜかと言うと、Markdown形式のWikiアプリから他のアプリに移行するのに、特定の値から移行したいJSONファイルを振り分ける必要があったからなのです。

そのもの

今回はJSONファイルのgroupsという項目の中のIDが"1111"だった以下のような場合にコピーする感じです。
"groups":[{"id":1111,"name":"ファイルが所属していたグループ名"}]

'use strict';// ターゲットのグループIDを指定consttargetGroup="1111";// 全ファイル名を取得constfs=require("fs");constdirPath="./全jsonファイルの保存先";constallDirents=fs.readdirSync(dirPath,{withFileTypes:true});constfileNames=allDirents.filter(dirent=>dirent.isFile()).map(({name})=>name);//ファイル数取得constallFilesNum=fileNames.length;//ターゲット数カウント(無くても良い)vartargetGroupNum=0;//カウンターvarcounter=0;//コピー先varcopyFileDir="./jsonファイルのコピー先";for(letcounter=0;counter<allFilesNum;counter++){varfileData=require(dirPath+"/"+fileNames[counter]);varfileGroups=fileData["groups"][0];//groupsの項目がグループIDの1つであれば、これだけでグループIDを取得可能// groupsに値の有無確認、ある場合はグループIDを取得varnotValue=undefined;if(fileGroups!=notValue){vargroupId=fileGroups.id;// ファイルのグループIDがターゲットのIDだった場合の処理if(groupId==targetGroup){//ターゲットグループ数をカウント(無くても良い)vartargetGroupNum=++targetGroupNum;console.log(targetGroupNum);//ファイルのコピーfs.copyFile(dirPath+"/"+fileNames[counter],copyFileDir+"/"+fileNames[counter],(err)=>{if(err)throwerr;console.log('ファイルをコピーしました');});}}}

今までに私が遭遇したgulpエラーの解説と解決方法まとめ

$
0
0

今回は私がgulpなどを触っていくなかで、発生したgulpエラーとその解決方法についてまとめました。
同じようなエラーに遭遇された方で、エラー解消の一助になれば幸いです。

参考にしたサイトのURLも一緒に載せておきます。

それでは早速いきましょう。

【目次】

  • 1 Error: Cannot find module 'gulp-sass'
  • 2 Error in plugin "gulp-imagemin"
  • 3 Error: Node Sass does not yet support your current environment: Windows 64-bit with Unsupported runtime (88)
  • 4 Error in plugin "gulp-imagemin"
  • 5 SyntaxError: Identifier '<変数名>' has already been declared
  • 6 ERR! missing script: start
  • 7 Error: Cannot find module 'gulp-imagemin'

1. Error: Cannot find module 'gulp-sass'

Error: Cannot find module 'gulp-sass'
    at Function.Module._resolveFilename (module.js:337:15)
    at Function.Module._load (module.js:287:25)
    at Module.require (module.js:366:17)
    at require (module.js:385:17)
    at Object.<anonymous> (/Applications/XAMPP/xamppfiles/htdocs/flyscoot.com/gulpfile.js:2:12)
    at Module._compile (module.js:435:26)
    at Object.Module._extensions..js (module.js:442:10)
    at Module.load (module.js:356:32)
    at Function.Module._load (module.js:311:12)
    at Module.require (module.js:366:17)

これは、私が始めてnpm run startをターミナルで叩いて発生したエラーです。

gulp-sassがモジュール内に入っていないことが原因で起こるエラーで
この場合、npm install --save-dev gulpnpm install --save-dev gulp-sassをターミナルに叩いて
gulpとgulp-sassをローカルインストールすれば、解決することができます。

--save-devとはローカルインストールするためのコマンドです。
 npm install -gがグローバルインストールのコマンドで、-gを付けることでグローバルインストールすることになります。

■参考にしたサイト: stack overflow Error: Cannot find module 'gulp-sass'

2.Error in plugin "gulp-imagemin"

[21:33:01] Using gulpfile ~\Desktop\npm-minify-img\gulpfile.js
[21:33:01] Starting 'default'...
[21:33:01] 'default' errored after 217 ms
[21:33:01] Error in plugin "gulp-imagemin"

このError in plugin "gulp-imagemin"は呼び出しているディレクトリ内に、pngquantが無いという意味になります。
pngquantは圧縮による画質の劣化が無いPNGを簡単に圧縮処理してくれるコマンドです。

npm install mozjpeg(JPEG、PNG、GIF、SVGなどの画像の画質を落とすことなく
サイズを圧縮する事ができるエンコーダー)と打ち込みmozjpegをインストールする事でエラーが解消しました。
  

■ 参考にしたサイト:stack overflow Error:Error in plugin "gulp-imagemin"

3.Error: Node Sass does not yet support your current environment: Windows 64-bit with Unsupported runtime (88)

Error: Missing binding /path/to/project/node_modules/node-sass/vendor/darwin-x64-64/binding.node
Error: Node Sass does not yet support your current environment: OS X 64-bit with Unsupported runtime (64)

Found bindings for the following environments:
  - OS X 64-bit with Node.js 8.x

This usually happens because your environment has changed since running `npm install`.
Run `npm rebuild node-sass` to download the binding for your current environment.
    at module.exports (/path/to/project/node_modules/node-sass/lib/binding.js:15:13)
    at Object.<anonymous> (/path/to/project/node_modules/node-sass/lib/index.js:14:35)
    at Module._compile (internal/modules/cjs/loader.js:778:30)

使用しているモジュールのバージョンが、自身の開発環境でサポートされていない場合に発生します。
私はnode.sassを最新バージョンにダウンロードしていた為、上記の様なエラーメッセージが起こりました。

解決方法としては、node.sassのバージョンをv15.6.0からv14.15.4にダウングレードと
npm rebuild node-sassのコマンドを叩く事で解決しました。

■参考サイト:stack overflow Error: Node Sass does not yet support your current environment]

4.Error in plugin "gulp-imagemin"

Error in plugin "gulp-imagemin"

これは、gulp-imageminが入っていない場合に起きるエラーですので、npm install mozjpegのコマンドを打ち込みエラーが解消します。

5.SyntaxError: Identifier '<変数名>' has already been declared

このエラーの内容は、変数が二重に宣言されているという意味です。
私の場合SyntaxError: Identifier 'imageminPngquant' has already been declaredと出ており、var imageminPngquant = require('imagemin-pngquant');
が二重で指定されていた為、先頭行の変数を削除する事でエラーが解消しました。

私の場合、imageminPngquantが二重で指定されていたので
「var imageminPngquant = require('imagemin-pngquant');」を削除することで、エラーが解消しました。


6.ERR! missing script: start

npm ERR! missing script: start

npm ERR! A complete log of this run can be found in:
npm ERR!     /Users/saigowtham/.npm/_logs/2020-07-27T05_56_13_752Z-debug.log

これは、package.jsonのscripts.startが無いことが原因で起こるエラーです。
package.json内に下記コマンドを打つことで解消します。

"scripts": {
   "start": "実行するプログラム.js"
},

7.Error: Cannot find module 'gulp-imagemin'

Error: Cannot find module 'gulp-imagemin'

このエラーの内容は、呼び出しているモジュール内にpngquant-binがみつからないと言われています。
その為、 npm install gulp-imageminを実行することでエラーが解消します。

私が遭遇したエラーは以上となります。
gulpは初心者の為、もし間違いがあればご指摘頂けると助かります。

Viewing all 8825 articles
Browse latest View live