Quantcast
Channel: Node.jsタグが付けられた新着記事 - Qiita
Viewing all 8902 articles
Browse latest View live

ローカルでデバッグ&テスト可能なLINEチャットボット開発環境(Node.js Express LINESimulator )を作成する

$
0
0

ローカルでデバッグ&テスト可能なLINEチャットボット開発環境(Node.js Express LINESimulator )を作成する

 
※本記事は最終的にQ&Aチャットボットを構築するための一部分となります。
本編はこちら

※前段の記事で作成したオウム返しチャットボットベースとなります。
まだ未作成の方はこちら

DEBUG環境を作成する

1.DEBUG環境を作成します

構成の追加からlaunch.jsonを生成します

image.png

DEBUG用の設定情報を追加します。DEBUG時はシュミレータに接続するように設定します。
"Channel_endpoint"の設定はDEBUG用の設定("http://localhost:8080/v2/bot/message/reply/" 固定)にしましょう。 

{
    // IntelliSense を使用して利用可能な属性を学べます。
    // 既存の属性の説明をホバーして表示します。
    // 詳細情報は次を確認してください: https://go.microsoft.com/fwlink/?linkid=830387
    "version": "0.2.0",
    "configurations": [
        {
            "type": "node",
            "request": "launch",
            "name": "プログラムの起動",
            "program": "${workspaceFolder}\\index.js",
             "env": {
                "Channel_endpoint":"http://localhost:8080/v2/bot/message/reply/"
              }
        }
    ]
}


2.LINEシュミレーターを準備します

LINEシミュレーターの導入はとても簡単

git clone https://github.com/kenakamu/LINESimulator ../LINESimulator
cd ..\LINESimulator\
npm install


LINEシミュレーターの起動はいつものコマンドで

npm start


BOTをDEBUGで起動しておきます
image.png


起動するとLINE設定情報を求めらるので、.envからコピーして設定を貼り付けます
設定を入力したらConnectします
image.png


接続がうまくいくとシュミレーターを使ってBOTとのやり取りが可能になります
これで開発効率が大幅に向上するはず
image.png


NestJS アプリケーションをプロダクションレディにする

$
0
0

この記事は NestJS アドベントカレンダー 6 日目の記事です。

はじめに

サンプルコードのリポジトリは以下になります。

https://github.com/nestjs-jp/advent-calendar-2019/tree/master/day6-prepare-for-production-usage

なお、環境は執筆時点での Node.js の LTS である v12.13.1 を前提とします。

cli で雛形アプリケーションを作成

この記事では @nestjs/cliで生成される雛形に対して、プロダクションで実行するための設定を加えてゆきます。

$ nest new day6-prepare-for-production-usage

config を作る

公式ドキュメントの Configurationの項では、環境変数を活用するのが良いと説明されています。
重厚にやる場合はドキュメントのように dotenv等を使うのが良いですが、このサンプルでは小さいので、 NODE_ENV での分岐をベースにした config ファイルを作成します。

config.ts
import{LogLevel}from'@nestjs/common';interfaceConfig{logLevel:LogLevel[];}constdevelop:Config={logLevel:['debug','log','verbose','warn','error'],};constproduction:Config={logLevel:['log','verbose','warn','error'],};exportconstconfig=process.env.NODE_ENV==='produiction'?production:develop;

アプリケーションの logger を設定する

NestFactory.create()の引数にオプションを渡すことで、 logger のログレベルを設定できます。先ほどの config を用いて設定してみます。
また、 app.useLoggerを指定することで、 logger を指定することができます。
デフォルトで NestJS の提供する logger を使っているのですが、次で使用するので明示的に宣言しておきます。

main.ts
asyncfunctionbootstrap(){constapp=awaitNestFactory.create(AppModule,{logger:config.logLevel});constlogger=newLogger();app.useLogger(logger);awaitapp.listen(3000);}

middleware にリクエストロガーを設定する

NestJS はデフォルトの場合は express のエンジンを使用するため、 express の作法で middleware を記述することができます。

request-logger.middleware.ts
import{RequestasExpressRequest,ResponseasExpressResponse,}from'express';exportfunctionrequestLogger(logger:any,):(req:ExpressRequest,res:ExpressResponse,next:()=>void)=>void{return(req,res,next):void=>{res.on('finish',():void=>{logger.info(`${req.method}${req.url} -> ${res.statusCode}`);});next();};}

middleware の設定も express と同じように app.use()で設定することができます。

main.ts
asyncfunctionbootstrap(){constapp=awaitNestFactory.create(AppModule,{logger:config.logLevel});constlogger=newLogger();app.useLogger(logger);app.use(requestLogger(logger));awaitapp.listen(3000);}

CORS の設定

NestJS の標準設定では CORSは不許可なので、別のドメインからのアクセスを弾きます。
別ドメインにホスティングしたフロントエンドから NestJS アプリケーションの API を叩けるようにするためには、 CORS を有効にする設定が必要です。

試しに、 fetch を行うだけの html を作り、そこから Nest アプリケーションの API を叩いてみます。

public/index.html
<!DOCTYPE html><htmllang="en"><head><metacharset="UTF-8"/><title>CORS sample</title><script>fetch('http://localhost:3000').then(res=>res.text()).then(text=>console.log(text));</script></head><body></body></html>

NestApplication での CORS を許可する設定は 2 種類あります。両方紹介します。

  1. NestFactory.create(){ cors: true }のオプションを渡す。
main.ts
asyncfunctionbootstrap(){constapp=awaitNestFactory.create(AppModule,{cors:true});constlogger=newLogger();app.useLogger(logger);app.use(requestLogger(logger));awaitapp.listen(3000);}
  1. app.enableCors()する。
main.ts
asyncfunctionbootstrap(){constapp=awaitNestFactory.create(AppModule);constlogger=newLogger();app.useLogger(logger);app.use(requestLogger(logger));app.enableCors()awaitapp.listen(3000);}

それぞれ、オプションとして CORS の設定が渡せます。デフォルトでは全許可なので、必要に応じて絞り込んでください。

cors-oprions.interface.d.ts
exportinterfaceCorsOptions{/**
     * Configures the `Access-Control-Allow-Origins` CORS header.  See [here for more detail.](https://github.com/expressjs/cors#configuration-options)
     */origin?:boolean|string|RegExp|(string|RegExp)[]|CustomOrigin;/**
     * Configures the Access-Control-Allow-Methods CORS header.
     */methods?:string|string[];/**
     * Configures the Access-Control-Allow-Headers CORS header.
     */allowedHeaders?:string|string[];/**
     * Configures the Access-Control-Expose-Headers CORS header.
     */exposedHeaders?:string|string[];/**
     * Configures the Access-Control-Allow-Credentials CORS header.
     */credentials?:boolean;/**
     * Configures the Access-Control-Max-Age CORS header.
     */maxAge?:number;/**
     * Whether to pass the CORS preflight response to the next handler.
     */preflightContinue?:boolean;/**
     * Provides a status code to use for successful OPTIONS requests.
     */optionsSuccessStatus?:number;}

ビルドとプロダクション実行

@nestjs/clinest startコマンドは、内部で TypeScript をコンパイルしてから実行しているため、起動が遅くなっています。
開発時は nest start --watchを使用することで自動でビルド 〜 再起動までしてくれるため回避できますが、プロダクションでは、特にクラウドネイティブな環境では起動が遅いことがパフォーマンスのネックとなることが往々にしてあります。

本来の TypeScript のアプリケーションと同様にビルドして実行するために、 @nestjs/cliでは、 nest buildコマンドが用意されています。
標準では dist ディレクトリにファイルが吐き出されるため、その中にある main.jsを実行します。

$ yarn build
$ node dist/main.js

終わりに

この記事では、アプリケーションをプロダクションとして動かす上で必要な手順のうち、いくつかを紹介しました。全てではありませんが、 express をベースとした手法は上記の方法でほとんど実現できると思われます。

明日は @potato4dさんによる、サンプルアプリケーションの実装です。

IBM Cloud App ID Node.js Webクイックスタート

$
0
0

はじめに

IBM Cloud App IDは、ユーザー認証を手軽に組み込めるサービスです。
AWSでいうとCognitoに相当するサービスです。

今回は、IBM Cloudのドキュメントで公開されているNode.js Webクイックスタートを補足&若干の変更を加えてながらやってみたいと思います。

なお、本記事で紹介するソースコードは、ここからダウンロード可能です

環境

ローカルPC上のNode.js(v10.6.3)を利用します。
Node.js自体のセットアップ手順は割愛します。

クイックスタートでやること

クイックスタートでは、OAuth 2.0 認可コードフローを用いた認証するアプリケーションを作成します。
image.png

画面遷移

具体的な手順の前に、クイックスタートで作成する画面遷移を紹介します。

初期表示

index.htmlの初期表示は以下の通りです。 Loginリンクがあるだけです。
image.png

ログイン画面 by App ID

Loginをクリックすると、App IDが表示するログインフォームへ遷移します(画面はカスタマイズしてませんが)。
フロー図でいうと(3)に相当します。
image.png

ログイン後

ログイン後に表示するindex.htmlは以下の通りです。
ログインユーザーの情報を出力し、かつリンクがLogoutに変更されています。
フロー図でいうと(8)に相当します。
image.png

パスワード忘れ時の救済画面、ユーザー登録画面

なお、ログイン画面で、Forgot password? および Sign upをクリックすると、それぞれ以下の画面へ遷移します。

Forgot password
image.png
Sign up
image.png

App IDの設定

まず、App IDの設定を行います。

IBM Cloudへログイン後、CatalogからApp IDを検索します。
image.png

次画面で、RegionおよびPlanを選択し、Createします
image.png

サービス作成後、左メニューのManage Authenticationを選択し、Authentication Settingsタブを表示させます。
Add web redirect URLsに、認可コード取得後のリダイレクトURLを入力します。前述のフロー図では(5)のリダイレクト先になります。

image.png

サンプルユーザーを登録します。
左メニューのCloud Directory -> Userを選択し、次にCreate Userをクリックします
以下の画面が表示されるので、必要な情報を入力し、Saveします。
image.png

Save後、ユーザ一覧が表示されます。
image.png

最後に、Applicationを登録します。
Applicationは、OAuthクライアントを表す概念で、フロー図ではアプリ・サーバーが相当します。
左メニューのApplicationを選択し、Add Applicationをクリックし、必要情報を入力します。
今回はサーバー側で画面制御をするので、Typeは「Regular web application」を選択します。

image.png

登録後、一覧が表示されます。
以降のステップで、詳細情報が必要になるので確認しましょう。
image.png

Node.jsの設定

package.jsonの作成および、アプリに必要なpackageをインストールします。

まずはpackageから。
App IDのNode.js SDKを利用します。
このSDKは、PassportのStrategyとして機能します。
また、Passportはログイン結果をセッションに保存するので、セッション管理の仕組みとしてexpress-sessionも必要になります。

npm install --save express express-session passport log4js pug
npm install --save ibmcloud-appid

package.jsonも作成しましょう。
mainで起動するファイル名は、app.jsとします。

npm init

==省略==

package name: (node_appid) node-appid
version: (1.0.0)
description:
entry point: (index.js) app.js
test command:
git repository:
keywords:
author:
license: (ISC)
About to write to /work/node_appid/package.json:

{
  "name": "node-appid",
  "version": "1.0.0",
  "description": "",
  "main": "app.js",
  "dependencies": {
    "express": "^4.17.1",
    "express-session": "^1.17.0",
    "ibmcloud-appid": "^6.0.2",
    "log4js": "^6.1.0",
    "passport": "^0.4.0",
    "pug": "^2.0.4"
  },
  "devDependencies": {},
  "scripts": {
    "test": "echo \"Error: no test specified\" && exit 1"
  },
  "author": "",
  "license": "ISC"
}
Is this OK? (yes) yes

app.jsの作成

パーツごとに解説を交えながら、コーディング内容を記載します。

初期化

まずは、初期化部分です。
ここで、WebAppStrategyの初期化で設定している各種値は、App IDでApplication登録時に取得した値および、Authentication Settingsで登録したRedirect URLになります。
また、express-sessionのデフォルトストアはメモリーなので、このままではスケールアウトはできないことに注意してください。スケールさせるためには、Redis等の外部サービスを保管先に指定する必要があります(本記事では触れません)。

app.js(初期化)
constexpress=require('express');// https://www.npmjs.com/package/expressconstlog4js=require('log4js');// https://www.npmjs.com/package/log4jsconstsession=require('express-session');// https://www.npmjs.com/package/express-sessionconstpassport=require('passport');// https://www.npmjs.com/package/passportconstWebAppStrategy=require('ibmcloud-appid').WebAppStrategy;// https://www.npmjs.com/package/ibmcloud-appid// loggervarlogger=log4js.getLogger('testApp');// setup express-session. default store is memoryconstapp=express();app.use(session({secret:'hogehoge',resave:false,saveUninitialized:false}));// setup passportapp.use(passport.initialize());// initialization is mandatoryapp.use(passport.session());// use sessionpassport.serializeUser((user,cb)=>cb(null,user));passport.deserializeUser((user,cb)=>cb(null,user));passport.use(newWebAppStrategy({// WebAppStragegy is passport StrategytenantId:"xxxxxxxx-xxxx-4460-xxxx-750f7a624e01",clientId:"xxxxxxxx-xxxx-4c42-xxxx-bb4765e130e7",secret:"xxxxxxxxxxxxxxxxxxxxxxxxxxxxxxxxxxxxxxxxxxxxxx",oauthServerUrl:"https://jp-tok.appid.cloud.ibm.com/oauth/v4/xxxxxxxxxx",redirectUri:"http://localhost:3000/appid/callback"}));

ログイン

認証を行うには、passport.authenticateを利用します。
passportは、具体的な認証手段の実装であるStrategyをauthenticateの第1引数に設定します。
ここで設定するのが、App IDのSDKの1機能であるWebAppStrategyです。

WebAppStrategyのパラメーターですが、Login成功時のRedirect先は、index.htmlへ戻したいので/を設定しています。
また、ログイン有無に関係なく、ログインフォームを表示させたいのでforceLogin: trueを設定します。

この処理は、フロー図の(2)と(8)に相当します。

app.js(login)
// Loginapp.get('/appid/login',passport.authenticate(WebAppStrategy.STRATEGY_NAME,{successRedirect:'/',forceLogin:true}));

Callback

基本的には、passport.authenticateを実行するだけです。
認可コードをインプットに、アクセストークンを取得してくれます。
フロー図で言うと、(5)から始まり(6)、(7)に相当します。

処理の前半は、認可コードをログ出力しているだけで、必須ではありません。

app.js(callback)
// Callback from appidapp.get('/appid/callback',(req,res,next)=>{logger.info('call back is called. authorized Code ='+req.query.code);next();},passport.authenticate(WebAppStrategy.STRATEGY_NAME));

ログアウト

これも簡単で、WebAppStrategy.logoutを実行するだけです。

app.js(logout)
// Logoutapp.get('/appid/logout',(req,res)=>{WebAppStrategy.logout(req);res.redirect('/');});

ユーザー情報取得

この処理は、ログイン後に表示するユーザー情報をjsonで応答します。
ログインユーザーの情報は、req.userで取得可能です
未ログインの場合、同オブジェクトは取得できないので、HTTP Status Code 401 Unauthorizedを返しています。

app.js(get_user)
// get user info apiapp.get("/api/user",(req,res)=>{if(!req.user){res.status(401);res.send('');}else{logger.info(req);res.json({user:{name:req.user.name,email:req.user.email,given_name:req.user.given_name,family_name:req.user.family_name}});}});

その他

最後に、index.htmlを保存するディレクトリを登録し、port:3000でリクエストを待ち受けます。

app.js(etc)
// Server static resourcesapp.use(express.static('./public'));// Start serverapp.listen(3000,()=>{console.log('Listening on http://localhost:3000');});

index.html

最後に、index.htmlです。
非常に簡単な内容なので、解説は省略します。

index.html
<!DOCTYPE html><htmllang="en"><head><title>Simple Node Web App index</title></head><body><h1>Hello from the app!</h1><ahref="/appid/login"id="login">Login</a><ahref="/appid/logout"id="logout"style="display: none;">Logout</a><h3id="name"></h3><h3id="email"></h3><h3id="given_name"></h3><h3id="family_name"></h3><script src="https://ajax.googleapis.com/ajax/libs/jquery/3.3.1/jquery.min.js"></script><script>$().ready(()=>{$.get("/api/user").then((res)=>{$("#name").text("name:"+res.user.name);$("#email").text("email:"+res.user.email);$("#given_name").text("given_name:"+res.user.given_name);$("#family_name").text("family_name:"+res.user.family_name);$("#logout").show();$("#login").hide();});});</script></body></html>

まとめ

App IDを使うと画面作成もDBも不要で、簡単にユーザー認証が組み込め流ことが、ご理解いただけたかと思います。

と言いつつ、実業務では、ログイン画面は自作するとか、ユーザー情報に項目追加したいとか、ユーザー管理用画面も別に必要だなど、さまざまなカスタマイズ要件が想定されます。

次回以降、それらの対応例も(可能であれば)投稿していきたいと思います。

前々回の記事で作成したオウム返しチャットボットにQ&Aエンジンを実装する

$
0
0

前々回の記事で作成したオウム返しチャットボットにQ&Aエンジンを実装する

 
※本記事は最終的にQ&Aチャットボットを構築するための一部分となります。
本編はこちら

Q&Aナレッジを格納するベースファイルを作成します

テストの為に気象庁のQ&Aを元にQ&Aエクセルを作成します
QANDA.xlsxというファイル名で保存します

出典:https://www.jma.go.jp/jma/kishou/know/faq/faq10.html

image.png


knowledgeBaseというフォルダを作成し、QANDA.xlsxを配置します
image.png

libというフォルダを作成し、knowledgeBase.jsというファイルを作成します
これはエクセルのQA一覧をナレッジベースとして読み込むためのリソースです。

参考用ソースは以下

knowlegeBasex.js ※新規作成(クリックして展開)
/***********************************
 エクセルからナレッジベースを取得
***********************************/exports.getKnowledgeBase=function(){vardocList=[];constXLSX=require("xlsx");constUtils=XLSX.utils;// Workbookの読み込みconstworkbook=XLSX.readFile("knowledgeBase/QANDA.xlsx");// シート読み込みletworksheet=workbook.Sheets['Sheet1'];// 有効なセルを取得letrange=worksheet['!ref'];constdecodeRange=Utils.decode_range(range);// シートからQ&A情報を取得するvarcount=0;for(letrowIndex=decodeRange.s.r;rowIndex<=decodeRange.e.r;rowIndex++){constq=Utils.encode_cell({r:rowIndex,c:0});consta=Utils.encode_cell({r:rowIndex,c:1});constcellq=sheet1[q];constcella=sheet1[a];if(typeofcellq!=='undefined'&&typeofcellq.v!=='undefined'&&cellq.v!=='Question'&&typeofcella!=='undefined'&&typeofcella.v!=='undefined'&&cella.v!=='Answer'){docList.push({id:count,'title':cellq.v,'body':cella.v});count++;}}console.log('Knowledge base');console.log(docList);returndocList;}


検索エンジンを日本語に対応するのに必要なリソースを手に入れてlib配下にコピーします
https://github.com/MihaiValentin/lunr-languages
上記ページから以下のファイルを取得してlib配下にコピー
lunr.stemmer.support.js
lunr.jp.js

日本語形態素解析に必要なリソースもlib配下にコピーします
http://chasen.org/~taku/software/TinySegmenter/tiny_segmenter-0.2.js


同じくlibフォルダ配下に、elasticlunrsearch.jsというファイルを作成します
これはナレッジベースとして読み込んだナレッジからQ&A抽出を行う為の検索エンジンコントローラです。

参考用ソースは以下

elasticlunrsearch.js ※新規作成(クリックして展開)
// ******************************************************************//// ** 全文検索エンジン関連 ここから                                  **//// ******************************************************************//constelasticlunr=require('elasticlunr');require('./lunr.stemmer.support.js')(elasticlunr);require('./lunr.jp.js')(elasticlunr);// ドキュメントライブラリを取得varlibdocs=require('./knowledgeBase.js');vardocs=libdocs.getKnowledgeBase();// 質問のブースト値constBOT_qes_boost=process.env.BOT_qes_boost;// 回答のブースト値constBOT_ans_boost=process.env.BOT_ans_boost;// インデックス構築constindex=elasticlunr(function(){this.use(elasticlunr.jp);this.addField('body');this.addField('title');this.setRef('id');for(vari=0;i<docs.length;i++){this.addDoc(docs[i]);}});/***********************************
 エクセルからナレッジベースを取得
***********************************/exports.indedxsearch=asyncfunction(keyword){constresult=awaitindex.search(keyword,{fields:{title:{boost:BOT_qes_boost},body:{boost:BOT_ans_boost},},expand:true,});returnresult;}/***********************************
 ナレッジIDをキーにナレッジを取得
***********************************/exports.searchById=function(id){for(vari=0;i<docs.length;i++){if(id==docs[i].id){returndocs[i];}}returnnull;}


同じくlibフォルダ配下に、bot.jsというファイルを作成します
これは現在のindex.jsのBOT関連リソースを集約したファイルになります。
これに合わせてindex.jsのソースも修正します

参考用ソースは以下

bot.js ※新規作成(クリックして展開)
/***********************************
 BOTが回答できない場合のソーリーメッセージ
***********************************/exports.BOT_sorrymsg=process.env.BOT_sorrymsg;/***********************************
 BOTが理解不能と判断する際の閾値(下回り)
***********************************/constBOT_Sorry_threshold=process.env.BOT_Sorry_threshold;/***********************************
 LINEのエンドポイント設定
***********************************/constChannel_endpoint=process.env.Channel_endpoint;/***********************************
 LINEのチャネルアクセストークン設定
***********************************/constChannel_access_token=process.env.Channel_access_token;/***********************************
 BOTの回答が有効なものである場合の定数値
***********************************/constBOT_ANSWER_TRUE="BOT_ANSWER_TRUE";exports.BOT_ANSWER_TRUE=BOT_ANSWER_TRUE;/***********************************
 BOTの回答が有効だが一定の確信度に満たない場合の低数値
***********************************/constBOT_ANSWER_TRUE_ANY="BOT_ANSWER_TRUE_ANY";exports.BOT_ANSWER_TRUE_ANY=BOT_ANSWER_TRUE_ANY;/***********************************
 BOTの回答が無効なものである場合の定数値
***********************************/constBOT_ANSWER_FALSE="BOT_ANSWER_FALSE";exports.BOT_ANSWER_FALSE=BOT_ANSWER_FALSE;// ---- ************************************************** -------// ---- BOTの回答が有効であるか判断した結果を返す             -------// ---- ************************************************** -------exports.isAnswerEnabled=function(result){if(isNullOrUndefined(result)||result.lentgh==0||isNullOrUndefined(result[0])){// 回答がない場合returnBOT_ANSWER_FALSE;}elseif(isNullOrUndefined(result[0].ref)||result[0].score<BOT_Sorry_threshold){// 回答はあるが最低限の確信度に満たない場合console.log("first score(score ng)");console.log(result[0].score);returnBOT_ANSWER_FALSE;}else{// 最低限の確信度を満たした回答が存在する場合console.log("first score");console.log(result[0].score);returnBOT_ANSWER_TRUE;}}// ---- ************************ -------// ---- 一答形式の回答を作成する   -------// ---- ************************ -------exports.createAnsMessage=function(req,message){varoptions={method:"POST",uri:Channel_endpoint,body:{replyToken:req.body.events[0].replyToken,messageNotified:0,messages:[// 基本情報{contentType:1,type:"text",text:message,}]},auth:{bearer:Channel_access_token},json:true};returnoptions;}// ---- ************************************************** -------// ---- 空チェック  -------// ---- ************************************************** -------functionisNullOrUndefined(o){return(o===undefined||o===null);}


index.jsを以下のように修正します
lib配下に移動した処理を削除
BOTの回答を制御するための処理を追加

参考用ソースは以下

index.js ※修正(クリックして展開)
// ******************************************************************//// ** 初期設定関連 ここから                                          **//// ******************************************************************//varexpress=require("express");varapp=express();varcfenv=require("cfenv");require('dotenv').config();varrequest=require("request");varbodyParser=require("body-parser");app.use(bodyParser.urlencoded({extended:true}));app.use(bodyParser.json());// 検索エンジンコントローラ読み込みvarelasticlunrsearch=require('./lib/elasticlunrsearch.js');// BOTコントローラ読み込みvarbot=require('./lib/bot.js');// ******************************************************************//// ** メッセージ処理 ここから                                      **//// ******************************************************************//constasyncwrap=fn=>(req,res,next)=>fn(req,res,next).catch(next);app.post("/api",asyncwrap(async(req,res)=>{// 受信テキストvaruserMessage=req.body["events"][0]["message"]["text"];console.log("user -> "+userMessage);// 問い合わせ内容をキーにQAデータを検索varresult=awaitelasticlunrsearch.indedxsearch(userMessage);// 取得したQAデータを元に応答メッセージを作成varoptions=null;// 回答が有効化どうかを判断した結果を取得するswitch(bot.isAnswerEnabled(result)){// BOTが質問を理解できない場合はソーリーメッセージcasebot.BOT_ANSWER_FALSE:options=bot.createAnsMessage(req,bot.BOT_sorrymsg);break;  // BOTが質問を理解し、回答が可能な場合casebot.BOT_ANSWER_TRUE:// ナレッジIDをキーにナレッジを抽出するconstknowledge=elasticlunrsearch.searchById(result[0].ref);options=bot.createAnsMessage(req,knowledge.body);break;}// メッセージを返すrequest(options,function(err,res,body){});res.send("OK");}));// サーバ起動varappEnv=cfenv.getAppEnv();app.listen(appEnv.port,"0.0.0.0",function(){console.log("server starting on "+appEnv.url);});


.envファイルに以下の設定を追記します

# ---------------------#
# BOTのチューニング設定         
# ---------------------#
# BOTが理解不能と判断する際の閾値(下回り)
BOT_Sorry_threshold=0.25# BOTが1問1答する為の確信度の閾値(上回り)
BOT_Confidence=0.9# 質問のブースト値
BOT_qes_boost=0.3# 回答のブースト値
BOT_ans_boost=0.1# 複数回答を返す際に最大いくつの候補を提示するか
BOT_any_ans_count=5# BOTが質問を理解できないときのソーリーメッセージ
BOT_sorrymsg=申し訳ありません。質問の意味が理解できませんでした。

# BOTが複数回答を投げかけるときのメッセージ
BOT_anyansmsg=この中にお役に立てる情報はございますでしょうか。


現時点でソースコードは以下のような構成になっているはずです

image.png


動作確認

BOTを起動して動作確認します。

image.png


シュミレータ上で期待通りの動きをすることを確認したら、Gitにコミット&プッシュします

git add .
git commit -am "Q&Aエンジンの追加"
git push heroku master


LINEで動きを確認してみましょう

image.png

Node.jsでTwitterを自動化する

$
0
0

https://adventar.org/calendars/4650
OUCC(大阪大学コンピュータクラブ)のアドベントカレンダー12日目です。

Node.jsのtwitterモジュールでtwitterAPIを叩きました。
モジュールの更新が2017年で止まっており、一部機能が使えなくなっています。
先駆者の皆さんの記事のコードが動かないこともありました。

ツイートする

twitter APIを取得して、API key, API secret key, Access token, Access token secretを取得しました。これに関しても参照ページからほかの方の記事をご覧ください。

送信できる環境が整ったので、ひとまずtwitterモジュールからツイートしてみました。

//モジュールの読み込み
const twitter = require('twitter');

//ツイート内容
const text = 'test'

//上からAPI key, API secret key, Access token, Access token secret
const client = new twitter({
    consumer_key        : "-----------",
    consumer_secret     : "-----------",
    access_token_key    : "-----------",
    access_token_secret : "-----------"
});

client.post('statuses/update', {status: text}, function(error, tweet, response) {
  if (!error) {
    console.log(tweet);
  }
});

これでちゃんとツイートできました。定期的に実行すればbotが作れますね。

いいねを送信する

キーワードでツイートを検索して、いいねを送信していきます。
streamモジュールというものが以前は使えたらしいのですが、2019年春ごろから使えなくなっているようです。
モジュールの更新が2017年で止まっているので仕方ないですね。
そんなわけでstreamなしでやっていきます。

//モジュールの読み込み
const twitter = require('twitter');

//上からAPI key, API secret key, Access token, Access token secret
const client = new twitter({
    consumer_key        : "-----------",
    consumer_secret     : "-----------",
    access_token_key    : "-----------",
    access_token_secret : "-----------"
});

async function searchTweet(queryArg, nextResultsMaxIdArg = null) {
    client.get('search/tweets', { q: queryArg, count: 1, max_id: nextResultsMaxIdArg }, async (error, searchData, response) => {

      if (error) console.log(error);

      for (item in searchData.statuses) {
        const tweet = searchData.statuses[item];

      await client.post('https://api.twitter.com/1.1/friendships/create.json', {screen_name: tweet.user.screen_name}, () => {
        console.log(`\n${tweet.user.screen_name}さんをフォローしました。\n`);
      });

      //検索に失敗
      if (searchData.search_metadata == undefined) {
        console.log('no metadata');
      }

      else if (searchData.search_metadata.next_results) {
        let maxId = searchData.search_metadata.next_results.match(/\?max_id=(\d*)/);
        searchTweet(queryArg, maxId[1]);
      }
    }
  });
}

searchTweet('検索ワード');

postの内容を改変すればフォローもできます。

バージョン

Node.js : 12.13.1

モジュール

twitter : 6.13.1

参考ページ

twitterモジュール公式
https://www.npmjs.com/package/twitter

twitterAPIの解説
https://syncer.jp/Web/API/Twitter/REST_API/

bot作成の記事
https://yukimonkey.com/js-application/twitter-bot-2/

twitterモジュールの機能を一通り使った記事
https://tasoweb.hatenablog.com/entry/2018/06/01/002438

Node.js + Express で ES6を使う

$
0
0

確認環境

node v10.17.0

アプリケーションテンプレートの作成

ここではplay_expressというアプリを作る前提で進めていきます。
※npxコマンドの使用には、npm 5.2.0以降がインストールされている必要があります。

npx express-generator play_express

次に依存関係をインストールします。

cd play_express
npm i

一旦、動作確認をします。アプリのカレントディレクトリで以下のコマンドを実行します。

npm start

このあと、webブラウザからhttp://localhost:3000/にアクセスすると、「Welcome to Express」画面が表示されます。
動作確認を終了するには、npm start実行中のコンソール上で、Cmd(Ctrl)+cを押下します。

Babelのインストール

ES6を使うため、babelをインストールします。

npm i @babel/core @babel/node @babel/preset-env --save-dev

インストールが完了したらアプリのカレントディレクトリに以下の内容で.babelrcファイルを作成します。

.babelrc
{"presets":["@babel/preset-env"]}

package.jsonの修正

startコマンドの内容を書き換えます。

package.json
{
  "name": "play-express",
  "version": "0.0.0",
  "private": true,
  "scripts": {
-    "start": "node ./bin/www"
+    "start": "babel-node ./bin/www"
  },
  "dependencies": {
    "cookie-parser": "~1.4.4",
    "debug": "~2.6.9",
    "express": "~4.16.1",
    "http-errors": "~1.6.3",
    "jade": "~1.11.0",
    "morgan": "~1.9.1"
  },
  "devDependencies": {
    "@babel/core": "^7.7.2",
    "@babel/node": "^7.7.0",
    "@babel/preset-env": "^7.7.1"
  }
}

動作確認

以下のコマンドで動作確認。

npm start

[Memo]DockerでDjango+Nuxt.jsの開発環境構築

$
0
0

はじめに

2つのDockerコンテナで構成される、Webアプリ(バックエンドにdjango、フロントエンドにNuxt.js)の開発環境をdocker-composeで構築した際のメモ書きです。

手元の環境

  • macOS Catalina v10.15.1
  • Docker version 18.09.2, build 6247962
  • docker-compose version 1.23.2, build 1110ad01

ディレクトリ構成

home
|- backend
| |- code (djangoプロジェクトのソースコードが入る)
| |- Dockerfile
| |- requirements.txt
|- frontend
| |- src (nuxtプロジェクトのソースコードが入る)
| |- Dockerfile
|- .gitignore
|- docker-compose.yml
|- README.md

Dockerコンテナを立てる

今回は、フロンエンドにnuxt、バックエンドにdjangoを採用して、2つのDockerfileを用意して、docker-composeを使って、各々のコンテナを立てていきたいと思います。

それではDockerfileから見ていきましょう。

Dockerfile

バックエンドのDockerfile

pythonイメージからdjango用のディレクトリをmakeして、requirements.txtに記述したパッケージをインストールしています。今回は、djangoだけ入れておきます。

backend/Dockerfile
FROM python:3.7ENV PYTHONUNBUFFERED 1RUN mkdir /code
WORKDIR /codeADD requirements.txt /code/RUN pip install--upgrade pip
RUN pip install--no-cache-dir-r requirements.txt
requirements.txt
Django==3.0

フロントエンドのDockerfile

Nodeのイメージから、Nuxtのアプリを
今回はyarnでなくnpmを使用しました。

frontend/Dockerfile
FROM node:12.13-alpineRUN mkdir-p /usr/src/app
WORKDIR /usr/src/appRUN apk update &&\
    apk upgrade &&\
    apk add git
RUN npm install-g npm &&\
    npm install-g core-js@latest &&\
    npm install-g @vue/cli &&\
    npm install-g @vue/cli-init &&\
    npm install-g nuxt create-nuxt-app

ENV LANG C.UTF-8ENV TZ Asia/TokyoENV HOST 0.0.0.0EXPOSE 3000

docker-compose.yml

各々のコンテナのボリュームをホスト側と同期させます。
※コメントアウトは、django/nuxtプロジェクト作成後に外します。

docker-compose.yml
version: '3'

services:
  backend:
    container_name: backend
    build: ./backend
    tty: true
    ports:
      - '8000:8000'
    volumes:
      - ./backend/code:/code
    # command: python djangoproject/manage.py runserver 0.0.0.0:8000

  frontend:
    container_name: frontend
    build: ./frontend
    tty: true
    ports:
      - '3000:3000'
    volumes:
      - ./frontend/src:/usr/src/app
    # command: [sh, -c, "cd nuxtproject/ && npm run dev"]

Dockerイメージのビルドとコンテナ起動

上述のDockerfileのDockerイメージをビルドする。

$ docker-compose build

ビルドが成功したら、コンテナを立ち上げる。

$ docker-compose up -d

2つのコンテナが起動しているか確認する。

$ docker-compose ps

Django & Nuxt プロジェクトの作成

コンテナの中に入って、プロジェクトを作成します。

Djangoプロジェクトの作成

sh
$ docker exec-it backend bash

コンテナに入ったら、startprojectでプロジェクト作成。
プロジェクト名は、djangoprojectとしました。

bash
$ django-admin startproject djangoproject

開発環境ということで、settings.pyのALLOWED_HOSTSにlocalhostを追加します。

settings.py
ALLOWED_HOSTS=['localhost']

Nuxtプロジェクトの作成

sh
$ docker exec-it frontend sh

プロジェクト名は、nuxtprojectとしました。

sh
$ npx create-nuxt-app nuxtproject

色々質問されますので、回答しましょう。

確認

プロジェクトを作成したら、一旦コンテナを終了します。

$ docker-compose stop

そして、docker-compose.ymlのcommandのコメントアウトを外して、もう一度コンテナを起動します。

docker-compose.yml
command: python djangoproject/manage.py runserver 0.0.0.0:8000
command: [sh, -c, "cd nuxtproject/ && npm run dev"]
sh
$ docker-compose up -d

ブラウザからlocalhost:8000Djangoのロケットが打ち上げられている画面とlocalhost:3000でNuxtの画面が表示されれば成功です。

そのうち気が向いたらGithubに上げます。

Node.js + Express で ES6を使う

$
0
0

確認環境

node v10.17.0

アプリケーションテンプレートの作成

ここではplay_expressというアプリを作る前提で進めていきます。
※npxコマンドの使用には、npm 5.2.0以降がインストールされている必要があります。

npx express-generator play_express

次に依存関係をインストールします。

cd play_express
npm i

一旦、動作確認をします。アプリのカレントディレクトリで以下のコマンドを実行します。

npm start

このあと、webブラウザからhttp://localhost:3000/にアクセスすると、「Welcome to Express」画面が表示されます。
動作確認を終了するには、npm start実行中のコンソール上で、Cmd(Ctrl)+cを押下します。

Babelのインストール

ES6を使うため、babelをインストールします。

npm i @babel/core @babel/node @babel/preset-env --save-dev

インストールが完了したらアプリのカレントディレクトリに以下の内容で.babelrcファイルを作成します。

.babelrc
{"presets":["@babel/preset-env"]}

package.jsonの修正

startコマンドの内容を書き換えます。

package.json
{
  "name": "play-express",
  "version": "0.0.0",
  "private": true,
  "scripts": {
-    "start": "node ./bin/www"
+    "start": "babel-node ./bin/www"
  },
  "dependencies": {
    "cookie-parser": "~1.4.4",
    "debug": "~2.6.9",
    "express": "~4.16.1",
    "http-errors": "~1.6.3",
    "jade": "~1.11.0",
    "morgan": "~1.9.1"
  },
  "devDependencies": {
    "@babel/core": "^7.7.2",
    "@babel/node": "^7.7.0",
    "@babel/preset-env": "^7.7.1"
  }
}

動作確認

以下のコマンドで動作確認。

npm start

スクレイピング &サーバレスAPIでNode.jsの雰囲気を体験してみる

$
0
0

みなさん、今年ももう終わりです。1年早いですね。
今回はチュートリアル形式でNode.jsとサーバレスを体験していただきたいなと思っています。
初心者の方にもとっつきやすく、目に見えるフィードバックがあるのでモチベーションも続きやすいと思います。

対象の読者

  • 面倒なので5分で試したい (大事)
  • プログラミングやったことあるけど、もっと踏み込んだものを作りたい
  • そもそもJavaScript触ったことない
  • JavaScriptを触ったことがあるけどそこまで深く知らない
  • asyncとawaitってなに?
  • API作ってみたい
  • 無料がいい
  • サーバレスって聞いたことあるけど触ったことない or メリットがわからない

使うもの

APIが動作環境 -> Zeit NOW
スクレイピング -> Puppeteer

なんでこの構成にしたか

  • 僕がPython触ったことがなく、Selenium触るのがちょっとめんどうだった。(JSはある程度触れる)
  • スクレイピングは、割とオンデマンドな面があると思っていて、要求があった時に対象のWebサイトの情報を引っ張ってきて返せばいい -> このことからサーバレスとの相性が良いと思ったため。(必要ないときはサーバが立ち上がらない) ※デメリットとしては、APIがコールされる度にPuppeteerが起動するため、その時間がかかってしまうという点がありますがご愛嬌。
  • デプロイがめっちゃ楽

Puppeteerについて

Puppeteerの使い方は、Qiitaの他の記事で細かいところまで書いているので、本記事では割愛します🙏
レンダリング済みのページを取得できるため、JavaScriptが動作するページでもそれが反映されている状態でスクレイピングすることができます。

Puppeteerはかなり柔軟な設定ができます。
https://github.com/puppeteer/puppeteer/blob/master/docs/api.md

やってみる(お試し)

やっておくこと: ZEIT(now) に登録しておいてください。
https://now.sh

パッケージ管理はyarnに統一します。

  1. 適当なディレクトリを作成し、yarn add nowします。(nowをインストールします)
  2. とりあえず、テスト用のレスポンスを返すファイルを作成してみます。
index.js
module.exports=async(req,res)=>{res.end('Hello world')}
  1. nowの設定ファイル(now.json)を作成します。 ここでは、全てのリクエストをindex.jsに流すようにします。
now.json
{"version":2,"builds":[{"src":"index.js", "use":"@now/node"}],"routes":[{"src":"(.*)", "dest":"index.js"}]}
  1. この時点で動作させることができます。yarn now devでローカルで起動できます。

  2. nowにデプロイしてみます。now loginでログインします。
    メールアドレスを求められるので、ZEIT(now)登録時のものを入力します。

  3. ログインに成功したら、yarn nowでサーバにデプロイします。
    コンソールに、デプロイ後のURLが表示されるので、ブラウザでアクセスします。
    Hello worldの文字が表示されていたら成功です。
    スクリーンショット 2019-12-05 22.51.21.png

応用編

サーバレスでPuppeteer起動、スクレイピングして結果を返却するAPIを作成してみたいと思います。
今回は、Qiitaのユーザランキング情報を返却するAPIを作成してみたいと思います。
スクリーンショット 2019-12-06 1.34.37.png

  1. Puppeteerが必要になりますが、now上ではそのままPuppeteerが動作しないので、puppeteer-corechrome-aws-lambdaをインストールします。
yarn add puppeteer-core
yarn add chrome-aws-lambda
  1. 次にスクレイピング & こちらがスクレイピングを行う & APIの本体のソースです。既存のindex.jsを下記のように編集してみます。 30行程度でかけてしまうので、かなり簡単で使いやすいと感じていただけたのではないかと思います。
constchrome=require('chrome-aws-lambda');constpuppeteer=require('puppeteer-core');constgetQiitaHotUser=async()=>{constbrowser=awaitpuppeteer.launch({args:chrome.args,executablePath:awaitchrome.executablePath,headless:chrome.headless});constpage=awaitbrowser.newPage();awaitpage.goto('https://qiita.com/',{waitUntil:"domcontentloaded"});//検索結果の取得varitems=awaitpage.$$('.ra-User');constretData=[];for(leti=0;i<items.length;i++){constuserName=awaititems[i].$eval('.ra-User_screenname',el=>el.textContent);constcontribCount=awaititems[i].$eval('.ra-User_contribCount',el=>el.textContent);constprofileUrl=awaititems[i].$eval('a',el=>el.href);retData.push({userName:userName,contribCount:contribCount,profileUrl:profileUrl});}awaitbrowser.close();returnretData;}module.exports=async(req,res)=>{constdata=awaitgetQiitaHotUser();res.json({data:data});}

※ このソースはnow.sh上環境でしか動作しません。

  1. 早速、yarn nowでnowにデプロイします。
  2. デプロイが完了すると、コンソール上にエンドポイントが表示されるので叩いてみます。
yutaronnoMacBook-Pro:scraping-api yutaron$ curl https://scraping-api.xxxxxx.now.sh
{"data":[{"userName":"@dala00","contribCount":"1784","profileUrl":"https://qiita.com/dala00"},{"userName":"@raki","contribCount":"1750","profileUrl":"https://qiita.com/raki"},{"userName":"@peisuke","contribCount":"1553","profileUrl":"https://qiita.com/peisuke"},{"userName":"@2gt","contribCount":"1346","profileUrl":"https://qiita.com/2gt"},{"userName":"@hirokidaichi","contribCount":"1147","profileUrl":"https://qiita.com/hirokidaichi"},{"userName":"@EaE","contribCount":"959","profileUrl":"https://qiita.com/EaE"},{"userName":"@dcm_chida","contribCount":"717","profileUrl":"https://qiita.com/dcm_chida"},{"userName":"@Yametaro","contribCount":"681","profileUrl":"https://qiita.com/Yametaro"},{"userName":"@baby-degu","contribCount":"643","profileUrl":"https://qiita.com/baby-degu"},{"userName":"@kirimin","contribCount":"631","profileUrl":"https://qiita.com/kirimin"}]}

正常に動作しているようですね💪

まとめ

これまでのチュートリアルで、Node.jsやサーバレスの雰囲気を掴めたと思います。

以前、APIが公開されていないサイトの情報を収集したいなと思ったことがあり、この方法で対応したことから、今回のアドベントカレンダーの題材に選びました。
スクレイピング x API x サーバレスは親和性があるという発見ができたので、個人的には満足しています。

また、Puppeteerは割と高機能なので、いろんな使い方ができます。
CIに組み込んで、フロントエンドのテストに使われたりというのをよく見かけます。
興味が湧いた方はぜひ試してみてください。

参考URL

Puppeteerを使った開発の勘所
https://qiita.com/taminif/items/1ba7f68aedd68bae5e09

puppeteerでの要素の取得方法
https://qiita.com/go_sagawa/items/85f97deab7ccfdce53ea

AWS Lambda Layers上でHeadless Chromeを動かすいくつかの方法
https://qiita.com/tabimoba/items/9ffe4ba6f2af28c702af

[Electron / TypeScript] ElectronでTypeScript

$
0
0

次Electronでなにか作る時はTypeScript使おっかなー。

本題

TypeScriptってのをあんまり触ったこと無いけど型が決められるとかなんとか。

参考にしました

https://github.com/electron/electron-quick-start-typescript

ここを真似してやる。

package.jsonつくる

Node.js入れておいてね。
npm versionは6.4.1です。

適当にフォルダを作成し、ターミナルで以下のコードを。

npm init -y

package.jsonが作成されていれば成功です。

Electron入れる

ターミナルで

npm install --save electron

TypeScript入れる

ターミナルで

npm install -g typescript

package.jsonを書き換える

package.jsonを開いて、"scripts"{}を書き換えます。

package.json
"scripts":{"build":"tsc","start":"npm run build && electron ./js/main.js"}

あとmainのところも変えます

package.json
"main":"js/main.js",

tsconfig.json 作成

ターミナルで

tsc --init

と入力してください。
tsconfig.jsonが生成されていれば成功です。

ファイルの中身は公式通りに書き換えておきましょう。

tsconfig.json
{"compilerOptions":{"module":"commonjs","noImplicitAny":true,"sourceMap":true,"outDir":"js","baseUrl":".","paths":{"*":["node_modules/*"]}},"include":["src/**/*"]}

本家ではoutDirがdistになってますが、Electron Builderの出力と被りそうなので変えときました。(ドキュメント見れば変えられそう。)

HTMLとTypeScriptかく

srcフォルダを作成して、

index.html と main.ts を作成してください。

image.png

index.html
<!DOCTYPE html><htmllang="en"><head><metacharset="UTF-8"><metaname="viewport"content="width=device-width, initial-scale=1.0"><metahttp-equiv="X-UA-Compatible"content="ie=edge"><title>TypeScript</title></head><body><h1>TypeScriptですー</h1></body></html>
main.ts
import{app,BrowserWindow}from"electron";import*aspathfrom"path";letmainWindow:Electron.BrowserWindow;functioncreateWindow(){// Create the browser window.mainWindow=newBrowserWindow({height:600,webPreferences:{nodeIntegration:true//trueにしておく。preload使ってもいいけど今回はパス。},width:800,});// and load the index.html of the app.mainWindow.loadFile(path.join(__dirname,"../src/index.html")); //index.htmlはsrcフォルダ(main.jsはjsフォルダ)なのでパス気をつけて。// Open the DevTools.mainWindow.webContents.openDevTools();// Emitted when the window is closed.mainWindow.on("closed",()=>{// Dereference the window object, usually you would store windows// in an array if your app supports multi windows, this is the time// when you should delete the corresponding element.mainWindow=null;});}// This method will be called when Electron has finished// initialization and is ready to create browser windows.// Some APIs can only be used after this event occurs.app.on("ready",createWindow);// Quit when all windows are closed.app.on("window-all-closed",()=>{// On OS X it is common for applications and their menu bar// to stay active until the user quits explicitly with Cmd + Qif(process.platform!=="darwin"){app.quit();}});app.on("activate",()=>{// On OS X it"s common to re-create a window in the app when the// dock icon is clicked and there are no other windows open.if(mainWindow===null){createWindow();}});// In this file you can include the rest of your app"s specific main process// code. You can also put them in separate files and require them here.

main.tsは参考どおり(ちょっと変えたけど)です→https://github.com/electron/electron-quick-start-typescript/blob/master/src/main.ts

実行してみる

ターミナルで

npm start

と入力すると起動するはずです。

image.png

実行するとTypeScriptがJavaScriptに変換されて、jsフォルダの中に入ってると思います。

レンダラープロセスもTypeScriptで

レンダラープロセスとメインプロセスがよくわらんって方、
console.log()がデベロッパーツールの方に出ればレンダラープロセス、
ターミナルの方に出力されればメインプロセスです。
あとはalert()はレンダラープロセスからしか使えないのでそんな感じで。

まずはHTMLを変えて

index.html
<!DOCTYPE html><htmllang="en"><head><metacharset="UTF-8"><metaname="viewport"content="width=device-width, initial-scale=1.0"><metahttp-equiv="X-UA-Compatible"content="ie=edge"><title>TypeScript</title></head><body><h1>TypeScriptですー</h1><inputtype="button"value="ダイアログ"id="button"><!-- srcには変換後のJS指定しておく --><script src="../js/renderer.js"></script></body></html>

renderer.ts 作成

今回はダイアログを出してみましょう。
申し訳程度のTypeScript要素

renderer.ts
//レンダラープロセスなのでremoteつけるconst{dialog}=require('electron').remoteconstbutton:HTMLElement=document.getElementById('button')//ダイアログの選択肢とかconstdialogList:string[]=["🍜","🍣","🥞"]//押した時button.onclick=function(){dialog.showMessageBox(null,{type:"info",message:"TypeScriptだぞ",buttons:dialogList})}

これで実行してボタンを押すとダイアログが表示されると思います。

image.png

以上です。

ソースコード

https://github.com/takusan23/ElectronTypeScriptSample

Node.jsのasync/awaitとPromiseを超ざっくり_中編

$
0
0

Node.jsのasync/awaitとPromiseを超ざっくり_前編の続きです。後でまとめるかも。
※arrow関数は使わないといったな、あれは嘘だ。

目次

1. Node.jsの非同期処理について

2. 非同期処理の書き方

2.1 コールバック(callback)関数

2.2 Promise

2.3 asycn/await ←この記事はココから!

3. Promiseとasycn/awaitが一緒だと思ったらハマった件
4. 参考

2.3.asycn/await

asycn/awaitとはPromiseのシンタックスシュガー。
(同じような内容のことをもっと簡単な書き方でできるよ、というもの。)

async

Promiseの場合は

functionhoge(){returnnewPromise((resolve,reject)=>{//処理resolve('success')//orreject('error')})}

というように明示的にPromiseをリターンしていたが、asyncを使って書くと以下のように書ける。

asyncfunction()hoge{//処理return'success'//orthrownewError('error')}

asyncで宣言した関数内は
・Promiseを返す。
・値をreturnするとPromiseをresolveする
・エラーをthrowするとPromiseをrejectする

await

・async functionの中でしか使えない
・Promiseが resolve or rejectされるまでasync functionの処理を待つ
使用例)

//プロミスを返す非同期functionfunctionaddNum_promise(num1,num2){returnnewPromise((resolve,reject)=>{setTimeout(()=>{resolve(num1+num2);},1000);})}asyncfunctionexample(num1,num2){//[2]constres=awaitaddNum_promise(num1,num2)//Promsieがresolveされるまで待つreturnres+10}(async()=>{console.log('start')  //[1]console.log(awaitexample(1,2))console.log('end')})()
console
//結果
start
13
end

Promiseを返すfunctionにawaitをつけて呼び出すことで処理の順番が同期的になっていることがわかります。
ちなみに[1]、[2]のawaitを外してみた場合はそれぞれこのようになります

//*******************[1]asyncfunctionexample(num1,num2){constres=awaitaddNum_promise(num1,num2)//Promsieがresolveされるまで待つreturnres+10}(async()=>{console.log('start')  //[1]await外す//console.log(await example(1,2))console.log(example(1,2))console.log('end')})()//*******************[2]asyncfunctionexample(num1,num2){//[2]await外す//const res = await addNum_promise(num1, num2) //Promsieがresolveされるまで待つconstres=addNum_promise(num1,num2)//Promsieがresolveされるまで待つreturnres+10}(async()=>{console.log('start')  console.log(awaitexample(1,2))console.log('end')})()
console
[1]のawaitを外した場合
start
Promise { pending }
end

[2]のawaitを外した場合
start
[object Promise]10
end

[1]の場合はfunction「example」が返すPromiseがまだ準備中だよ(未resolve)~って意味
[2]の場合はfunction「addNum_promise」のPromise(res)がresolveされていない状態でres+10をreturn(==resolve)しているので上のような結果になる。[object Promise]の中身はPromise { pending }である。

上の2つをまとめると
[1]function「example」が未解決という結果が返された
[2]function「example」が解決済(function「addNum_promise」が未解決+10)という結果が返された

書いててよくわからなくなったので続きはまた後日...(薄く延ばす戦法)

4.参考

Node.js 非同期処理・超入門 -- Promiseとasync/await
Node.jsデザインパターン
async/await 入門(JavaScript)

超初心者がAuth0でログイン機能を実装した

$
0
0

はじめに

プログラミングを学び始めてから2か月の初心者です。最近は初心者でも出来る色んな技にチャレンジして体感しながら勉強しています。というわけで、今回はと~っても面倒なログイン機能を「さささ~」という感じで実装できちゃうAuth0を使ってみました。

Auth0とは?(超初心者的解釈)

Auth0とはWebやスマホアプリに対して認証機能をクラウドを介して提供してくれるサービスのこと。有難いことにLine,Google, Facebook, Twitterなど有名どころのSNSと既に連携していて、簡単な操作でそれらを使ったログイン機能を自分のWEBに付加することが出来ます。
初心者的に有難いことにはサイトを作る前からログイン機能だけテストが出来たり、サンプルサイトを用意してくれていたりとても親切。しかも一定時間・量までは無料なので助かります。
詳細はこちらでも紹介されています。

目指すもの

年末ということで引き続き、カレンダーをテーマにすることにしました。
Auth0を使ってLineやGoogleのアカウントを使ってログインすると
アカウント写真付きのカレンダーを表示します。

環境

Node.js v10.16.3
Windows 10 pro
Visual Studio Code v1.39.1
Auth0
Bootstrap

方法

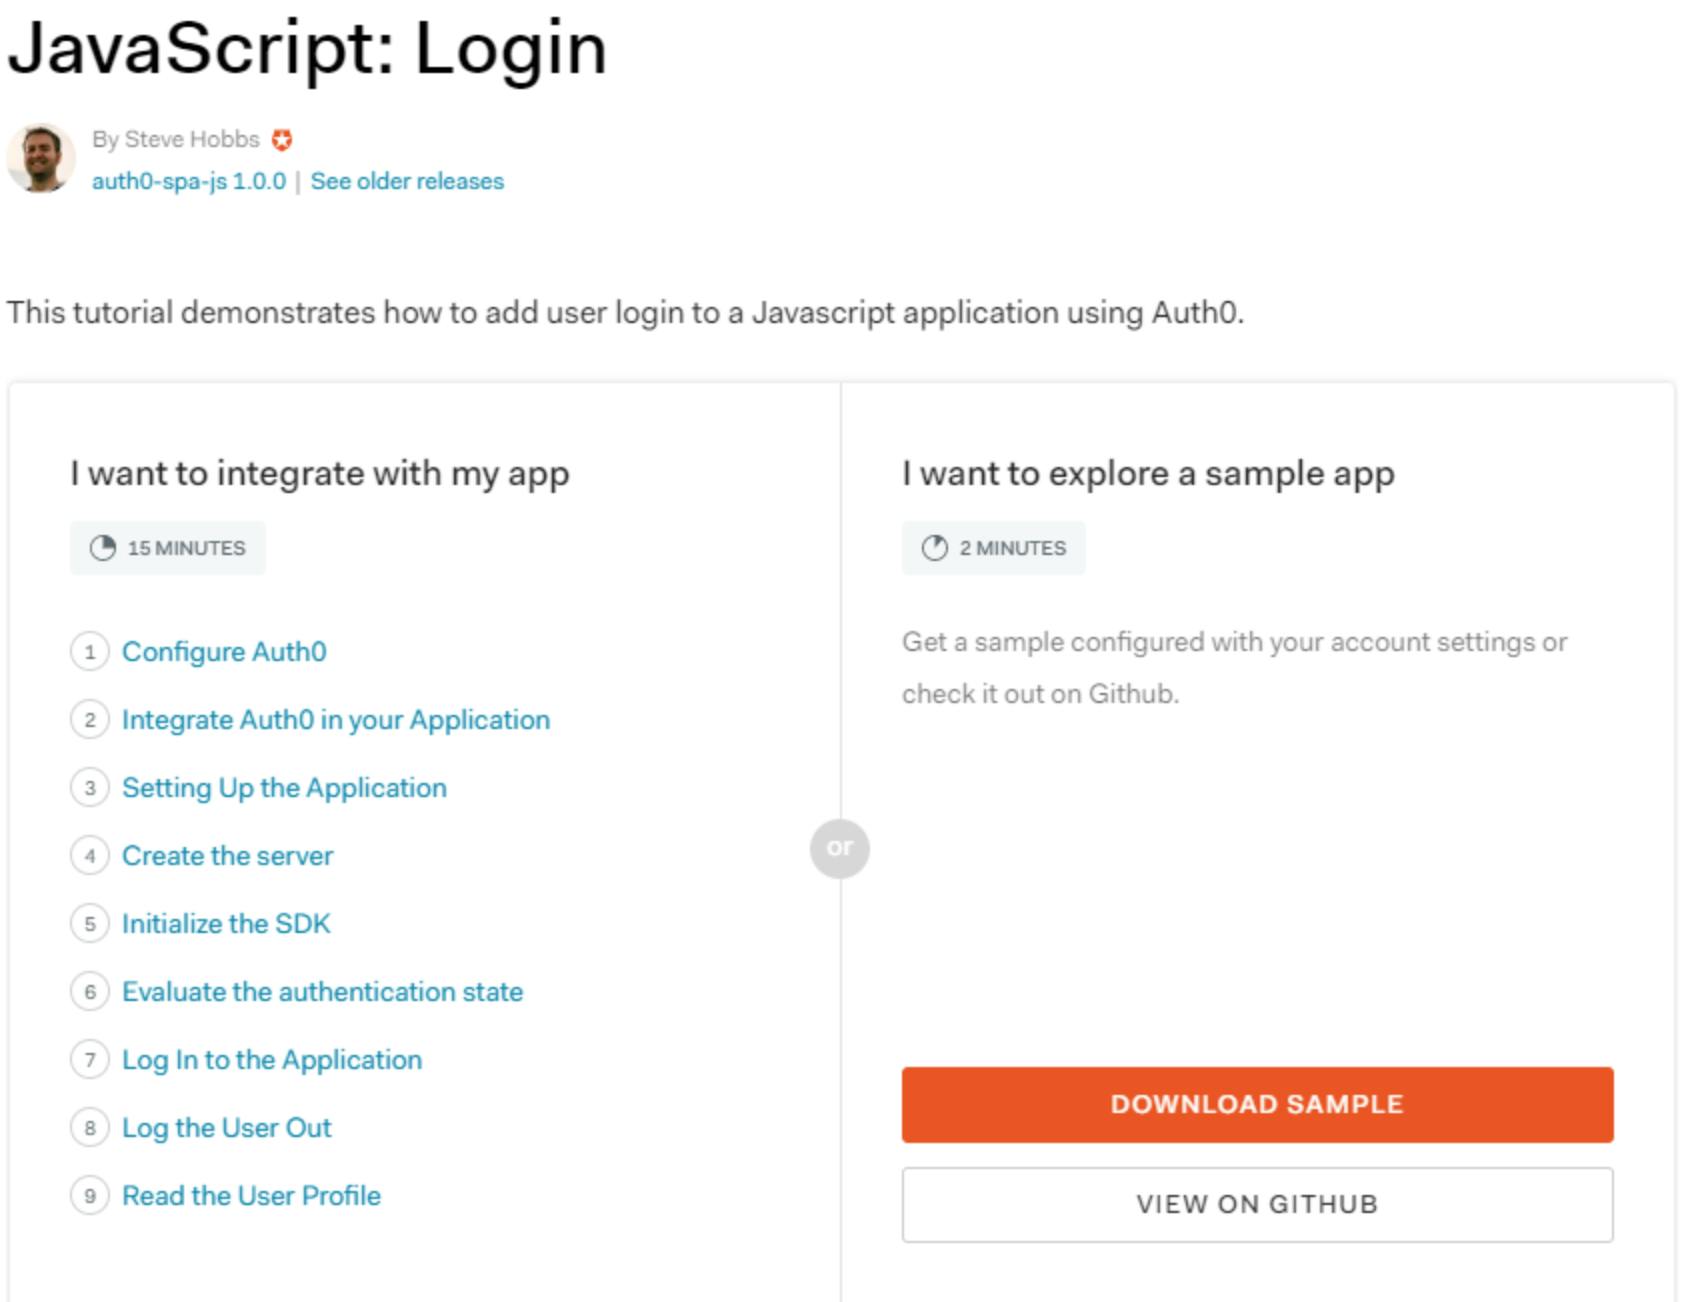
1.まずはAuth0のサイトにてサインインからアカウントを作成します。
 登録したメールにVerifyメールが来るので迷惑メールに入らないように気を付けます。
2.サインイン出来たら+Create Application→Nameに適当な名前
 →Single Page Web Applications→Createをクリック
3.黄色のJavaScriptを選択したのち、オレンジのDownload sampleをクリック
image.png
image.png
4.こちらの赤枠のApplication Settingsを別タブで開き、下記の情報を参照しながら入力していきます。終わったら下の方にある水色のSAVE CHANGESをクリックして保存します。
image.png
5.すると元の画面に戻りオレンジのDownloadボタンをクリックし、ダウンロードされたファイルを解凍(展開)しておきます。
6.Visual Studio Codeで解凍したファイルを開きます。New Terminalを開き、まずは下記でフォルダを移動

cdvanillajs-01-login/01-login

7.インストールを実施

npmi

8.今回はあらかじめ設定されているローカルサーバーをスタート

npmstart

9.こちらを参照にしながらLINEのログイン機能も追加。Auth側への情報はチャンネルIDやシークレットトークンが必要。入力してSAVEするとTRYというボタンが出てくるので、ログイン可能か確認。
image.png
10.基本的にindex.htmlファイルを変更して遊ぶ。今回は私の場合はカレンダーを出力したかったのでこちらを参考にいたしました。またスタイルシートの部分についてはこちらはBootstrapが使われていたのでそのホームページで調べながら変更しています。

コード

<!DOCTYPEhtml><htmlclass="h-100"><head><metacharset="UTF-8"/><title>SPASDKSample</title>
<linkrel="stylesheet"href="https://stackpath.bootstrapcdn.com/bootstrap/4.3.1/css/bootstrap.min.css"/><linkrel="stylesheet"type="text/css"href="/css/auth0-theme.min.css"/><linkrel="stylesheet"type="text/css"href="/css/main.css"/><linkrel="stylesheet"href="//cdnjs.cloudflare.com/ajax/libs/highlight.js/9.15.6/styles/monokai-sublime.min.css"/><linkrel="stylesheet"href="https://use.fontawesome.com/releases/v5.7.2/css/solid.css"integrity="sha384-r/k8YTFqmlOaqRkZuSiE9trsrDXkh07mRaoGBMoDcmA58OHILZPsk29i2BsFng1B"crossorigin="anonymous"/><linkrel="stylesheet"href="https://use.fontawesome.com/releases/v5.7.2/css/fontawesome.css"integrity="sha384-4aon80D8rXCGx9ayDt85LbyUHeMWd3UiBaWliBlJ53yzm9hqN21A+o1pqoyK04h+"crossorigin="anonymous"/><linkrel="stylesheet"href="https://cdn.auth0.com/js/auth0-samples-theme/1.0/css/auth0-theme.min.css"/><style>.calendar-title{text-align:left;}</style>
</head>
<bodyclass="h-100"><divid="app"class="h-100 d-flex flex-column"><divclass="nav-container"><navclass="navbar navbar-expand-md navbar-light bg-light"><divclass="container"><divclass="navbar-brand logo"></div>
<buttonclass="navbar-toggler"type="button"data-toggle="collapse"data-target="#navbarNav"aria-controls="navbarNav"aria-expanded="false"aria-label="Toggle navigation"><spanclass="navbar-toggler-icon"></span>
</button>
<divclass="collapse navbar-collapse"id="navbarNav"><ulclass="navbar-nav mr-auto"><liclass="nav-item"><ahref="/"class="nav-link route-link">Home</a>
</li>
</ul>
<ulclass="navbar-nav d-none d-md-block"><!--Loginbutton:showifNOTauthenticated--><liclass="nav-item auth-invisible"><buttonid="qsLoginBtn"onclick="login()"class="btn btn-primary btn-margin auth-invisible hidden">Login</button>
</li>
<!--/Loginbutton--><!--Fullsizedropdown:showifauthenticated--><liclass="nav-item dropdown auth-visible hidden"><aclass="nav-link dropdown-toggle"href="#"id="profileDropDown"data-toggle="dropdown"><!--Profileimageshouldbesettotheprofilepicturefromtheidtoken--><imgalt="Profile picture"class="nav-user-profile profile-image rounded-circle"width="50"/></a>
<divclass="dropdown-menu"><!--Showtheuser's full name from the id token here -->
                    <div class="dropdown-header nav-user-name user-name"></div>
                    <a
                      href="/profile"
                      class="dropdown-item dropdown-profile route-link"
                    >
                      <i class="fas fa-user mr-3"></i> Profile
                    </a>
                    <a
                      href="#"
                      class="dropdown-item"
                      id="qsLogoutBtn"
                      onclick="logout()"
                    >
                      <i class="fas fa-power-off mr-3"></i> Log out
                    </a>
                  </div>
                </li>
                <!-- /Fullsize dropdown -->
              </ul>

              <!-- Responsive login button: show if NOT authenticated -->
              <ul class="navbar-nav d-md-none auth-invisible">
                <button
                  class="btn btn-primary btn-block auth-invisible hidden"
                  id="qsLoginBtn"
                  onclick="login()"
                >
                  Log in
                </button>
              </ul>
              <!-- /Responsive login button -->

              <!-- Responsive profile dropdown: show if authenticated -->
              <ul
                class="navbar-nav d-md-none auth-visible hidden justify-content-between"
                style="min-height: 125px"
              >
                <li class="nav-item">
                  <span class="user-info">
                    <!-- Profile image should be set to the profile picture from the id token -->
                    <img
                      alt="Profile picture"
                      class="nav-user-profile d-inline-block profile-image rounded-circle mr-3"
                      width="50"
                    />
                    <!-- Show the user'sfullnamefromtheidtokenhere--><h6class="d-inline-block nav-user-name user-name"></h6>
</span>
</li>
<li><iclass="fas fa-user mr-3"></i>
<ahref="/profile"class="route-link">Profile</a>
</li>
<li><iclass="fas fa-power-off mr-3"></i>
<ahref="#"id="qsLogoutBtn"onclick="logout()">Logout</a>
</li>
</ul>
</div>
</div>
</nav>
</div>
<divid="main-content"class="container mt-5 flex-grow-1"><divid="content-home"class="page"><divclass="text-center hero"><imgclass="mb-3 app-logo"src="https://1.bp.blogspot.com/-RJRt_Hv37Kk/VMIu-CCBpII/AAAAAAAAq2E/JsIJ8pPwmuY/s400/calender_takujou.png"alt="JavaScript logo"width="75"/><h1class="mb-1 text-warning">CalendarSampleProject</h1>
<pclass="lead text-center">カレンダーを作ってみよう</p>
</div>
<h2class="mb-4 text-center"><aclass="lead auth-visible hidden"><iclass="text-center"></i> カレンダー</a>
<aclass="auth-visible hidden"><imgalt="Profile picture"class="nav-user-profile profile-image rounded-circle"width="100"/></a>
<h6class="calendar-title text-center auth-visible hidden"><spanid="js-year"></span>年 <span id="js-month"></span></h6>
<divclass="mx-auto auth-visible hidden"style="width: 200px;"><tableclass="calendar-table"><thead><tr><th></th>
<th></th>
<th></th>
<th></th>
<th></th>
<th></th>
<th></th>
</tr>
</thead>
<tbodyid="js-calendar-body"></tbody>
</table>
</div>
</h2>
</div>             </div>
<divclass="page"id="content-profile"><divclass="container"><divclass="row align-items-center profile-header"><divclass="col-md-2"><imgalt="User's profile picture"class="rounded-circle img-fluid profile-image mb-3 mb-md-0"/></div>
<divclass="col-md"><h2class="user-name"></h2>
<pclass="lead text-muted user-email"></p>
</div>
</div>
<divclass="row"><preclass="rounded"><codeid="profile-data"class="json"></code></pre></div>
</div>
</div>
</div>
<footerclass="bg-light text-center p-5"><divclass="logo"></div>
<p>Sampleprojectprovidedby<ahref="https://auth0.com">MARUKO</a>
</p>
</footer>
</div>
<scriptsrc="https://cdnjs.cloudflare.com/ajax/libs/jquery/3.3.1/jquery.min.js"></script>
<scriptsrc="https://stackpath.bootstrapcdn.com/bootstrap/4.3.1/js/bootstrap.bundle.min.js"></script>
<scriptsrc="js/auth0-theme.min.js"></script>
<scriptsrc="https://cdn.auth0.com/js/auth0-spa-js/1.2/auth0-spa-js.production.js"></script>
<scriptsrc="//cdnjs.cloudflare.com/ajax/libs/highlight.js/9.15.6/highlight.min.js"></script>
<scriptsrc="js/ui.js"></script>
<scriptsrc="js/app.js"></script>
<script>var$window=$(window);var$year=$('#js-year');var$month=$('#js-month');var$tbody=$('#js-calendar-body');vartoday=newDate();varcurrentYear=today.getFullYear(),currentMonth=today.getMonth();$window.on('load',function(){calendarHeading(currentYear,currentMonth);calendarBody(currentYear,currentMonth,today);});functioncalendarBody(year,month,today){vartodayYMFlag=today.getFullYear()===year&&today.getMonth()===month?true:false;// 本日の年と月が表示されるカレンダーと同じか判定varstartDate=newDate(year,month,1);// その月の最初の日の情報varendDate=newDate(year,month+1,0);// その月の最後の日の情報varstartDay=startDate.getDay();// その月の最初の日の曜日を取得varendDay=endDate.getDate();// その月の最後の日の曜日を取得vartextSkip=true;// 日にちを埋める用のフラグvartextDate=1;// 日付(これがカウントアップされます)vartableBody='';// テーブルのHTMLを格納する変数for(varrow=0;row<6;row++){vartr='<tr>';for(varcol=0;col<7;col++){if(row===0&&startDay===col){textSkip=false;}if(textDate>endDay){textSkip=true;}varaddClass=todayYMFlag&&textDate===today.getDate()?'is-today':'';vartextTd=textSkip?'':textDate++;vartd='<td class="'+addClass+'">'+textTd+'</td>';tr+=td;}tr+='</tr>';tableBody+=tr;}$tbody.html(tableBody);}functioncalendarHeading(year,month){$year.text(year);$month.text(month+1);}vartoday=newDate();varcurrentYear=today.getFullYear(),currentMonth=today.getMonth();</script>
</body>
</html>

結果

ログイン前はこのような何もないホームページですが
image.png

ログインを経て
2019-12-08_01h40_05.png

写真付きのカレンダーが表示されます。
image.png

感想

提供されているサンプルバージョンを参考にしながら、単純ですがログイン前とログイン後の違いを出すような仕組みを作ることが出来ました。こちらのAuth0のサンプルページが非常にシンプルかつ応用しやすいコードになっていたので、手探りでテストしながらイメージのものに少しづつ近づけることが出来ました。万が一、壊しても再度サイトからダウンロードすればよいだけなので初心者にはとてもお勧めです。

初学者向けpackage.jsonハンズオン

$
0
0

これは Node.js Advent Calendar 2019の8日目の記事です。
昨日は @yuta-ronさんによる スクレイピング & サーバレスAPIでNode.jsの雰囲気を体験してみるでした。

初学者向けpackage.jsonハンズオン

Node.js初学者向けにpackage.jsonハンズオンを実施しましたので、その時に作ったハンズオン資料を公開します。

npmコマンドやpackage.jsonに慣れることが目的のハンズオンの資料ですので、Node.jsとは何か?といった説明はしません。ご了承ください。

文章の手順通りに進めていけば、npmコマンドやpackage.json編集が体験できます!

事前準備

Node.jsのインストール

事前にNode.jsのインストールをお願いします。(すでにNode.jsがインストール済の方は飛ばしてください。)

Windowsの場合

Windowsの方は、こちらの記事をご参照ください。Chocolatey > Nodist > Node.jsの順番でインストールします。

Windowsで、Chocolateyとnodistで、バージョン切り替え可能なNode.jsの環境を構築する

Macの場合

Macの方は、こちらの記事をご参照ください。Homebrew > nodebrew > Node.jsの順番でインストールします。

macOS に Homebrew で nodebrew をインストールして Node.js を使う

package.jsonハンズオン

それではハンズオンを始めます。

作業ディレクトリを作ろう

お好きな場所に作業ディレクトリを作りましょう。

Windowsの場合

今回のハンズオンでは以下のディレクトリを 作業ディレクトリと呼ぶことにします。

D:\JavaScript\package-json-handson

Macの場合

今回のハンズオンでは以下のディレクトリを 作業ディレクトリと呼ぶことにします。

~/JavaScript/package-json-handson

WindowsならGit Bashを使おう

Web界隈ではLinuxサーバーが主流ですので、DOSコマンドよりもLinuxコマンドが使える環境の方が、何かと都合がよいと思います。

Git for Windowsをインストールしていれば、 Git Bashというターミナルがインストールされており、そこでLinuxコマンドが使えます。

今回のハンズオンでは、Git Bashを使う前提で進めます。

カレントディレクトリを作業ディレクトリにしてください。

作業ディレクトリに移動

カレントディレクトリを作業ディレクトリにしてください。

以下のコマンドを実行してみましょう。

# Windowscd /d/JavaScript/package-json-handson

# Maccd ~/JavaScript/package-json-handson

npmコマンドでpackage.jsonを生成してみる

作業ディレクトリにnpmパッケージを作っていきます。

以下のコマンドを実行して、npmパッケージを初期化してみましょう。

# 作業ディレクトリをnpmで初期化
npm init

以下のようなメッセージが表示されます。

This utility will walk you through creating a package.json file.
It only covers the most common items, and tries to guess sensible defaults.

See `npm help json` for definitive documentation on these fields
and exactly what they do.

Use `npm install <pkg>` afterwards to install a package and
save it as a dependency in the package.json file.

Press ^C at any time to quit.
package name: (package-json-handson)

最後の行で上記のように表示されると思います。

ここでは、これから作るnpmパッケージの名前をどうするのか質問されています。デフォルトでディレクトリ名が表示されていますので、そのまま何も入力せずEnterしてください。

そうすると、以下のように次の質問が表示されます。

version: (1.0.0)

ここでは、npmパッケージのバージョンをどうするのか聞かれています。

デフォルトは 1.0.0となっていますが、ここでは、 0.1.0を入力してください。(理由は後で説明します。)

そうすると、以下のように次の質問が表示されます。

description: 

ここでは、npmパッケージの説明文の入力を求められています。

とりあえず handsonと入力してください。(後から変更できますので、真剣に悩まなくても大丈夫です。)

そうすろt、以下のように次々と質問されます。

entry point: (index.js)test command:
git repository:
keywords:
author:
license: (ISC)

とりあえず、何も入力せず、すべてEnterしてください。

そうると、最後に以下の質問が表示されます。

Is this OK? (yes)

ここでも、何も入力せずEnterしてください。(yesの意味になります。)

これで、npmパッケージの初期化が完了しました!

package.jsonが作業ディレクトリに生成されていますので、内容を確認してみましょう!

# package.json の中身を表示するcat package.json

以下のようにJSON形式のデータが表示されれば成功です!

{"name":"package-json-handson","version":"0.1.0","description":"handson","main":"index.js","scripts":{"test":"echo \"Error: no test specified\"&& exit 1"},"author":"","license":"ISC"}

自分が入力してきた値が格納されていることがわかると思います。

npm-scriptをつくってみる

テキストエディター(こだわりがなければVS Codeがオススメです)で package.jsonを開いてください。

scriptsという項目があります。この部分には、独自のスクリプトを登録できます。

"scripts":{"test":"echo \"Error: no test specified\"&& exit 1","show-files":"ls -al"},

試しに、上記のように show-filesの行を追加してみてください。

package.jsonを保存したら、以下のコマンドを実行してみましょう。

npm run show-files

そうすると、 ls -alが実行されます!

Linuxコマンドが動くターミナル(Git Bash等)なら、ファイル一覧が表示されます!

もし、コマンドプロンプトを使っている場合は、Linuxコマンドが動かないので、エラーが表示されます。

この独自のスクリプトのことを npm-scriptと呼びます!覚えておきましょう。

app.jsをつくってみる

作業ディレクトリに app.jsというファイルを作ってください。

中身に以下の一行を書いて保存してください。

console.log("Hello World!");

以下のコマンドを実行してみてください。

node app.js

以下が表示されれば成功です。

Hello World!

おまけ: index.jsapp.jsの使い分け

たったいま、 app.jsを作りましたが、先ほどの package.jsonには index.jsという記述がありました。

これらは何が違うのでしょうか?

実は、今作っているnpmパッケージが

  • アプリケーションなら app.jsに、最初に実行するコードを書く。
  • ライブラリなら index.jsに、最初に実行するコードを書く。

という慣習があります。(諸説あります)

Start Scriptを作ってみる

今度は、 package.jsonscriptsstartの行を追加してください。

"scripts":{"test":"echo \"Error: no test specified\"&& exit 1","show-files":"ls -al","start":"node app.js"},

以下のコマンドを実行してみてください。

npm run start

以下が表示されれば成功です。

Hello World!

次に、以下のコマンドを実行してみてください。

npm start

こちらのコマンドでも同じ結果になりました!以下が表示されれば成功です。

Hello World!

実は npm startというのは npm run startのエイリアスになっています。

メインに実行する処理はnpm-scriptの startに登録しましょう。

momentをインストールしてみる

まず、以下のコマンドを実行してみましょう。

# moment をインストール
npm install moment

作業ディレクトリに node_modulesフォルダーが生成されました。

このフォルダーを開くと、 momentフォルダーが見つかります。

加えて、 package.jsonに以下の行が自動で追加されます。

"dependencies":{"moment":"^2.24.0"}

バージョン番号が勝手に追加されましたね。このバージョンの先頭についている ^に関しては、あとで説明します。

次に、app.jsを以下のように書き換えてください。

// ライブラリを読み込むconstmoment=require("moment");// 現在時刻を取得するconstnow=moment().format("YYYY-MM-DD HH:mm:ssZ");// 現在時刻を表示するconsole.log(now);

以下のコマンドを実行してみてください。

npm start

すると、以下のように現在時刻が表示されます。

2019-11-20 18:51:02+09:00

momentは日付に関する処理を扱った歴史のあるライブラリで、Node.js界隈で広く使われています。

歴史がある分、多機能でファイルサイズが大きいという欠点もあります。

dayjsのような軽量なライブラリも台頭してきていますので、必要に応じて使い分けていきましょう。

momentをアンインストールしてみる

せっかく入れた momentですが、今度はアンインストールしてみます。

以下のコマンドを実行してみましょう。

# moment を案インストール
npm uninstall moment

node_modulesフォルダーから momentフォルダーが削除されました。

同時に package.jsonからも消えました。

"dependencies":{}

以下のコマンドを実行してみてください。

npm start

momentがなくなったので、以下のようにエラーが表示されるはずです。

internal/modules/cjs/loader.js:626
    throw err;
    ^

Error: Cannot find module 'moment'

package.jsonから momentをインストールしてみる

今度は、 package.jsonに以下の行を手動で追加してみましょう。

"dependencies":{"moment":"^2.24.0"}

以下のコマンドを実行してみます。

# dependencies に書かれたライブラリをインストール
npm install

実は、これでも momentがインストールされます!

以下のコマンドを実行してみてください。

npm start

以下のように現在時刻が表示されれば成功です。

2019-11-20 18:51:02+09:00

dependenciesに色々インストールしてみる

試しに色々インストールしてみましょう

# dependencies にインストール
npm install express
npm install cors

package.jsondependenciesにアルファベット順で追加されていくのがわかると思います。

"dependencies":{"cors":"^2.8.5","express":"^4.17.1","moment":"^2.24.0"}

eslintdev-dependenciesにインストールしてみる

ESLintというライブラリがあります。
これを使うと、JavaScriptの文法を検査し、問題があればVS Code上に警告を表示してくれたりします。

このライブラリは開発環境では使いますが、サーバー環境では使いません。

こういったライブラリを扱うのが devDependenciesです。

以下のコマンドを実行してみてください。

# devDependencies にインストール
npm install--save-dev eslint
npm install--save-dev eslint-config-airbnb-base

package.jsondependenciesとは別に devDependenciesという項目が増えたと思います。

"devDependencies":{"eslint":"^5.16.0","eslint-config-airbnb-base":"^13.1.0",},

dependenciesのみインストールする

サーバー環境等で、 devDependenciesをインストールせずに、 dependenciesのみをインストールしたいということがあります。

以下のコマンドを使えば可能です。

# dependencies のみインストール
npm install--production

セマンティックバージョニングについて

いつのまにか package-lock.jsonというものが生成されています。これは何なのでしょうか?

これが何なんか説明する前に、セマンティックバージョンについて説明します。

Node.js界隈では セマンティックバージョニングX.Y.Zという考え方が浸透しています。

おおざっぱに説明すると、以下のようにバージョン番号を付けます。

  • X : メジャーバージョン : 互換性がなくなったら上昇
  • Y : マイナーバージョン : 互換性を保ちつつ、機能を追加したら上昇
  • Z : パッチバージョン : バグ修正したら上昇

それでは、一番最初の開発版のバージョンはどうするのか?というと、セマンティックバージョニングによれば、 0.1.0から始めるのが良いとされています。

このハンズオンの最初に、バージョン番号を 0.1.0にしたのも、それが理由です。

バージョンの範囲指定について

package.jsonでのバージョンの範囲指定についても説明します。

先ほど ^という記号が登場しました。以下のような特徴があります。

  • ~X.Y.Z : パッチバージョン Zの上昇まで許容します。
  • ^X.Y.Z : マイナーバージョン Yの上昇まで許容します。

たとえば、以下の表のように、複数のバージョンを持つライブラリがあるとします。

バージョン2.x2.1.x~2.1.1^2.1.1
1.35.7:x::x::x::x:
2.0.0:white_check_mark::x::x::x:
2.1.0:white_check_mark::white_check_mark::x::x:
2.1.1:white_check_mark::white_check_mark::white_check_mark::white_check_mark:
2.1.2:white_check_mark::white_check_mark::white_check_mark::white_check_mark:
2.2.0:white_check_mark::x::x::white_check_mark:
3.0.0:x::x::x::x:

:white_check_mark:がついているものの中で、最新のものがインストールされます!

このようにバージョンを範囲指定することで、 npm installするだけで、バグが修正された新しいライブラリを使うことができます。

ただし、以下のようなことも発生します。

  • Aさん、11月に npm installを実行したところ、 2.1.1がインストールされた。
  • Bさん、12月に npm installを実行したところ、 2.1.2がインストールされた。

npm installを実行したタイミングで異なるバージョンのライブラリがインストールされます!

結局どのバージョンがインストールされているのか?は、 package.jsonを見ただけではわかりません。

それを記録しているのが、 package-lock.jsonです!

これは自動で生成されるファイルなので、このファイルを手動で編集しないようにお願いします。

npm cipackage-lock.jsonから高速にインストールする

せっかく色々インストールしましたが、ここでいったん、 node_modulesフォルダーを削除してみましょう。

(VS Codeで node_modulesを開いている場合は、エラーが起きるかもしれません。その場合は、VS Codeを閉じてください。)

削除ができたら、以下のコマンドを実行してください。

npm ci

node_modulesフォルダーが復活しました!

実は、 npm cipackage-lock.jsonを元にライブラリをインストールするんです!

また、 npm installよりも npm ciの方が、インストールが早く終わったことに気づいたかもしれません。

npm installを実行したときは、ライブラリが依存している別のライブラリを検索したりと、依存関係の解決に時間がかかります。

しかし、 package-lock.jsonには、そういった依存関係の検索が済んだデータが記載されています。そのため、 npm ciの方が npm installよりも高速になったんです。

グローバルに npm install

今度は、以下のコマンドを実行してくてみましょう。

npm install--global fixpack

fixpackというライブラリがインストールされたはずですが、 package.jsonにも node_modulesにも fixpackは追加されていません。

実は、npmにはグローバル用の node_modulesがあり、そこに追加されています。

WindowsでNodistを使ってNode.jsをインストールした場合、 C:\Program Files (x86)\Nodist\bin\node_modulesにあるようです。

fixpackを使ってみる

グローバルにインストールした fixpackを使ってみましょう。

以下のコマンドを実行してください。

fixpack

package.jsonの中身が自動でソートされたと思います。

とくにぐちゃぐちゃになりがちな dependenciesの中身がアルファベット順にソートされるので便利です。

積極的に使っていきましょう!

さいごに

以上おつかれさまでした。

ひととおり、npmコマンドや package.jsonの編集を体験できたと思います。

本記事作成にあたり、以下のページを参考にしました。ありがとうございました。

Node.js Advent Calendar 2019 9日目は @shimataro999さんの記事です。

スポーツ解説アプリ SpoLive における分析基盤の構築

$
0
0

本記事は、NTTコミュニケーションズ Advent Calendar 2019 8日目の記事です。
昨日は、 @y-iさんの 社内ISUCONで優勝した時にやったことでした。

これは何

  • スポーツ解説アプリ SpoLiveにおける分析基盤構築についてのノウハウ共有
  • サーバーレスで、要件に応じて柔軟に分析できる基盤を構築した話

SpoLive について

SpoLiveは、「スポーツファンとアスリートの距離を、デジタルの力で縮める」ことをビジョンに掲げた新サービスです。例えば試合中に、「なんで今のプレーが許されてるんだっけ?」「この選手どんな人だっけ?」といった気になることをすぐに解決できるのはもちろんのこと、より手軽に、より深く豊かな選手の情報に触れることができるようなアプリを目指して日々アップデートを重ねています。

本記事では、SpoLiveにおける分析基盤を構築したノウハウを述べます。構築の前提条件として下記がありました。

  • データをビジネスサイドのメンバー(SQL を書いて分析できるメンバーがいる)が柔軟に分析できる基盤を用意したい
  • 開発・運用コストはできるだけ抑えたい

分析基盤

SpoLive は、Firebaseexpoで開発をしています。
基盤構築の方針として下記の方針が考えられますが、後述の理由で2を採用しました。

  • 1. Firebase Analytics + BigQuery
  • 2. Google Analytics + BigQuery
  • 3. 別の分析ツール(Amplitude・Mix Panel 等)

理由: Firebase を利用していたら、 Firebase Analyticsを利用することが主流だと思いますが、 expoにおいて対応できるライブラリは(自分の知る限り)なく、別の分析ツールではなくまずは世の中の知見も多くシンプルな構成から入ろうと考えたためです。

Bigqueryは、データ分析にあたってはよく用いられているサービスで、SQLで複数データを統合して集計することも容易ですし、例えば、Googleデータポータルを利用して可視化することなどができ、柔軟に分析ができます。

技術要素

前述の方針に基づき、分析基盤を構築するにあたり、下記の要素に分割できます。

アプリ =(1)=> Google Analytics =(2)=|
                     |
            Firebase  =(3)==> BigQyery

上記のうち、(2)(3)のGoogle Analytics/FirebaseからBigqueryへ転送するタスクは、Node.jsで実装し、CloudFunctions の 定期ジョブ としてデプロイします。

理由として、BigQuery のNode.js SDKが世の中に知見が溜まっていそうな点、expo(ReactNative)と技術要素をjsで揃えることによる、メンバーのメンテしやすさの点がありました。また、後述する通り、CloudFunctionsの定期ジョブは、コードだけでスケジューリング可能で、コンソールで手動で設定・・といった必要がなく、変更管理のしやすさを感じています。

(1)アプリ から Google Analytics

ライブラリ expo-analyticsを利用して、アプリから GoogleNAalytics へアプリの利用状況に関するデータを収集します。

// analitics.jsimport{AnalyticsasGoogleAnalytics,ScreenHit,Event}from"expo-analytics";classAnalytics{constructor(code=null){this.ga=null;this.code=code;}init=()=>{this.ga=newGoogleAnalytics(this.code);};EventHit=(category=null,action=null,label=null,value=0)=>{if(category&&action){constparams=[category,action];if(label){params[2]=label;if(value>=0){params[3]=value;}}this.ga.event(newEvent(...params));}};}exportdefaultnewAnalytics(gaId);
// someview.jsimportAnalyticsfrom"app/src/libs/analytics";Analytics.EventHit("categoryName","actionName","labelName",);

転送タスクのデプロイ・自動起動

前述のとおり、(2)(3)のGoogle Analytics/FirebaseからBigqueryへ転送するタスクは、Node.jsで実装し、CloudFunctions の 定期ジョブ としてデプロイします。

# ディレクトリ構成
functions/src/index.ts
           |    
           |--- modules/
                 |    
                 |--- transferBigquery.ts
Node.js
import*asfunctionsfrom"firebase-functions";import{transferBigquery}from"./modules/transferBigquery";// bigqueryへの定期エクスポートmodule.exports.transferBigquery=functions.region("asia-northeast1").runWith({timeoutSeconds:9*60,// max: 9minmemory:"1GB"}).pubsub.schedule("0 4 * * *").timeZone("Asia/Tokyo").onRun(transferBigquery);

(2)Google Analytics から BigQuery

GAからのデータ取得には、GoogleAPIs の Node.js向け SDKを利用します。
(3)とあわせて、一つのFunctionsとして実装します。

API利用時の認証情報は、Functionsの環境変数として保存しますが、ローカルでの開発時も functionsディレクトリで、 firebase functions:config:get > .runtimeconfig.jsonとしておくと、ローカルでも環境変数をjsonファイルの値から利用できます。

Functionsのメイン処理は下記のイメージです

Node.js
// transferBigquery.tsimportfirebasefrom"./firebase-admin";importmomentfrom"moment";import{Analytics}from"../libs/googleAnalytics";import{BigQuery}from"@google-cloud/bigquery";import{Storage}from"@google-cloud/storage";// main関数で、class初期化・メソッド実行exportconsttransferBigquery=async()=>{constprojectId=process.env.GCLOUD_PROJECT;if(!projectId){console.error("projectId is invalid",projectId);return;}// firestoreの環境変数としてGAの認証情報を保存const{client_email,private_key,view_id}=functions.config().googleanalyticsconstga=newAnalytics(client_email,private_key,view_id);consttb=newTransferBigquery(projectId)// 後述// GAのデータは過去1日分を入れ替えconststart:Moment=moment().add(-1,"days")constend:Moment=moment().add(-1,"days")awaittb._delete_eventdata_from_bigquery(start,end)awaittb._export_eventdata_to_storage(start,end)// ここが本節で説明したい部分awaittb._save_eventdata_to_bigquery()//firebaseの試合情報は、全件更新awaittb._export_gamedata_to_storage();// 後述awaittb._save_gamedata_to_bigquery();// 後述};exportclassTransferBigquery{privateprojectId:stringprivatesuffix:stringconstructor(projectId:string){this.projectId=projectId}async_export_eventdata_to_storage(start:Moment,end:Moment){consteventData=awaitthis.analytics._eventToJson(start,end)// GAからイベントデータを取得returnawaitthis._exportJSON(eventData.join("\n"),`events.json`);//CloudStorageへ保存(後述)}// ...省略...}

GAのイベントデータを取得する処理は下記のとおり

Node.js
// libs/googleAnalytics.tsimport{google}from"googleapis";import{Moment}from"moment";exportconstAnalytics=class{privatejwtClient:any;privateanalytics:any;privateviewId:string;constructor(clientEmail:string,privateKey:string,viewId:string){this.jwtClient=newgoogle.auth.JWT(clientEmail,undefined,privateKey,["https://www.googleapis.com/auth/analytics.readonly"],undefined,);this.analytics=google.analytics("v3");this.viewId=viewId;}// event以外の情報を取得したい場合は、別のパラメータを指定する// - Dimensions & Metrics Explorer: https://ga-dev-tools.appspot.com/dimensions-metrics-explorer/_event_param(date:Moment){constparams:any={"start-date":date.format("YYYY-MM-DD"),"end-date":date.format("YYYY-MM-DD"),metrics:"ga:uniqueEvents",dimensions:"ga:eventCategory,ga:eventAction,ga:eventLabel",sort:"ga:eventCategory"};returnparams}// 指定期間のデータを取得しJSONを生成async_eventToJson(start:Moment,end:Moment){consteventJson=[]while(start.diff(end)<=0){consteventData=awaitthis._fetch_report_data(this._event_param(start));if(eventData==undefined){start.add(1,"days");continue}console.log(`add gaEvent: ${start.format("YYYY-MM-DD")}`)for(consteofeventData){eventJson.push(JSON.stringify({date:start.format("YYYY-MM-DD"),eventCategory:e[0],eventAction:e[1],eventLabel:e[2],uniqueEvents:e[3],}))}start.add(1,"days");}returneventJson}// GAからデータ取得async_fetch_report_data(params:any):Promise<any[]>{params.auth=this.jwtClient;params.ids=`ga:${this.viewId}`;returnnewPromise((resolve,reject)=>{this.jwtClient.authorize((err:any,tokens:any)=>{if(err){reject(err);}this.analytics.data.ga.get(params,(err:Error,resp:any)=>{if(err){reject(err);}resolve(resp.data.rows);})});});}};

(3)Firebase から BigQuery

Bigqurey の Node.js向け SDK google-cloud/bigqueryを利用します。
Bigqureyへのデータインポートには、CloudStorageにあるファイルから一括インポートする方法と、 一度に 1 レコードずつ BigQuery にデータをストリーミング処理でインポートする方法がありますが、公式ドキュメントにもありますがコスト的には ストリーミング処理は必要がなければ避けるべきです。

上記の理由から、データを改行区切り JSON にしてCloudStorageへ出力し、Bigqueryへインポートさせます。

Node.js
// transferBigquery.ts// // 前述のメイン処理抜粋// // firebaseの試合情報は、全件更新// await tb._export_gamedata_to_storage();// await tb._save_gamedata_to_bigquery(); exportclassTransferBigquery{privateprojectId:stringprivateanalytics:anyprivatelocation:stringconstructor(projectId:string,analytics:any){this.projectId=projectIdthis.analytics=analyticsthis.location='US'//Bigquery>datasetのlocationを変更した場合はここも変更する}async_export_gamedata_to_storage(){constgameData=awaitfirebase.firestore().collection(`games`).get().then(querySnapshot=>{constreturnData:string[]=[];querySnapshot.forEach(doc=>{const{team_homeName=null,team_awayName=null}=doc.data();// BigQueryがサポートしている改行区切りJSONを出力するために、ここで整形returnData.push(JSON.stringify({gameId:doc.id,team_homeName,team_awayName}));});returnreturnData;});returnawaitthis._exportJSON(gameData.join("\n"),"games.json");};// Cloud Storageへの保存async_exportJSON(jsonText:string,filename:string){conststorage=newStorage();constbucket=storage.bucket(`${this.projectId}.some_storage.com`);bucket.file(`somedir/${filename}`).save(jsonText,err=>{if(!err){bucket.file(`somedir/${filename}`).setMetadata({metadata:{contentType:"application/json"}},(err:any,apiResponse:any)=>{if(err){console.log("err",err);}else{console.log(`finish saving ${JSON.stringify(apiResponse)}`);}});}else{console.log("fail saving",err);}});};// Clound Storage からBigqueryへインポートasync_save_gamedata_to_bigquery(){constschema:any={fields:[{name:"gameId",type:"STRING",mode:"NULLABLE"},{name:"team_homeName",type:"STRING",mode:"NULLABLE"},{name:"team_awayName",type:"STRING",mode:"NULLABLE"}]};returnawaitthis._saveBigquery({bqSchema:schema,tabeleName:"games",filename:`games.json`,isAppendMode:false,});};_loadStorageFile(filename:string){conststorage=newStorage();constbucket=storage.bucket(`${this.projectId}.some_storage.com`);returnbucket.file(`somedir/${filename}`);};async_saveBigquery(params:BigqueryParam){const{bqSchema,tabeleName,filename,isAppendMode}=paramsconstdatasetId="some_dataset";if(!this.projectId){console.error("projectId is invalid",this.projectId);return;}constbigquery=newBigQuery({projectId:this.projectId});consttable=bigquery.dataset(datasetId).table(tabeleName);// https://cloud.google.com/bigquery/docs/reference/auditlogs/rest/Shared.Types/WriteDispositionconstimportMode:string=isAppendMode?"WRITE_APPEND":"WRITE_TRUNCATE";constmetadata:any={sourceFormat:"NEWLINE_DELIMITED_JSON",schema:bqSchema,// Set the write disposition to overwrite existing table data.writeDisposition:importMode,};table.load(this._loadStorageFile(filename),metadata,(err,apiResponse)=>{if(err){console.log("err",err);}else{console.log(`finish saving: ${JSON.stringify(apiResponse)}`);}return;});};}

最後に

本記事では、Firebase / Cloud Functins / BigQuery などのクラウド基盤上に、サーバーレスでユーザー分析基盤を構築するノウハウについて述べました。

スポーツ解説アプリSpoLiveでは、これからも利用者の方により楽しくスポーツを楽しんでいただけるアプリを目指して日々改善中です。今現在、ラグビーやサッカーの試合がお楽しみいただける他、今後も対応スポーツを拡大していく予定です。ぜひご利用ください。

明日は、 @tetrapod117さんの記事です。

ソフトウェア初心者がtoio.jsで作ってみた 5つの作例紹介

$
0
0

これは「toio™(ロボットトイ | toio(トイオ)) Advent Calendar 2019」の8日目の記事になります。

はじめに

はじめまして。ヒラノユウヤです。
普段はハードウェアエンジニア(電気)として暮らしています。
この記事では、ソフトウェア初心者の私がtoio.jsを使って作ってみたtoio作品を紹介したいと思います。

ソフトウェアスキル

  • C言語
    • 学校の授業では真面目に取り組んでいました
    • 社会人になってからも、Arduinoを使いこなすくらいには使っていた感じ

以上。なんとも貧弱で泣けてきます。
なんですが、toio core cubeを使ったプログラミングがどうしてもやりたくて。
toio.jsの環境を友人に手伝って構築してもらったところからスタートしました。
始めてみると、サンプルコードもあるので、苦労はしながらも意外といろんなものができました。

参考にしたもの

1にも2にも、公式情報が命でした。
用意されているtoio.jsの使い方はtoio.jsのページで。
buzzerの音階やtoio IDの情報など、toio自体に対しての情報は技術仕様のページで。

あとはサンプルプログラムの読み解きと、ちょい変でのトライ&エラーを繰り返しました。

作例紹介

早速紹介始めます。
実際に作ってtwitterに上げたのは結構昔なので、記憶を辿りながら文章書いてみます。
ソースコードもまんま貼り付けるので、批判称賛なんでもコメントいただければ嬉しいです。

1.モールス信号発生器

パソコンのキーボード入力の取得と、toio.jsのplaySound()の組み合わせです。

キーボード入力の取得はtoio.jsのサンプルプログラム keyboard-control から拝借しました。

入力されたアルファベットをcase文で場合分けします。
対応するモールス信号の構造体を生成して、それをCubeのブザーから鳴らしています。

モールス信号は法則性がないので、このようなcase文での力技しか方法が思いつきませんでした。

constkeypress=require('keypress')const{NearestScanner}=require('@toio/scanner')constTONE=64constTONE_SILENT=127constDURATION_SHORT=200constDURATION_LONG=DURATION_SHORT*3varmorse_short=[{durationMs:DURATION_SHORT,noteName:TONE},{durationMs:DURATION_SHORT,noteName:TONE_SILENT},]varmorse_long=[{durationMs:DURATION_LONG,noteName:TONE},{durationMs:DURATION_SHORT,noteName:TONE_SILENT},]varmorseasyncfunctionmain(){// start a scanner to find nearest cubeconstcube=awaitnewNearestScanner().start()// connect to the cubeawaitcube.connect()keypress(process.stdin)process.stdin.on('keypress',(ch,key)=>{if((key&&key.ctrl&&key.name==='c')){process.exit()}switch(key.name){case'a':morse=morse_short.concat(morse_long)cube.playSound(morse,1)breakcase'b':morse=morse_long.concat(morse_short).concat(morse_short).concat(morse_short)cube.playSound(morse,1)breakcase'c':morse=morse_long.concat(morse_short).concat(morse_long).concat(morse_short)cube.playSound(morse,1)breakcase'd':morse=morse_long.concat(morse_short).concat(morse_short)cube.playSound(morse,1)breakcase'e':morse=morse_shortcube.playSound(morse,1)breakcase'f':morse=morse_short.concat(morse_short).concat(morse_long).concat(morse_short)cube.playSound(morse,1)breakcase'g':morse=morse_long.concat(morse_long).concat(morse_short)cube.playSound(morse,1)breakcase'h':morse=morse_short.concat(morse_short).concat(morse_short).concat(morse_short)cube.playSound(morse,1)breakcase'i':morse=morse_short.concat(morse_short)cube.playSound(morse,1)breakcase'j':morse=morse_short.concat(morse_long).concat(morse_long).concat(morse_long)cube.playSound(morse,1)breakcase'k':morse=morse_long.concat(morse_short).concat(morse_long)cube.playSound(morse,1)breakcase'l':morse=morse_short.concat(morse_long).concat(morse_short).concat(morse_short)cube.playSound(morse,1)breakcase'm':morse=morse_long.concat(morse_long)cube.playSound(morse,1)breakcase'n':morse=morse_long.concat(morse_short)cube.playSound(morse,1)breakcase'o':morse=morse_long.concat(morse_long).concat(morse_long)cube.playSound(morse,1)breakcase'p':morse=morse_short.concat(morse_long).concat(morse_long).concat(morse_short)cube.playSound(morse,1)breakcase'q':morse=morse_long.concat(morse_long).concat(morse_short).concat(morse_long)cube.playSound(morse,1)breakcase'r':morse=morse_short.concat(morse_long).concat(morse_short)cube.playSound(morse,1)breakcase's':morse=morse_short.concat(morse_short).concat(morse_short)cube.playSound(morse,1)breakcase't':morse=morse_longcube.playSound(morse,1)breakcase'u':morse=morse_short.concat(morse_short).concat(morse_long)cube.playSound(morse,1)breakcase'v':morse=morse_short.concat(morse_short).concat(morse_short).concat(morse_long)cube.playSound(morse,1)breakcase'w':morse=morse_short.concat(morse_long).concat(morse_long)cube.playSound(morse,1)breakcase'x':morse=morse_long.concat(morse_short).concat(morse_short).concat(morse_long)cube.playSound(morse,1)breakcase'y':morse=morse_long.concat(morse_short).concat(morse_long).concat(morse_long)cube.playSound(morse,1)breakcase'z':morse=morse_long.concat(morse_long).concat(morse_short).concat(morse_short)cube.playSound(morse,1)break}})process.stdin.setRawMode(true)process.stdin.resume()}main()

2.電子ピアノ

1.でBuzzerが鳴らせたので、今度は読み取りセンサと合わせたものが作りたいと言うことで、作ったものです。

読み取りセンサでトイオ・コレクションのマット座標を読み取って、対応する音をブザーから鳴らしています。
読み取りセンサの値はそのまま使うのではなく、トイオ・コレクションのマットの格子単位の単位で検出するように丸めています。
ここの丸めかた、実物合わせで採寸しながらやりました。

Cubeがマットに触れている間だけ音が鳴るように、
Cubeがマットに載った時に動く関数 cube.on('id:position-id' で音を鳴らして
Cubeがマットから離れた時に動く関数 cube.on('id:position-id-missed' で音を消す処理を入れています。

実はここで複数Cube接続できるようにコードを修正しています。
起動時にキーボード入力で入力した数自分のCubeを接続できるようにしています。
私の環境では最大6台までのCubeの接続ができました。

constkeypress=require('keypress')const{NearScanner}=require('@toio/scanner')varmidi_note=newArray()vardata_norm=newArray()data_norm[0]={x:0,y:0}constDURATION=3000varMIDI_SCALE_C=[0,0,2,4,5,7,9,11,12,12,12]constX_INI_TOICOLE=555.5constX_END_TOICOLE=946.95constY_INI_TOICOLE=53constY_END_TOICOLE=44.95constUNIT_TOICOLE=43.2varcube_number=2functioncube_control(cube){varlastData={x:0,y:0}varflag=0cube.on('id:position-id',data1=>{vartmp={x:Math.floor((data1.x-X_INI_TOICOLE)/UNIT_TOICOLE)+1,y:Math.floor((data1.y-Y_INI_TOICOLE)/UNIT_TOICOLE)+1}if(tmp.x!=lastData.x)flag=0if(tmp.y!=lastData.y)flag=0midi_note=MIDI_SCALE_C[tmp.x]+(tmp.y-1)*12if(flag==0){cube.playSound([{durationMs:DURATION,noteName:midi_note}],1)flag=1}lastData=tmpconsole.log('[X_STEP]',tmp.x)console.log('[Y_STEP]',tmp.y)console.log('MIDI',midi_note)})cube.on('id:position-id-missed',()=>{flag=0cube.stopSound()console.log('[POS ID MISSED]')})}asyncfunctioncube_connect(cube_number){// start a scanner to find the nearest cubeconstcubes=awaitnewNearScanner(cube_number).start()// connect to the cubefor(vari=0;i<cube_number;i++){awaitcubes[i].connect()}returncubes}asyncfunctionmain(){console.log('USE Rhythm and Go Mat')console.log('Press connect cube number')keypress(process.stdin)process.stdin.on('keypress',async(ch,key)=>{// ctrl+c or q -> exit processif(key){if((key&&key.ctrl&&key.name==='c')||(key&&key.name==='q')){process.exit()}}else{console.log('[Ch]',ch)cube_number=chconstcubes=awaitcube_connect(ch)for(vari=0;i<cube_number;i++){cube_control(cubes[i])}}})process.stdin.setRawMode(true)process.stdin.resume()}main()

3.宝探しゲーム

今度はLEDの点灯と組み合わせを試してみた作品です。
ランダムに生成されるゴール位置をLEDの色を見ながら手探りで探し当てるといったゲームを作りました。

マット上にCubeを置くと、座標(X,Y)と姿勢(Θ)が取得できます。
ゴールの場所(X,Y,Θ)から遠ざかるほどLED色が強くなり、Target場所に一致すると消える という仕様。
つまり、LEDの光が消える場所をさがす というゲームです。

X方向は赤、Y方向は緑、Θ方向は青
といったように各軸で別の色のLEDが反応するので、色味を見ながらどっちの方向に動かすかを考えます。

ゴールの位置にみごCubeを持っていくことができたら勝利判定し、勝利のファンファーレを鳴らすようにしています。
melody_win, melody_lose のやたら長い構造体はこのファンファーレの音データです。

constkeypress=require('keypress')const{NearScanner}=require('@toio/scanner')varmidi_note=newArray()vardata_norm=newArray()varledData=newArray()vartarget=newArray()vardiff=newArray()data_norm[0]={x:0,y:0}constDURATION=0ledData={durationMs:DURATION,red:255,green:255,blue:255}constX_INI_TOICOLE=555.5constY_INI_TOICOLE=53constUNIT_TOICOLE=43.2constX_BEGIN_TOICOLE=45constX_END_TOICOLE=455constY_BEGIN_TOICOLE=45constY_END_TOICOLE=455constANGLE_FULLSCALE=360varcube_number=2target={x:Math.round(Math.random()*(X_END_TOICOLE-X_BEGIN_TOICOLE))+X_BEGIN_TOICOLE,y:Math.round(Math.random()*(X_END_TOICOLE-X_BEGIN_TOICOLE))+X_BEGIN_TOICOLE,angle:Math.round(Math.random()*ANGLE_FULLSCALE)}diff={x:0,y:0,angle:0}varmelody_win=[{durationMs:400,noteName:127},{durationMs:400,noteName:60},{durationMs:100,noteName:72},{durationMs:100,noteName:127},{durationMs:100,noteName:67},{durationMs:100,noteName:127},{durationMs:100,noteName:72},{durationMs:100,noteName:127},{durationMs:600,noteName:75},{durationMs:100,noteName:77},{durationMs:100,noteName:127},{durationMs:100,noteName:77},{durationMs:100,noteName:127},{durationMs:100,noteName:77},{durationMs:100,noteName:127},{durationMs:1600,noteName:79},];varmelody_lose=[{durationMs:5000,noteName:127},{durationMs:3000,noteName:127},{durationMs:150,noteName:71},{durationMs:150,noteName:77},{durationMs:150,noteName:127},{durationMs:150,noteName:77},{durationMs:200,noteName:77},{durationMs:200,noteName:76},{durationMs:200,noteName:74},{durationMs:200,noteName:72},];varflag_gloval=0varwinnerCubeId=0functioncube_control(cube){varlastData={x:0,y:0,angle:0}varlastData2={x:0,y:0,angle:0}varflag=0varflag_2=0cube.on('id:position-id',data1=>{vartmp={x:Math.floor((data1.x-X_INI_TOICOLE)/UNIT_TOICOLE)+1,y:Math.floor((data1.y-Y_INI_TOICOLE)/UNIT_TOICOLE)+1,angle:data1.angle}//angle calcdiff.angle=Math.abs(target.angle-data1.angle)if(diff.angle>180)diff.angle=360-diff.angle//xy calcdiff.x=Math.abs(target.x-data1.x)diff.y=Math.abs(target.y-data1.y)//Thinningif(Math.abs(data1.x-lastData2.x)>3)flag_2=0if(Math.abs(data1.y-lastData2.y)>3)flag_2=0if(Math.abs(data1.angle-lastData2.angle)>3)flag_2=0if(flag_gloval==1&&flag==0){if(cube.id==winnerCubeId)cube.playSound(melody_win,1)elsecube.playSound(melody_lose,1)console.log('[WIN!]')flag=1}if(flag_2==0){ledData.red=Math.floor(diff.angle/360*20)*25ledData.green=Math.floor(diff.x/410*20)*25ledData.blue=Math.floor(diff.y/410*20)*25//winner judgeif((ledData.red+ledData.green+ledData.blue)==0){winnerCubeId=cube.idflag_gloval=1}cube.turnOnLight(ledData)flag_2=1//position storelastData2=data1}console.log('[Winner,cubeID]',winnerCubeId,cube.id)console.log(target)console.log(ledData)console.log(diff)console.log(data1)console.log(lastData2)})cube.on('id:position-id-missed',()=>{flag=0flag_2=0flag_gloval=0cube.stopSound()//cube.turnOffLight()console.log('[POS ID MISSED]')})}asyncfunctioncube_connect(cube_number){// start a scanner to find the nearest cubeconstcubes=awaitnewNearScanner(cube_number).start()// connect to the cubefor(vari=0;i<cube_number;i++){awaitcubes[i].connect()}returncubes}asyncfunctionmain(){console.log('USE Craft fighter Mat')console.log('Press connect cube number')keypress(process.stdin)process.stdin.on('keypress',async(ch,key)=>{// ctrl+c or q -> exit processif(key){if((key&&key.ctrl&&key.name==='c')||(key&&key.name==='q')){process.exit()}}else{console.log('[Ch]',ch)cube_number=ch//connect cubeconstcubes=awaitcube_connect(ch)//control cubefor(vari=0;i<cube_number;i++){cube_control(cubes[i])}}})process.stdin.setRawMode(true)process.stdin.resume()}main()

4.和音プレイヤー

複数Cubeの連携制御に挑戦したく、作った作品です。
1つのCubeがマットに触れると、格子ごとに他の3つのCubeが異なるコードを演奏します。

和音なので、3台のCubeでタイミングを合わせた音再生をするのをどうしたらいいか? といろいろ考えましたが、
今回は
Cube1のマットON判定の関数の中でCube2/3/4のBuzzer音再生を行う
ことでこれを実現できました。

const{NearScanner}=require('@toio/scanner')varmidi_note=newArray()vardata_norm=newArray()data_norm[0]={x:0,y:0}constDURATION=3000varMIDI_SCALE_C=[0,0,2,4,5,7,9,11,12,12,12]varscaleList=["C","C","D","E","F","G","A","B","C","D","D","D"]varcodeList=["M","m","7","sus4","M7","m7-5","aug","add9","6"]constX_INI_TOICOLE=555.5constX_END_TOICOLE=946.95constY_INI_TOICOLE=53constY_END_TOICOLE=44.95constUNIT_TOICOLE=43.2varcube_number=4varscale=0vartype=0varmidi_note=[{uno:60,dos:64,tre:67},//C major{uno:60,dos:63,tre:67},//m{uno:58,dos:64,tre:67},//7{uno:60,dos:65,tre:67},//sus4{uno:59,dos:64,tre:67},//M7{uno:60,dos:63,tre:66},//m7-5{uno:60,dos:64,tre:68},//aug{uno:60,dos:62,tre:67},//add9{uno:60,dos:64,tre:69},//6]functioncodeController(cubes){varlastData={x:0,y:0}varflag=0cubes[0].on('id:position-id',data1=>{vartmp={x:Math.floor((data1.x-X_INI_TOICOLE)/UNIT_TOICOLE)+1,y:Math.floor((data1.y-Y_INI_TOICOLE)/UNIT_TOICOLE)+1}if(tmp.x!=lastData.x)flag=0if(tmp.y!=lastData.y)flag=0if(flag==0){scale=tmp.ytype=tmp.x-1cubes[1].playSound([{durationMs:DURATION,noteName:midi_note[type].uno+MIDI_SCALE_C[scale]}],1)cubes[2].playSound([{durationMs:DURATION,noteName:midi_note[type].dos+MIDI_SCALE_C[scale]}],1)cubes[3].playSound([{durationMs:DURATION,noteName:midi_note[type].tre+MIDI_SCALE_C[scale]}],1)cubes[1].turnOnLight({durationMs:DURATION,red:0,green:255,blue:255})cubes[2].turnOnLight({durationMs:DURATION,red:255,green:0,blue:255})cubes[3].turnOnLight({durationMs:DURATION,red:255,green:255,blue:0})flag=1console.log('[CODE]',scaleList[scale],codeList[type])}lastData=tmp})cubes[0].on('id:standard-id',data2=>console.log('[STD ID]',data2))cubes[0].on('id:position-id-missed',()=>{flag=0cubes[1].stopSound()cubes[2].stopSound()cubes[3].stopSound()cubes[1].turnOffLight()cubes[2].turnOffLight()cubes[3].turnOffLight()})cubes[0].on('id:standard-id-missed',()=>console.log('[STD ID MISSED]'))}functioninit(cubes){cubes[0].turnOnLight({durationMs:DURATION,red:100,green:100,blue:100})}asyncfunctionmain(){console.log('4cubes')console.log('USE Rhythm and Go Mat')// start a scanner to find the nearest cubeconstcubes=awaitnewNearScanner(cube_number).start()// connect to the cubefor(vari=0;i<cube_number;i++){awaitcubes[i].connect()}init(cubes)codeController(cubes)}main()

5.マスゲーム

Cubeはやはり動かなきゃ!ということで、モーター制御が使いたくて作った作品です。
モーターを動かすところはtoio.jsのサンプルプログラム chase を参考にしています。

動きとしては極めて単純で、一定時間ごとに異なる目的地へCubeを制御しているだけ。
ただ、この「一定時間ことに」が曲者でした。
toio.jsはイベントドリブンなサンプルコードになっているので、「一定時間ごとに」実行するためのコードの書き方がわかりませんでした。

ここは友人に頼りまして、最強の武器
setinterval()
を教えてもらいました。これを使うことで「一定時間ごと」の処理が記述できました。

単純な動きでも、4つ組み合わさると、面白味が生まれますね。

const{NearScanner}=require('@toio/scanner')varmidi_note=newArray()vardata_norm=newArray()varledData=newArray()vartarget=newArray()vardiff=newArray()varcubePos=newArray()constX_INI_TOICOLE=555.5constY_INI_TOICOLE=53constUNIT_TOICOLE=43.2constX_BEGIN_TOICOLE=45constX_END_TOICOLE=455constY_BEGIN_TOICOLE=45constY_END_TOICOLE=455constANGLE_FULLSCALE=360constCUBE_WIDTH=32target[0]={x:145,y:145,angle:90}target[1]={x:355,y:145,angle:0}target[2]={x:355,y:355,angle:270}target[3]={x:145,y:355,angle:180}cubePos[0]={x:0,y:0,angle:0}cubePos[1]={x:0,y:0,angle:0}cubePos[2]={x:0,y:0,angle:0}cubePos[3]={x:0,y:0,angle:0}data_norm[0]={x:0,y:0}constDURATION=0varcube_number=4/* Cube sound converted from MIDI file */varflag_gloval=0varwinnerCubeId=0functionMoveToTarget(target,mine){constdiffX=target.x-mine.xconstdiffY=target.y-mine.yconstdistance=Math.sqrt(diffX*diffX+diffY*diffY)//  console.log(diffX,diffY)//calc anglevarrelAngle=(Math.atan2(diffY,diffX)*180)/Math.PI-mine.anglerelAngle=relAngle%360if(relAngle<-180){relAngle+=360}elseif(relAngle>180){relAngle-=360}constratio=1-Math.abs(relAngle)/90letspeed=60*distance/210if(distance<10){return[0,0]// stop}if(relAngle>0){return[speed,speed*ratio]}else{return[speed*ratio,speed]}}functioncube_control(cube,cubePosition){varlastData={x:0,y:0,angle:0}varlastData2={x:0,y:0,angle:0}varflag=0varflag_2=0cube.on('id:position-id',data1=>{cubePosition.x=data1.xcubePosition.y=data1.ycubePosition.angle=data1.angle})}functionsetTarget(){vartmp=target[0]target[0]=target[1]target[1]=target[2]target[2]=target[3]target[3]=tmp}asyncfunctionmain(){console.log('4cubes')console.log('USE Craft fighter Mat')// start a scanner to find the nearest cubeconstcubes=awaitnewNearScanner(cube_number).start()// connect to the cubefor(vari=0;i<cube_number;i++){awaitcubes[i].connect()}for(vari=0;i<cube_number;i++){cube_control(cubes[i],cubePos[i])}// loopsetInterval(()=>{for(vari=0;i<cube_number;i++)cubes[i].move(...MoveToTarget(target[i],cubePos[i]),100)},50)setInterval(()=>{setTarget()},3000)}main()

さいごに

友人達のサポートも多々ありましたが、初心者でもやればできるものですね。
javascriptはC言語と違って、イベントドリブンでの処理を書くのがとても簡単に出来ているように感じました。
C言語だと、割り込み処理で書かなきゃいけないところが、関数宣言しとけば勝手に実行される みたいな。
処理を『置いておく』感覚で簡単にプログラミングできるのが良かったです。

またいろいろと面白い動きを作っていきたいと思います。


VurePress プラグイン開発に挑戦 (ローカル編)

$
0
0

この記事は、 North Detail Advent Calendar 2019の8日目の記事です。

前置き

昨年に VuePressを知ってから、ちょっとしたドキュメントをまとめたサイトを作るのによく使っています。

Markdown でファイルをちゃちゃっと書けば、すぐに良い感じのサイトに仕立て上げられるので、すごく便利ですね。

ただ、コンテンツ全体を出すのにサイドバーにメニューを作っていかなきゃいけないんですが、それって結構面倒だなぁ、と思うんですよ。

「じゃぁ、プラグイン作っちゃえばよくね?」
と、思ったので挑戦してみました。

今回は NPM のパッケージではなく、ローカルに配置するパターンです。
また、作成した Markdown ファイルをアルファベット順に表示するだけ、です。
(これだけでも、シンプルなサイトなら十分楽になるので。)

準備

まず、 VuePress のプロジェクトを作りましょう。
$ mkdir sample-project
$ cd sample-project
$ yarn add -D vuepress
$ mkdir docs

できたら、順次下記ファイルを作成していきます。

ビルドなどを手軽にできるように、 package.json"scripts"追加。

package.json
{"devDependencies":{"vuepress":"^1.2.0"},"scripts":{"docs:dev":"vuepress dev docs","docs:build":"vuepress build docs"}}

サンプル表示用に、いくつか Markdown ファイルを作成。

docs/README.md
# 誰かの冒険

プラグイン作成のための冒険。

## 第1章: 旅立ち

[旅立ちます。](/01-departure)

## 第2章: 帰還

[ただいま。](/02-return)
docs/01-departure.md
# 第1章: 旅立ち

旅立ちます。

## 1.1: お城

王「ひのきの棒を与えよう。」

docs/02-return.md
# 第2章: 帰還

ただいま。

## 2.1: お城

王「死んでしまうとは何ごとだ。」

この状態で、開発サーバを立ち上げて画面を確認します。

$ yarn docs:dev

http://localhost:8080/をブラウザで表示してみましょう。

20191206_001.png

今の所サイドバーの設定はしていないので、何も表示されていませんね。

プラグイン作成へ

その前にサイドバーの設定をやる場合は

こんな感じで書きますね。

docs/.vuepress/config.js
module.exports={themeConfig:{sidebar:['/','/01-departure','/02-return',]}}

こうやると、当然ブラウザでサイドバーにメニューが表示されますね。

20191206_002.png

表示確認できたら、 sidebarは不要なので消してください。

プラグインを読み込む設定

では、プラグインを作っていきましょう。
今回は、ローカルにあるプラグイン用のJavaScriptを読み込みます。

Using a Plugin | VuePress

docs/.vuepress/config.js
module.exports={plugins:[require('./auto-sidebar')]}

docs/.vuepress/auto-sidebarのディレクトリの中に必要なファイルを作成していきます。

プラグインを書く

そもそも、サイドバーを変更するにはどうすれば良いのか。

実は情報をパッとは見つけられなくて、結構試行錯誤をしました。。。

その中で、 App Level EnhancementssiteDataを操作すれば良さそうなことがわかったので、こちらを色々といじっていきます。

作成したページの情報は siteData.pagesに入っており、これを使ってメニューに相当する配列を作成します。
作成した配列は siteData.themeConfig.sidebarに格納すればよさそうです。

では、実際にサイドバーにメニューを表示するプラグインを書いてみましょう。

色々な設定内容(API)があるので、詳しくはオフィシャルのドキュメントを確認してみてください。
Writing a Plugin | VuePress

今回はプラグイン内で App Level Enhancementsを利用できるような設定を行ないます。
これは enhanceAppFilesというのを設定すれば良いです。

docs/.vuepress/auto-sidebar/index.js
constpath=require('path')module.exports=(option,context)=>({enhanceAppFiles:path.resolve(__dirname,'enhanceAppFile.js')})

この設定で、実際の処理は同じディレクトリの enhanceAppFile.jsでやるよ、というような意味になります。
では、実際の処理を見てみましょう。

docs/.vuepress/auto-sidebar/enhanceAppFile.js
exportdefault({Vue,options,router,siteData})=>{constsidebar=[]// regularPath を使うと、ページトップの `#` で宣言した内容をタイトルとして使ってくれる。for(constpageofsiteData.pages){sidebar.push(page.regularPath)}// regularPath を昇順にソートsidebar.sort((page1,page2)=>{returnpage1.localeCompare(page2)})siteData.themeConfig.sidebar=sidebar}

確認

開発サーバ(yarn docs:dev)を起動していたら一旦終了して、再度立ち上げてください。
そして、再度 http://localhost:8080/をブラウザで表示してみましょう。

設定を書いた時と同じように表示されましたね!

ここで、 Markdown 内のタイトルを変更したり、ファイルを追加したりすると、リアルタイムに変更・追加されることも確認できると思います。

例えば次のような Markdown を追加すると、

docs/03-legend.md
# 終章: そして伝説へ

お星さまになります。

すぐにブラウザに反映されます。

20191206_003.png

これで目的達成できました!

作成した分は、下記リポジトリに置いています。
https://github.com/tacck/vuepress-plugin-sidebar

今後

もう少し構成の凝ったサイトでも導入できるように、もうちょっと色々とやってみたいですね。

  • オプション対応
    • 固定のメニューを追加するなど
  • グルーピング対応
  • マルチ言語対応
  • NPM パッケージ化

徐々にチャレンジしていきます。

FAQ

Q. プラグインを修正しても反映されない?
A. ローカルサーバを起動しなおしてみよう。うまいやり方あったら教えて。

Q. どこに設定要素があるかわからん。
A. 自分もわからん。 console.log()で頑張ったので、うまいやり方あったら教えて。。

Q. 順番をもうちょっとコントロールしたい。
A. ファイル名で頑張る想定。ソートしている部分を好きにすれば好きにできるので、プラグインを拡張してね。

花粉症の重症度が分かるWEBアプリの作成~Auth0でユーザー認証~

$
0
0

概要

プログラムの勉強を始めて5か月ほどの開業医です。

今回Auth0を使ったユーザー認証を勉強したので、花粉症の重症度が分かるWEBアプリに実装してみました。

花粉症(アレルギー性鼻炎)の重症度はくしゃみ・鼻水・鼻づまりの程度で判定できるので、その診断アルゴリズムをプログラミングしています。

実装

Googleアカウントを使ったユーザー認証機能。
ボタンを選択すると鼻アレルギーの重症度が分かるWEBアプリ。

完成動画

完成画像

image.png

2019-12-07_14h07_39.png

作成方法

※完成動画ではGoogleアカウントだけでなく、LINEアカウントでのユーザー認証機能も実装していますが、今回の記事ではLINEアカウント認証の実装法の説明は省いております。

1. Auth0のアカウント作成・サインイン
こちらから行ってください。
Auth0ホームページ

2. 基礎プロジェクトの作成
image.png

ログインしダッシューボードのCREATE APPLICATIONを押します。

今回は名前はMy Selfcheck AppでSingle Page Web Applicationsを選択してCREATEを押します。
image.png

今回はJavaScriptを選択します。
image.png

DOWNLOAD SAMPLEをクリックします。

image.png

1.2. 3. の設定を、Application Settingsを行います。

SAVE CHANGED で設定反映を忘れないようにします。

3.ダウンロードと解凍

image.png

ダウンロードを押します。

ZIPファイルがダウンロードされるので、自分のプロジェクトフォルダに保存します。
ZIPファイルを解凍します。

4. 移動
フォルダを移動します。

cd vanillajs-01-login/01-login
npm start

このコマンドを実行します

http://localhost:3000/が起動します。

5. プログラム作成

サンプルのHTMLを以下のように書き換えました。

<!DOCTYPE html><htmlclass="h-100"><head><metacharset="UTF-8"/><title>SPA SDK Sample</title><linkrel="stylesheet"href="https://stackpath.bootstrapcdn.com/bootstrap/4.3.1/css/bootstrap.min.css"/><linkrel="stylesheet"type="text/css"href="/css/auth0-theme.min.css"/><linkrel="stylesheet"type="text/css"href="/css/main.css"/><linkrel="stylesheet"href="//cdnjs.cloudflare.com/ajax/libs/highlight.js/9.15.6/styles/monokai-sublime.min.css"/><linkrel="stylesheet"href="https://use.fontawesome.com/releases/v5.7.2/css/solid.css"integrity="sha384-r/k8YTFqmlOaqRkZuSiE9trsrDXkh07mRaoGBMoDcmA58OHILZPsk29i2BsFng1B"crossorigin="anonymous"/><linkrel="stylesheet"href="https://use.fontawesome.com/releases/v5.7.2/css/fontawesome.css"integrity="sha384-4aon80D8rXCGx9ayDt85LbyUHeMWd3UiBaWliBlJ53yzm9hqN21A+o1pqoyK04h+"crossorigin="anonymous"/><linkrel="stylesheet"href="https://cdn.auth0.com/js/auth0-samples-theme/1.0/css/auth0-theme.min.css"/><script src="https://ajax.googleapis.com/ajax/libs/jquery/3.4.1/jquery.min.js"></script></head><bodyclass="h-100"><divid="app"class="h-100 d-flex flex-column"><divclass="nav-container"><navclass="navbar navbar-expand-md navbar-light bg-light"><divclass="container"><!-- <div class="navbar-brand logo"></div> --><!-- ブランドロゴはこちら --><imgclass="mb-3 app-logo"src="https://self-check.net/wp-content/uploads/2019/05/Logo-e1557133216298.png"alt="self-check logo"width="150"/><buttonclass="navbar-toggler"type="button"data-toggle="collapse"data-target="#navbarNav"aria-controls="navbarNav"aria-expanded="false"aria-label="Toggle navigation"><spanclass="navbar-toggler-icon"></span></button><divclass="collapse navbar-collapse"id="navbarNav"><ulclass="navbar-nav mr-auto"><liclass="nav-item"><ahref="/"class="nav-link route-link">Home</a></li></ul><ulclass="navbar-nav d-none d-md-block"><!-- Login button: show if NOT authenticated --><liclass="nav-item auth-invisible"><buttonid="qsLoginBtn"onclick="login()"class="btn btn-primary btn-margin auth-invisible hidden">
                    Log in
                  </button></li><!-- / Login button --><!-- Fullsize dropdown: show if authenticated --><liclass="nav-item dropdown auth-visible hidden"><aclass="nav-link dropdown-toggle"href="#"id="profileDropDown"data-toggle="dropdown"><!-- Profile image should be set to the profile picture from the id token --><imgalt="Profile picture"class="nav-user-profile profile-image rounded-circle"width="50"/></a><divclass="dropdown-menu"><!-- Show the user's full name from the id token here --><divclass="dropdown-header nav-user-name user-name"></div><ahref="/profile"class="dropdown-item dropdown-profile route-link"><iclass="fas fa-user mr-3"></i> Profile
                    </a><ahref="#"class="dropdown-item"id="qsLogoutBtn"onclick="logout()"><iclass="fas fa-power-off mr-3"></i> Log out
                    </a></div></li><!-- /Fullsize dropdown --></ul><!-- Responsive login button: show if NOT authenticated --><ulclass="navbar-nav d-md-none auth-invisible"><buttonclass="btn btn-primary btn-block auth-invisible hidden"id="qsLoginBtn"onclick="login()">
                  Log in
                </button></ul><!-- /Responsive login button --><!-- Responsive profile dropdown: show if authenticated --><ulclass="navbar-nav d-md-none auth-visible hidden justify-content-between"style="min-height: 125px"><liclass="nav-item"><spanclass="user-info"><!-- Profile image should be set to the profile picture from the id token --><imgalt="Profile picture"class="nav-user-profile d-inline-block profile-image rounded-circle mr-3"width="50"/><!-- Show the user's full name from the id token here --><h6class="d-inline-block nav-user-name user-name"></h6></span></li><li><iclass="fas fa-user mr-3"></i><ahref="/profile"class="route-link">Profile</a></li><li><iclass="fas fa-power-off mr-3"></i><ahref="#"id="qsLogoutBtn"onclick="logout()">Log out</a></li></ul></div></div></nav></div><divid="main-content"class="container mt-5 flex-grow-1"><divid="content-home"class="page"><divclass="text-center hero"><!-- ブランドロゴはこちら           --><imgclass="mb-3 app-logo"src="https://self-check.net/wp-content/uploads/2019/05/Logo-e1557133216298.png"alt="self-check logo"width="300"/><divclass="container"><!-- https://materializecss.com/buttons.html --><h5>くしゃみは1日平均何回ですか?</h5><formaction="#"><p><label><inputclass="with-gap"name="group1"type="radio"value="4"checked/><span>21回以上</span></label></p><p><label><inputclass="with-gap"name="group1"type="radio"value="3"/><span>20~11回</span></label></p><p><label><inputclass="with-gap"name="group1"type="radio"value="2"/><span>10~6回</span></label></p><p><label><inputclass="with-gap"name="group1"type="radio"value="1"/><span>5~1回</span></label></p><p><label><inputclass="with-gap"name="group1"type="radio"value="0"/><span>0回</span></label></p></form><h5>鼻をかむのは1日平均何回ですか?</h5><formaction="#"><p><label><inputclass="with-gap"name="group2"type="radio"value="4"checked/><span>22回以上</span></label></p><p><label><inputclass="with-gap"name="group2"type="radio"value="3"/><span>20~11回</span></label></p><p><label><inputclass="with-gap"name="group2"type="radio"value="2"/><span>10~6回</span></label></p><p><label><inputclass="with-gap"name="group2"type="radio"value="1"/><span>5~1回</span></label></p><p><label><inputclass="with-gap"name="group2"type="radio"value="0"/><span>0回</span></label></p></form><h5>鼻づまりはどの程度ですか?</h5><formaction="#"><p><label><inputclass="with-gap"name="group3"type="radio"value="4"checked/><span>1日中完全につまっている</span></label></p><p><label><inputclass="with-gap"name="group3"type="radio"value="3"/><span>鼻づまりが非常に強く、口呼吸が1日の内かなりの時間あり</span></label></p><p><label><inputclass="with-gap"name="group3"type="radio"value="2"/><span>鼻閉が強く、口呼吸が1日のうち、ときどきあり</span></label></p><p><label><inputclass="with-gap"name="group3"type="radio"value="1"/><span>口呼吸は全くないが鼻閉あり</span></label></p><p><label><inputclass="with-gap"name="group3"type="radio"value="0"/><span>鼻閉なし</span></label></p></form><divid="evaluation"></div><buttontype="button">鼻アレルギーの重症度を判定</button></div><divclass="next-steps"><h5class="my-5 text-center">自分に合ったアレルギー薬を選びましょう</h5><divclass="row"><divclass="col-md-5 mb-4"><h6class="mb-3"><ahref="https://auth0.com/docs/connections"><iclass="fas fa-link"></i>花粉飛散情報はこちら
                  </a></h6><!-- <p>
                  リンク先の説明文
                </p> --></div><divclass="col-md"></div><divclass="col-md-5 mb-4"><h6class="mb-3"><ahref="https://auth0.com/docs/multifactor-authentication"><iclass="fas fa-link"></i>アレルギーのお役立ち情報はこちら
                  </a></h6><p><!-- <p>
                  リンク先の説明文
                  </p> --></p></div></div><divclass="row"><divclass="col-md-5 mb-4"><h6class="mb-3"><ahref="https://auth0.com/docs/anomaly-detection"><iclass="fas fa-link"></i>市販の医薬品はこちら
                  </a></h6><p><!-- <p>
                  リンク先の説明文
                  </p> --></p></div><divclass="col-md"></div><divclass="col-md-5 mb-4"><h6class="mb-3"><ahref="https://auth0.com/docs/rules"><iclass="fas fa-link"></i>花粉症カレンダーはこちら
                  </a></h6><p><!-- <p>
                  リンク先の説明文
                  </p> --></p></div></div></div></div><divclass="page"id="content-profile"><divclass="container"><divclass="row align-items-center profile-header"><divclass="col-md-2"><imgalt="User's profile picture"class="rounded-circle img-fluid profile-image mb-3 mb-md-0"/></div><divclass="col-md"><h2class="user-name"></h2><pclass="lead text-muted user-email"></p></div></div><divclass="row"><preclass="rounded"><codeid="profile-data"class="json"></code></pre></div></div></div></div><footerclass="bg-light text-center p-5"><!-- ブランドロゴはこちら --><!-- <div class="logo"></div> --><imgclass="mb-3 app-logo"src="https://self-check.net/wp-content/uploads/2019/07/9ad0bd5a51dadd4d06039943c511517d.jpg"alt="self-check logo"width="150"/><p>©  katsuyukidoi 2019
        </p><!-- <p>
          //画像を入れるならこちら
          <a href="">画像説明</a>
        </p> --></footer></div><script>alert("鼻アレルギーの重症度を判定しましょう!");letseverity="";$("#judgment").click(function(){score1=$('input[name="group1"]:checked').val();score2=$('input[name="group2"]:checked').val();score3=$('input[name="group3"]:checked').val();if(score1=='4'||score2=='4'||score3=='4'){severity="最重症";}elseif(score1=='3'||score2=='3'||score3=='3'){severity="重症";}elseif(score1=='2'||score2=='2'||score3=='2'){severity="中等症";}elseif(score1=='1'||score2=='1'||score3=='1'){severity="軽症";}else{severity="無症状"}$("#evaluation").html(`<h5>あなたの鼻アレルギーの重症度:${severity}</h5>`);});</script><script src="https://cdnjs.cloudflare.com/ajax/libs/jquery/3.3.1/jquery.min.js"></script><script src="https://stackpath.bootstrapcdn.com/bootstrap/4.3.1/js/bootstrap.bundle.min.js"></script><script src="js/auth0-theme.min.js"></script><script src="https://cdn.auth0.com/js/auth0-spa-js/1.2/auth0-spa-js.production.js"></script><script src="//cdnjs.cloudflare.com/ajax/libs/highlight.js/9.15.6/highlight.min.js"></script><script src="js/ui.js"></script><script src="js/app.js"></script></body></html>

考察

Auth0はユーザー認証に必要な複雑な手順の多くを代わりにやってくれますので、今回数時間でユーザー認証機能が付いたWEBアプリを作成するとができました。
ユーザー認証があるだけでちゃんとしたアプリ感が出ると思います。
今後はユーザー情報を利用した機能を追加していきたいと思いました。

Heroku CLIの動きを観察する

$
0
0

HerokuはCLIでもちゃんと利用できます。でも、CLIがうまく動かなかったり、同様の動作を、直接Platform APIを叩いて、プログラムから実行したくなることもありますよね。そんな時は、CLIの動作を眺めてみるといろいろとヒントが得られるかもしれません。

この記事はHeroku Advent Calendar 2019の8日目の記事です。7日目はさえきさんによる「見積から開発・運用まで!Herokuの基本とTips」でした。9日目は、すみません!同じ筆者の記事が連続しちゃいます。

この記事の内容は2019年12月時点のものです。Heroku CLIの内部構成や非公開のAPIなどは予告なく変更になる可能性があります。

Heroku CLIとプラグイン

現在のHeroku CLIはNode.JSで書かれたCLIフレームワークであるoclifで構築されていて、プラグインを書きやすく、配布しやすくなっています。逆に言うと、CLIのそれぞれの動作がどのファイルで定義されているのか、コードを読むだけではわかりづらく、実際に動作する様子を観察して見たほうがわかりやすい場合があります。

うまく動かない例

今回はone-off dynoに接続できない問題を例にして、Heroku CLIのどこで何が起きているのか観察してみましょう。

$ heroku run bash
Running bash on ⬢ app-name... !▸    ETIMEDOUT: connect ETIMEDOUT 50.19.103.36:5000

環境変数を設定して動作を観察する

上記の例では、エラーメッセージから、Herokuのエンドポイントのポート5000に接続できないことが原因とわかりますが、Heroku CLIはどのようにこの接続先を認識してるのかな?

そんな時には、環境変数DEBUGを設定して、Heroku CLIを起動してみましょう。下記のように、実行ファイルの場所、プラグインのパス、クレデンシャルのパス、プラットフォームAPIとのやりとり、さらには、one-off dynoとセッションを接続するために必要なURLが表示されます。

$ DEBUG=* heroku run bash
/usr/local/Cellar/heroku/7.24.1/lib/client/bin/heroku run bash
HEROKU_BINPATH=/usr/local/Cellar/heroku/7.24.1/lib/client/bin/heroku /usr/local/Cellar/heroku/7.24.1/lib/client/7.35.0/bin/node /usr/local/Cellar/heroku/7.24.1/lib/client/7.35.0/bin/run run bash
  @oclif/config reading core plugin /usr/local/Cellar/heroku/7.24.1/lib/client/7.35.0 +0ms
  @oclif/config loadJSON /usr/local/Cellar/heroku/7.24.1/lib/client/7.35.0/package.json +0ms
  @oclif/config loadJSON /usr/local/Cellar/heroku/7.24.1/lib/client/7.35.0/oclif.manifest.json +3ms
  @oclif/config:heroku using manifest from /usr/local/Cellar/heroku/7.24.1/lib/client/7.35.0/oclif.manifest.json +0ms
  @oclif/config reading user plugins pjson /Users/zunda/.local/share/heroku/package.json +0ms
  @oclif/config loadJSON /Users/zunda/.local/share/heroku/package.json +3ms
  @oclif/config loading plugins [{ name: 'heroku-repo', tag: 'latest', type: 'user'},
  { name: 'heroku-pg-extras', tag: 'latest', type: 'user'},
  { name: 'heroku-builds', tag: 'latest', type: 'user'},
  { name: 'heroku-slugs', tag: 'latest', type: 'user'},
  {中略 }] +1ms
  @oclif/config loadJSON /Users/zunda/.local/share/heroku/package.json/package.json +5ms
  :
  @oclif/config reading user plugin /Users/zunda/.local/share/heroku/node_modules/heroku-repo +0ms
  @oclif/config loadJSON /Users/zunda/.local/share/heroku/node_modules/heroku-repo/package.json +1ms
  :
  @oclif/config loading plugins ['@oclif/plugin-legacy',
  '@heroku-cli/plugin-addons-v5',
  中略
] +25ms
  @oclif/config reading core plugin /usr/local/Cellar/heroku/7.24.1/lib/client/7.35.0/node_modules/@oclif/plugin-legacy +0ms
  @oclif/config loadJSON /usr/local/Cellar/heroku/7.24.1/lib/client/7.35.0/node_modules/@oclif/plugin-legacy/package.json +4ms
  :
  @oclif/config init hook done +1s
  heroku init version: @oclif/command@1.5.18 argv: ['run', 'bash'] +0ms
  @oclif/config runCommand run ['bash'] +5ms
  @oclif/config:@heroku-cli/plugin-run-v5 require /usr/local/Cellar/heroku/7.24.1/lib/client/7.35.0/node_modules/@heroku-cli/plugin-run-v5/commands/run.js +7ms
  @oclif/config start prerun hook +27ms
  heroku:heroku:hooks:prerun start /usr/local/Cellar/heroku/7.24.1/lib/client/7.35.0/lib/hooks/prerun/analytics +0ms
  netrc-parser load /Users/zunda/.netrc +0ms
  http --> POST /apps/app-name/dynos +0ms
--> POST /apps/app-name/dynos
  http
  http     accept=application/vnd.heroku+json;version=3
  http     content-type=application/json
  http     user-agent=heroku/7.35.0 darwin-x64 node-v12.13.0
  http     range=id ..;max=1000
  http     host=api.heroku.com
  http     authorization=REDACTED +0ms
-->{"command":"bash","attach":true,"env":{"TERM":"xterm-256color","COLUMNS":80,"LINES":25}}
Running bash on ⬢ app-name... ⣽
<-- 201 Created
  http <-- POST /apps/app-name/dynos
  http {"attach_url":"rendezvous://rendezvous.runtime.heroku.com:5000/省略","command":"bash","created_at":"2019-12-07T19:33:22Z","id":"省略","name":"run.8399","app":{"id":"省略","name":"app-name"},"release":{"id":"省略","version":123},"size":"Hobby","state":"starting","type":"run","updated_at":"2019-12-07T19:33:22Z"} +780ms
  http
  http     cache-control=private, no-cache
  http     content-length=474
  http     content-type=application/json
  http     date=Sat, 07 Dec 2019 19:33:22 GMT
  http     oauth-scope=global
  http     oauth-scope-accepted=global write write-protected
  http     ratelimit-multiplier=1
  http     ratelimit-remaining=4499
  http     request-id=省略
  http     vary=Accept-Encoding
  http     via=1.1 spaces-router (d458a6f05c96), 1.1 spaces-router (d458a6f05c96)
  http     x-content-type-options=nosniff
  http     x-runtime=0.194371404 +779ms
<--{"attach_url":"rendezvous://rendezvous.runtime.heroku.com:5000/省略","command":"bash","created_at":"2019-12-07T19:33:22Z","id":"6f38da4c-bb1d-4053-9c11-0ef19cedb4ee","name":"run.8399","app":{"id":"省略","name":"app-name"},"release":{"id":"省略","version":123},"sizeRunning bash on ⬢ app-name... !
  heroku:run Error: connect ETIMEDOUT 50.19.103.36:5000
  heroku:run     at TCPConnectWrap.afterConnect [as oncomplete] (net.js:1128:14) +0ms
 ▸    ETIMEDOUT: connect ETIMEDOUT 50.19.103.36:5000
Error: connect ETIMEDOUT 50.19.103.36:5000
    at TCPConnectWrap.afterConnect [as oncomplete] (net.js:1128:14)

それでは、Heroku CLIで/を、Happy Hacking!

オリジナルアイコンフォントを作成する

$
0
0

概要

Fontello や Font Awesomeなど様々なアイコンを提供しているサイトは多く存在するが、サイトデザインの時に用途にあったアイコンが見つからない場合がよくあります。

その場合、イラレなどで作成したデータからアイコンフォントを作成する方法を紹介します。

アイコンフォンとは?

アイコンフォントとは、簡単にいうと「アイコンを表現出来るWebフォント」です。
Webフォントとは、クラウド上にあげられたフォントデータを読み込むことでホームページに反映させる仕組みを指します。
CSS3からWebフォント機能が追加され、Webデザインの世界でも利用が進んできました。
アイコンフォントはWebフォント同様、CSS3を利用すれば比較的簡単に導入できます。

ferretからの引用

制作物

image.png

  • アイコンの一覧が見られる html
  • フォントデータ (.eot,.svg,.ttf,.woff,.woff2)
  • アイコンフォント用CSS

フォルダ構成

iconfont.png

package.json

{"name":"Iconfont","version":"1.0.0","description":"Generate Iconfont.","scripts":{"gulp":"gulp"},"author":"","license":"MIT","devDependencies":{"gulp":"^4.0.2","gulp-consolidate":"^0.2.0","gulp-iconfont":"^10.0.3","gulp-rename":"^2.0.0","lodash":"^4.17.15"}}

解説

  • gulp ・・・ タスクマネージャー
  • gulp-iconfont ・・・ フォント変換に使用
  • gulp-rename ・・・ ファイルのリネーム
  • gulp-consolidate ・・・ テンプレートエンジンで使用

gulpfile.js

vargulp=require('gulp');variconfont=require('gulp-iconfont');varconsolidate=require('gulp-consolidate');varrename=require('gulp-rename');varfilename='icon';gulp.task('Iconfont',function(){returngulp.src(['icons/*.svg']).pipe(iconfont({fontName:filename,//prependUnicode: true,formats:['ttf','eot','woff','woff2','svg']})).on('glyphs',function(glyphs,options){letconsolidateOptions={glyphs:glyphs,fontName:filename,fontPath:'../fonts/',className:'ico'}gulp.src('temp/css.ejs').pipe(consolidate('lodash',consolidateOptions)).pipe(rename({basename:filename,extname:'.css'})).pipe(gulp.dest('src/css/'));gulp.src('temp/html.ejs').pipe(consolidate('lodash',consolidateOptions)).pipe(rename({basename:filename,extname:'.html'})).pipe(gulp.dest('src/'));}).pipe(gulp.dest('src/fonts/'));});

解説

フォント変換完了後、HTMLとCSSを生成しています。

テンプレート

HTML

html.ejs

<html><head><title><%=fontName%></title><linkhref="css/<%= fontName %>.css"rel="stylesheet"><style>body{font-family:GillSans;text-align:center;background:#f7f7f7}body>h1{color:#666;margin:1em0}.glyph{padding:0}.glyph>li{display:inline-block;margin:.3em.2em;width:5em;height:6.5em;background:#fff;border-radius:.5em;position:relative}.glyph>lispan:first-child{display:block;margin-top:.1em;font-size:4em;}.glyph-name{font-size:.8em;color:#999;display:block}.glyph-codepoint{color:#999;font-family:monospace}</style></head><body><h1><%=fontName%></h1><ulclass="glyph"><%_.each(glyphs,function(glyph){%><li><spanclass="<%= className %> <%= className %>-<%= glyph.name %>"></span><spanclass="glyph-name"><%=className%>-<%=glyph.name%></span><spanclass="glyph-codepoint"><%=glyph.unicode[0].charCodeAt(0).toString(16).toUpperCase()%></span></li><%});%></ul></body></html>

スタイルシート

css.ejs

@font-face{font-family:"<%= fontName %>";src:url('<%= fontPath %><%= fontName %>.eot');src:url('<%= fontPath %><%= fontName %>.eot?#iefix')format('eot'),url('<%= fontPath %><%= fontName %>.woff')format('woff'),url('<%= fontPath %><%= fontName %>.ttf')format('truetype'),url('<%= fontPath %><%= fontName %>.svg#<%= fontName %>')format('svg');font-weight:normal;font-style:normal;}[class^="<%= className %>-"]:before,[class*=" <%= className %>-"]:before{display:inline-block;font-family:"<%= fontName %>";font-style:normal;font-weight:normal;line-height:1;-webkit-font-smoothing:antialiased;-moz-osx-font-smoothing:grayscale;}.<%=className%>-lg{font-size:1.3333333333333333em;line-height:0.75em;vertical-align:-15%;}.<%=className%>-2x{font-size:2em;}.<%=className%>-3x{font-size:3em;}.<%=className%>-4x{font-size:4em;}.<%=className%>-5x{font-size:5em;}.<%=className%>-fw{width:1.2857142857142858em;text-align:center;}<%_.each(glyphs,function(glyph){%>.<%=className%>-<%=glyph.name%>:before{content:"\<%= glyph.unicode[0].charCodeAt(0).toString(16).toUpperCase() %>"}<%});%>/**/[class^="af-<%= className %>-"]:after,[class*=" af-<%= className %>-"]:after{display:inline-block;font-family:"<%= fontName %>";font-style:normal;font-weight:normal;line-height:1;-webkit-font-smoothing:antialiased;-moz-osx-font-smoothing:grayscale;}.<%=className%>-lg{font-size:1.3333333333333333em;line-height:0.75em;vertical-align:-15%;}.af-<%=className%>-2x{font-size:2em;}.af-<%=className%>-3x{font-size:3em;}.af-<%=className%>-4x{font-size:4em;}.af-<%=className%>-5x{font-size:5em;}.af-<%=className%>-fw{width:1.2857142857142858em;text-align:center;}<%_.each(glyphs,function(glyph){%>.af-<%=className%>-<%=glyph.name%>:after{content:"\<%= glyph.unicode[0].charCodeAt(0).toString(16).toUpperCase() %>"}<%});%>

変換

npm run gulp Iconfont 

ソース

Githubソース

Arrayの分割2種

$
0
0

chunk

Lodashとかであるやつです。
第1引数の配列を第2引数の数の要素数の配列に分割します。

constchunk=(array,n)=>array.reduce((a,c,i)=>i%n==0?[...a,[c]]:[...a.slice(0,-1),[...a[a.length-1],c]],[]);

実行結果はこんな感じ

constarray=Array.from({length:7},(v,k)=>k);chunk(array,2);// [ [ 0, 1 ], [ 2, 3 ], [ 4, 5 ], [ 6 ] ]

divide

自分が欲しかったやつはこれでした。
第1引数の配列を第2引数の数の配列に分割します。

constdivide=(array,n)=>{consttbl=newArray(n);for(lety=0;y<n;y++){tbl[y]=newArray();}array.forEach((a,i)=>{tbl[(i+1)%n].push(a);});returntbl;};

決められたスレッドを利用して並列化したかったのでこんなのが必要になりました。
実行結果はこんな感じ

constarray=Array.from({length:7},(v,k)=>k);divide(array,2);// [ [ 1, 3, 5 ], [ 0, 2, 4, 6 ] ]

ぐぐってもchunkみたいな処理しかでてこなかった。もっといい書き方ありそう。

Viewing all 8902 articles
Browse latest View live